All ok! I appreciate your support over this crazy little makeover trip, and if this is your first time here, WELCOME! As the most of you are aware, I have been working on this project nonstop.
To make this idea a reality, I’ve paired up with the wonderful people at DAP and several of their fantastic products.
If you haven’t already, I recommend starting with the “R.V.
Paint Makeover” and moving on to the “R.V.
Bathroom Makeover,” at which point you should be pretty well up to speed.
Today, I’ll explain how I took an RV that had been gutted and furnished it with my own bespoke furnishings.
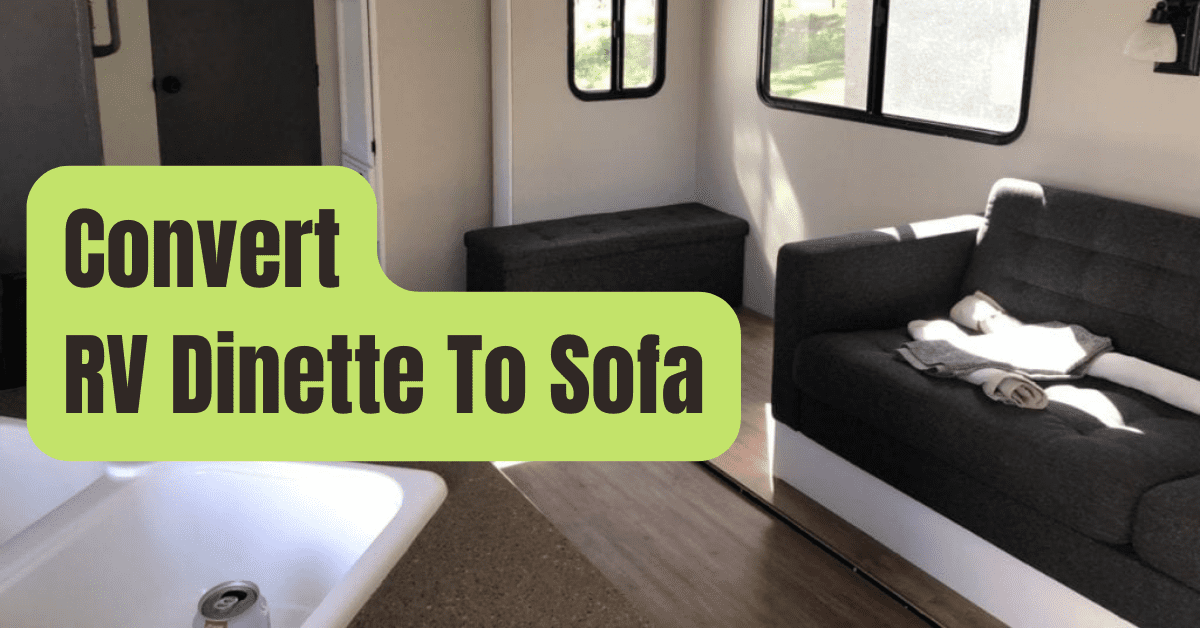
Mobile Sofa
I had intended to personally recover the original sofa when we gutted the trailer.
You already know that those plans swiftly altered if you’ve been reading along.
(I have to find out what the “gentleman” who sold us the camper used since it smelled wonderful, but I have no idea how he managed to conceal the stench while we were inspecting it.
The notion of maintaining the original couch was abandoned the next day when our gag reflexes began to activate whenever we approached it.) I went to IKEA while the sofa was taken to the landfill.
I wanted something that was reasonably priced, fairly compact, and as light as feasible.
IKEA seems to meet all of those standards by nature.
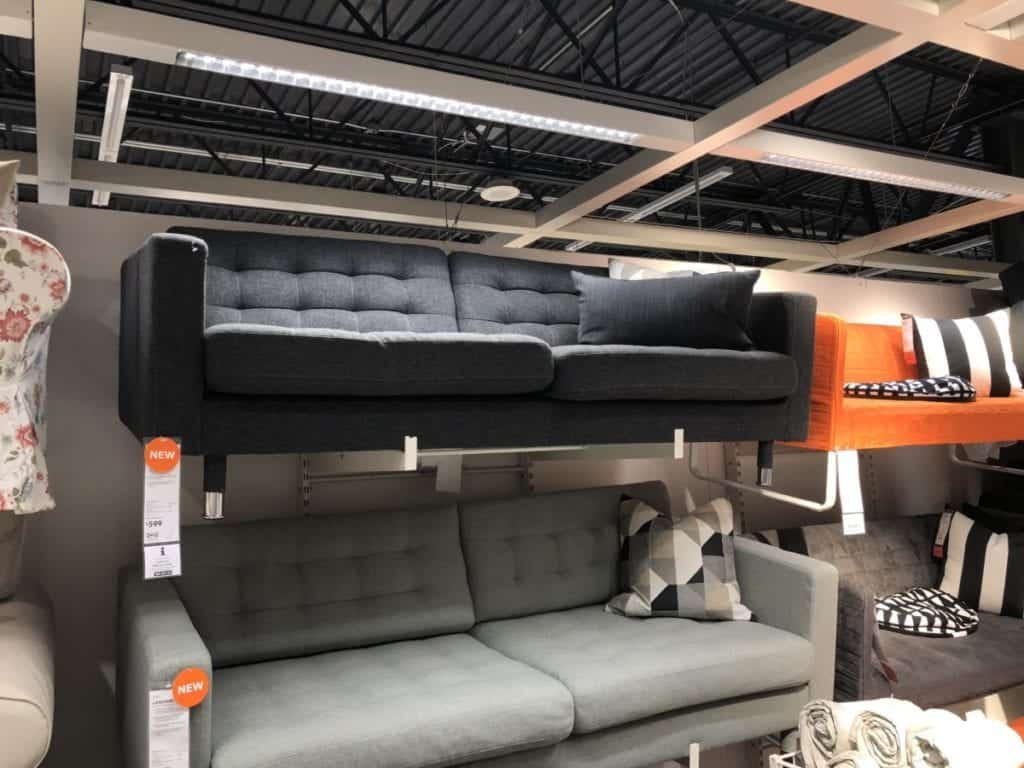
I’m delighted to say that I did discover a sofa that will, for the most part, work.
Although the Karlstad couch was smaller and less expensive, I preferred the “Landskrona” because of its deep color.
Instead of just placing this sofa and anchoring it, I chose a more time-consuming approach in the hopes that it would be worthwhile.
Warning: Spoiler: It was! I wanted this to seem to have been created intentionally rather than as an afterthought.
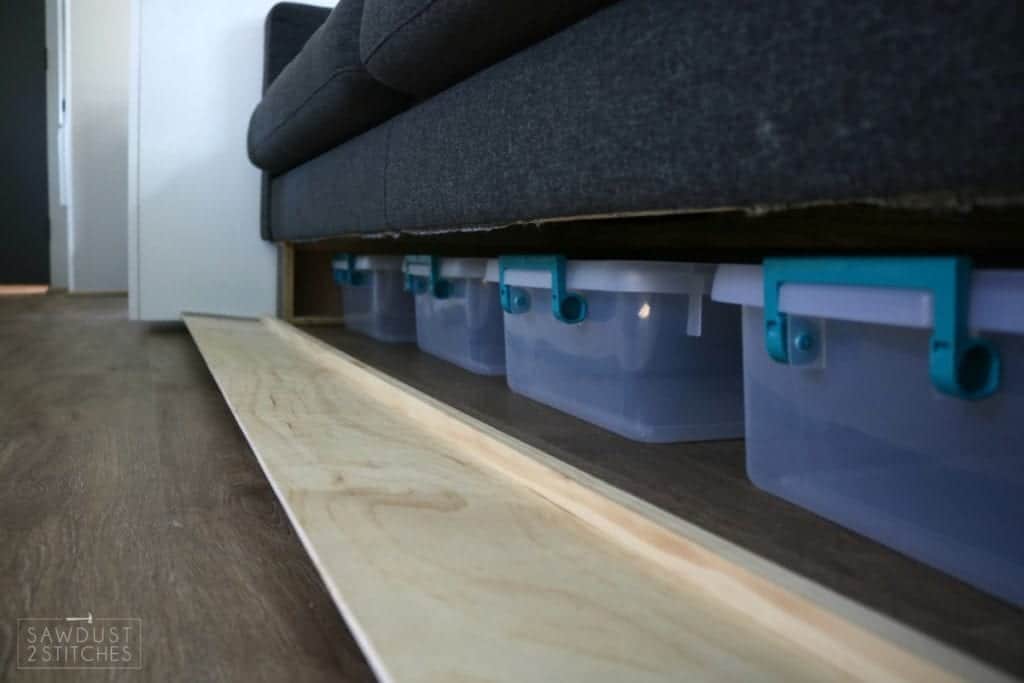
I raised it to give the impression that it was on a platform in order to achieve that.
This would still make it lightweight and provide plenty of room for storage beneath.
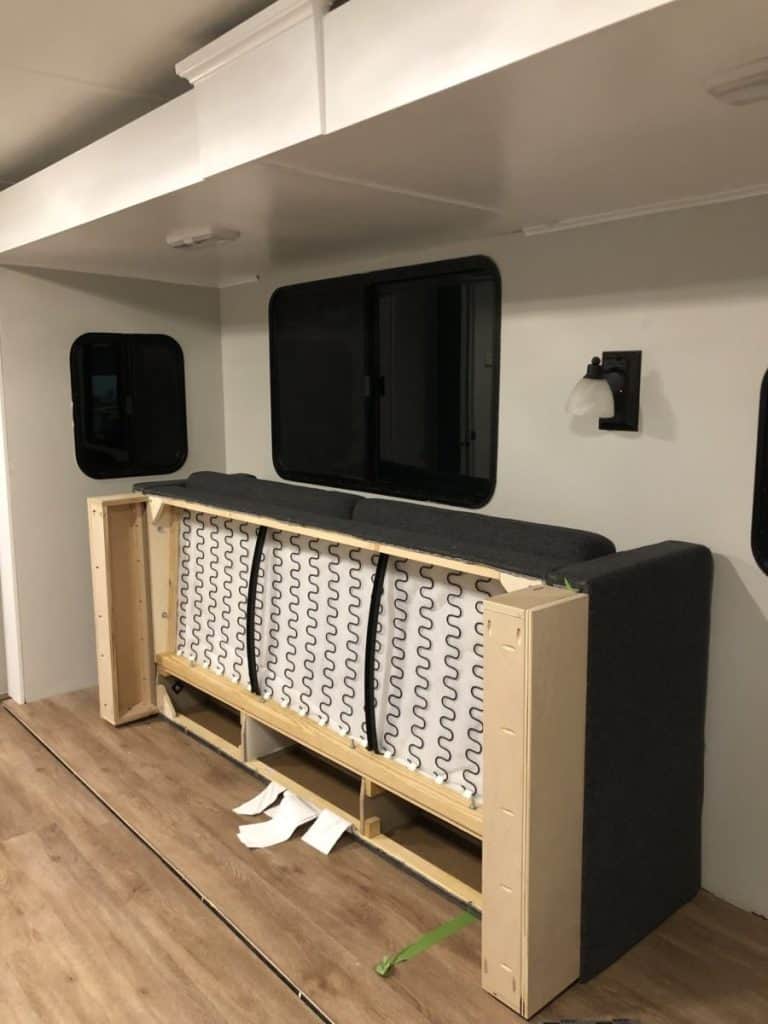
I constructed some pretty basic legs out of 3/4″ plywood.
Once again, the objective is to just lift it without placing too much weight on it.
This choice was ideal.
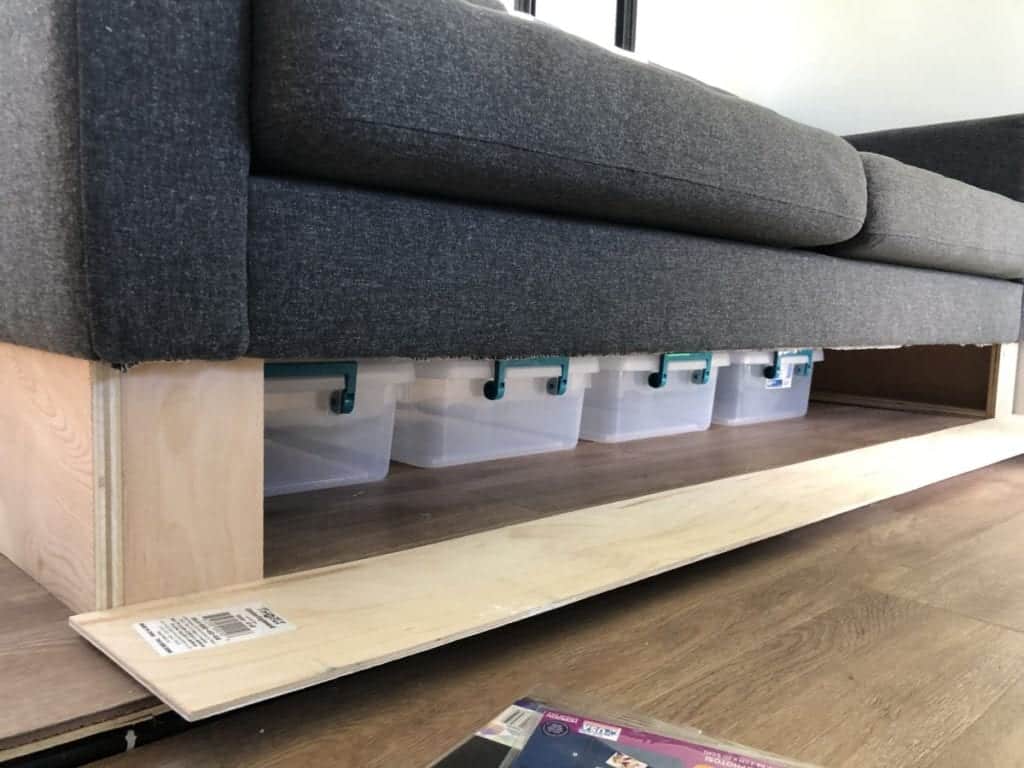
It had plenty of storage space and, should we ever decide to, another twin-sized foam mattress could fit inside.
NICE! I already have a platform that works, but I want to make it seem as if it was always there.
I was straining my mind to come up with a very spectacular approach to make this work.
I had thought of using hinges, glides, and several other devices, but my inner voice of reason intervened.
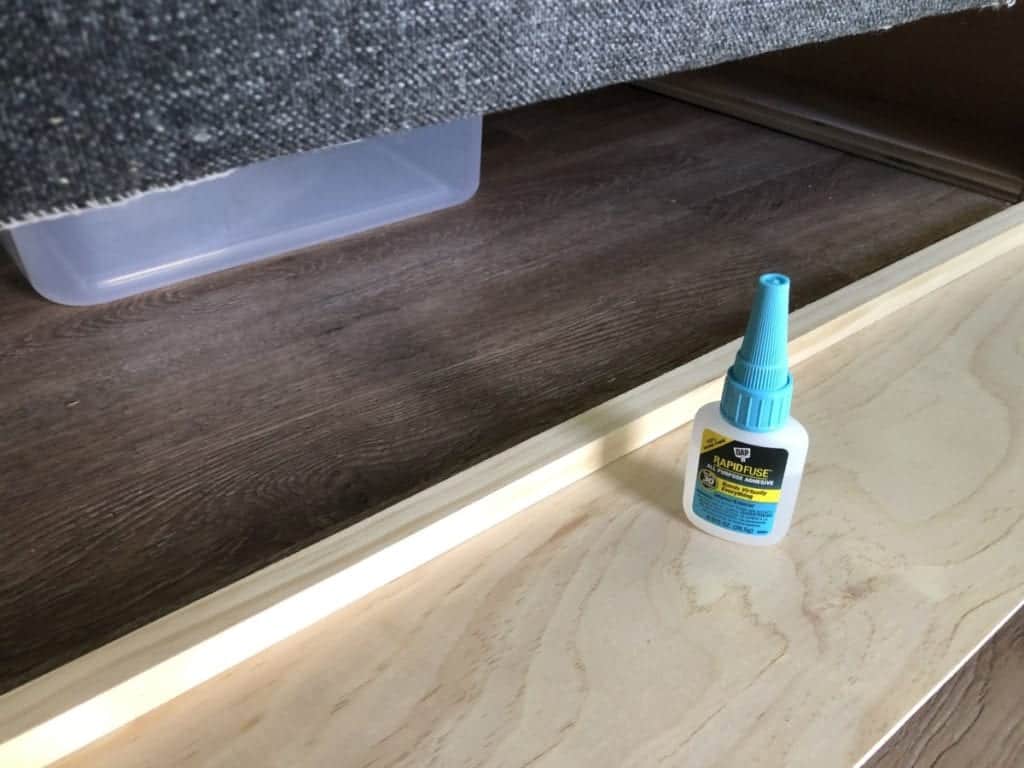
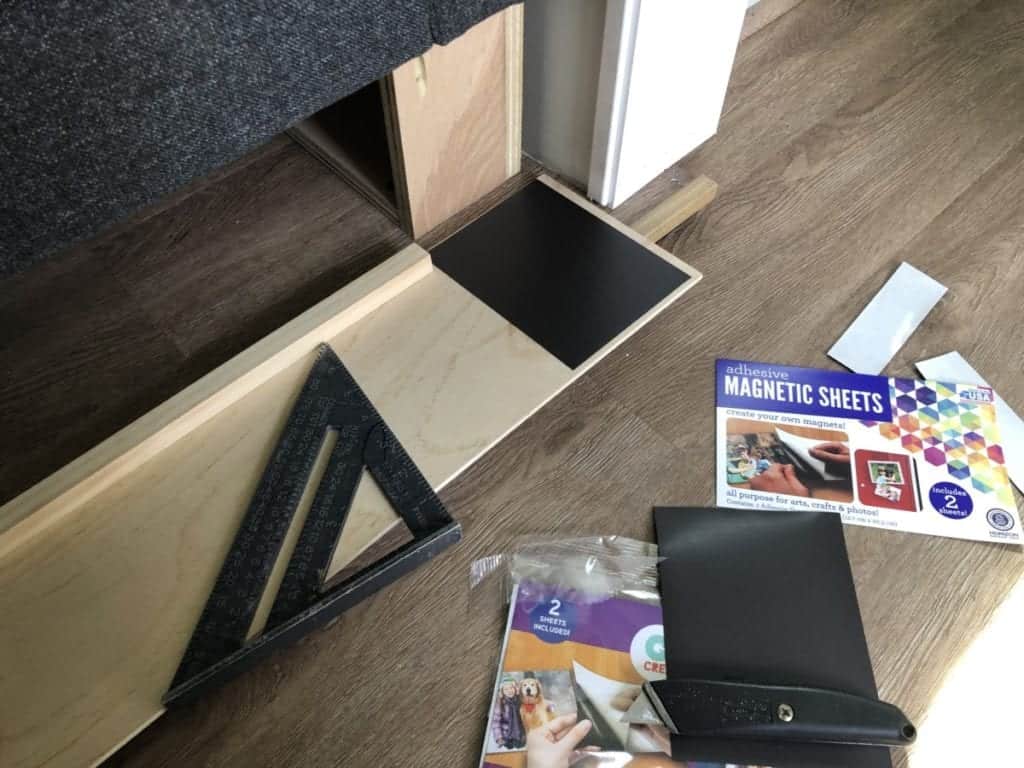
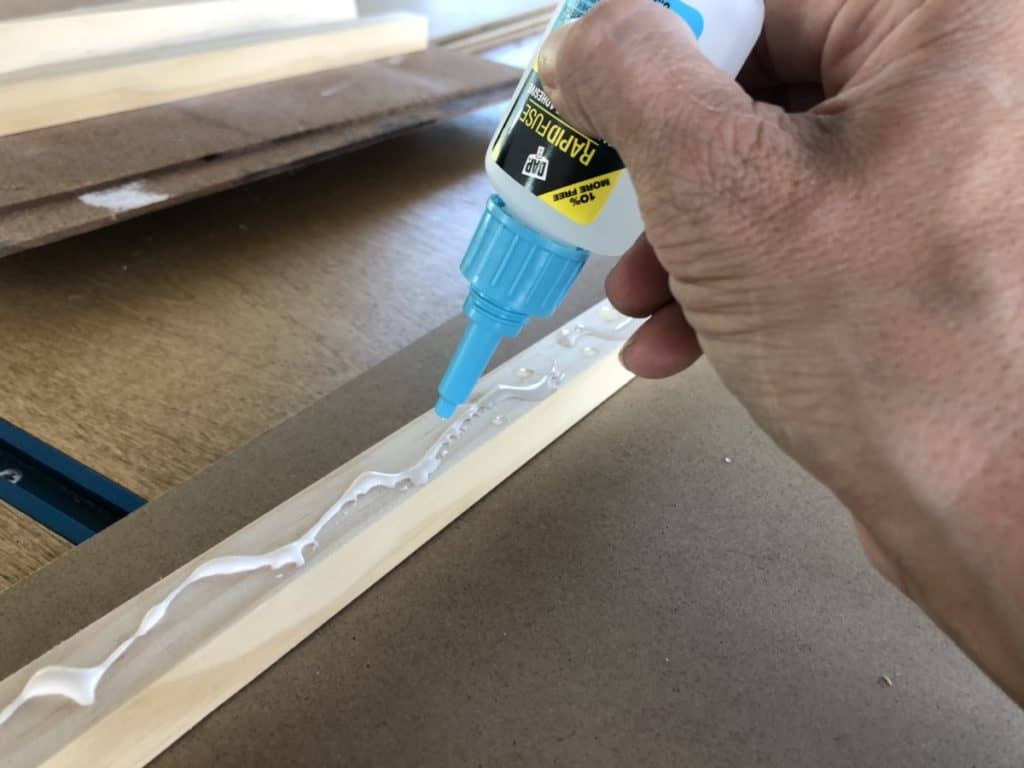
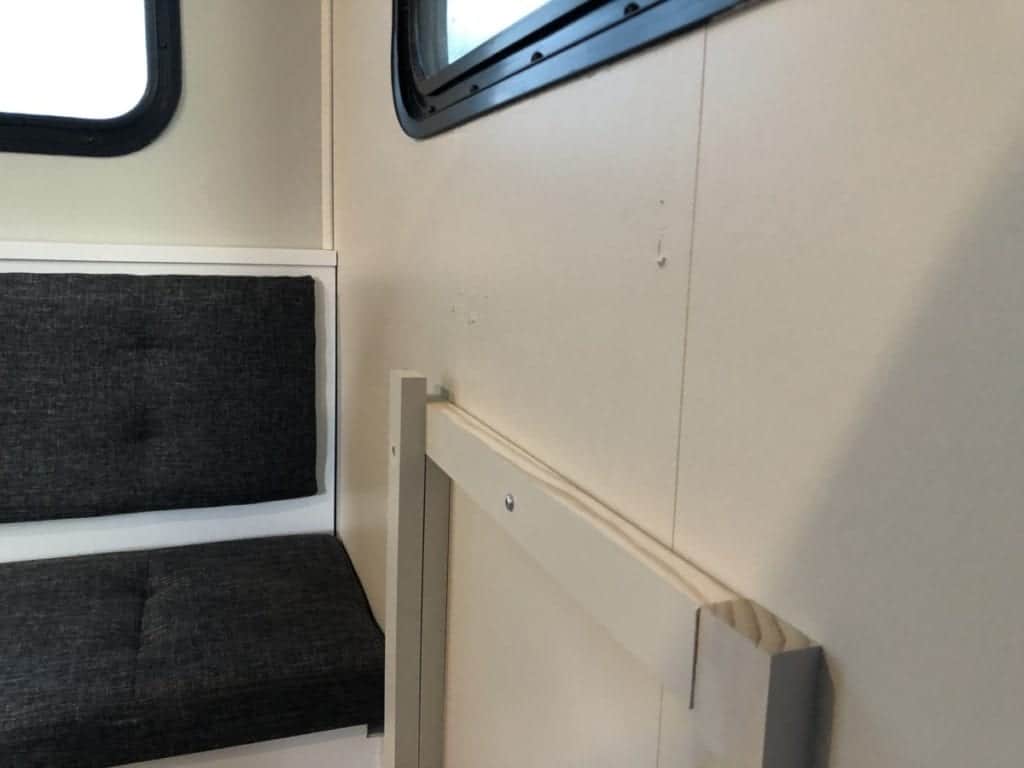
“Effectiveness doesn’t necessarily need a lot of time!” So I just cut a piece of paneling to size and connected a little board to the panel to act as a stabilizer.
This was a rather easy adjustment, but it worked really well.
I just used Rapid Fuse, and from start to finish it took 20 minutes!
How to hold it in place was the last consideration I needed to make.
Again, I immediately thought of many strategies I might use to make this work, but I reverted to my “simple is better” approach (in this case).
In the craft aisle, I discovered some magnets, and I used Rapid Fuse to attach them to the support/legs of my couch as well as the back of my cover panel.
Easy as pie! I’m so glad there’s that much storage.
Everything will be simpler to load and unload, and naturally, it will remain a little more organized!

Dinette/Benches for Campers
The section of the agenda that followed left me perplexed.
The dinette set required replacement.
I had to start again since the previous upholstery had to be removed.
I began looking around for a fabric that would work for the dinette set after I had decided which sofa I would use in the camper.
I was finding it difficult to feel enthusiastic about anything because… My little secret.
Despite the fact that my nickname is “Sawdust 2 Stitches,” I detest sewing.
I can do it, but I would much rather not.
As a result, I took my time.
Then, one day, while I was pondering my alternatives, a “light bulb” moment occurred to me.
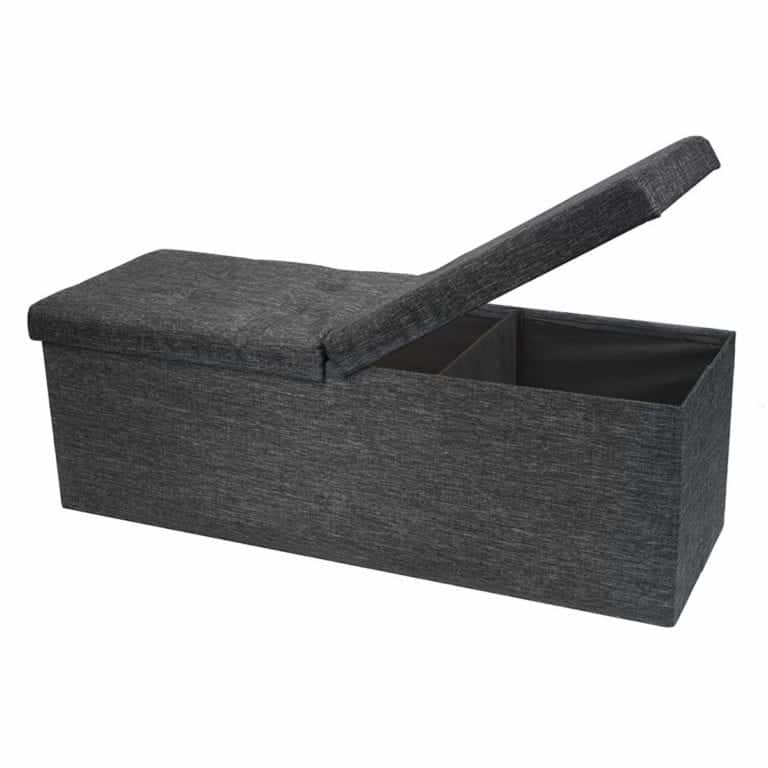
Why not use an ottoman as seating? Once the concept had been ingrained in my mind, it grew exponentially.
On Amazon, I ultimately discovered a few alternative choices.
It was a miracle that one of the two styles I miraculously bought came so close to being a perfect match! Therefore, I retained them and returned the rest.
I then loaded them inside the camper and enjoyed how beautifully they matched.
But the more I observed them, the more irritated I became.
I put a lot of effort into making this camper look fantastic, and now I was going to add some chairs.
Simply said, it isn’t me at all! Who am I, exactly? So, in typical Corey form, I began experimenting with a more complex concept.
What if I were to make something a bit more unique by using the upholstered lid? Ever wonder where I got the idea for my slogan, “where we can’t leave well enough alone”? So now you are aware.
So I started disassembling my new ottomans and used their components.
The cloth and upholstered movable storage lid were what I actually wanted to use, not the base, which I knew I could easily construct.
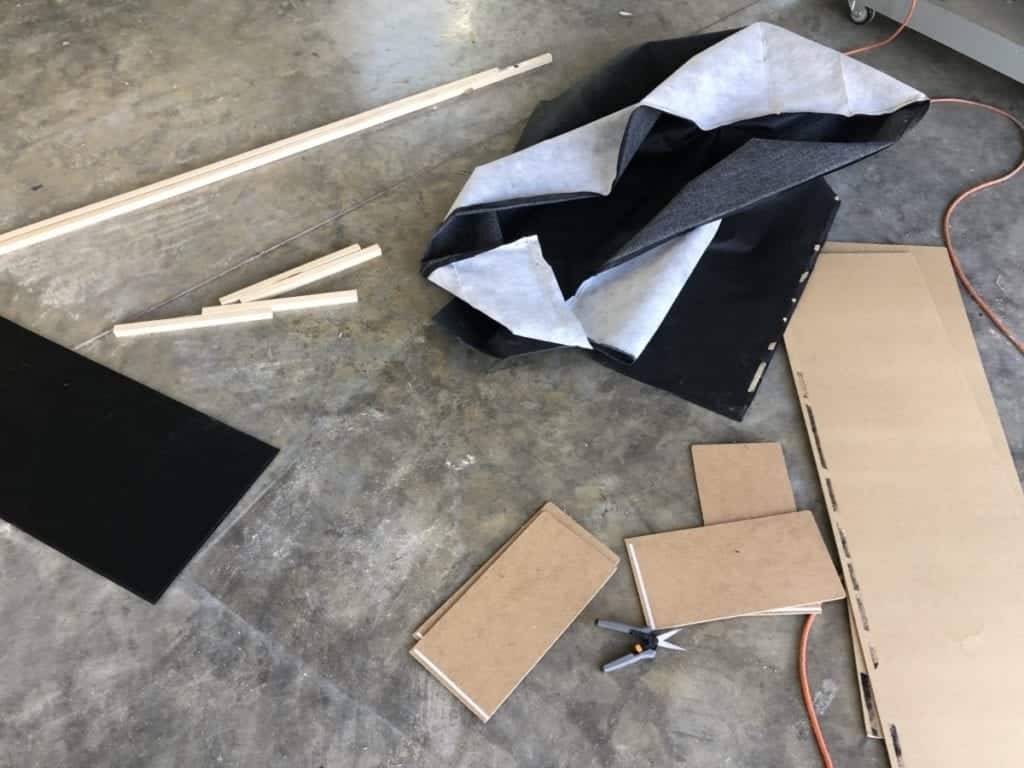
Even the base’s planks were repurposed by myself! The only thing that changed was the need that I create an internal skeleton for the boxes.
Previously, the ottoman’s construction was supported by the cloth.
I once again had to design a piece of furniture that was both strong and very light.
My tendency as a “builder” is to “overbuild” everything.
Making a bench out of paneling and 1″x1″ planks caused me to have mild heart palpitations.
You may see my InstaStories here if you want to learn more about the procedure.

I wanted to give this matchstick-style construction as much strength as possible without adding a lot of weight.
I improved my use of adhesives to achieve that.
Before gluing the framework together, I used Rapid Fuse and DAP Wood Glue.
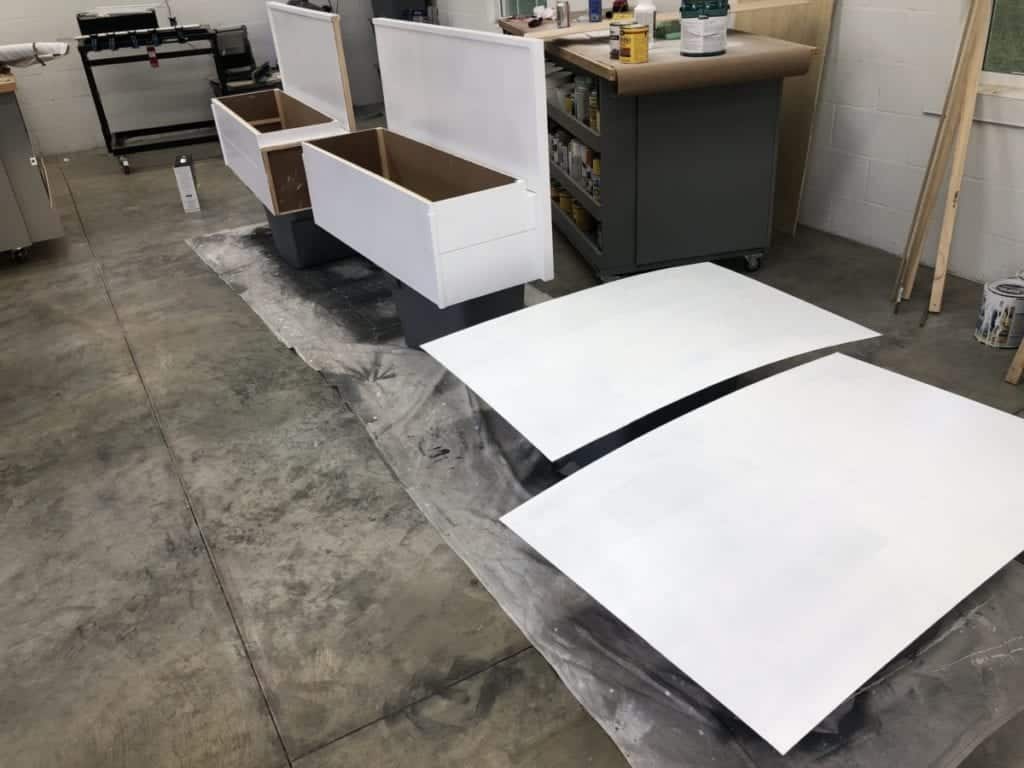
Can I just say how happy I was to discover how robust these small benches are?
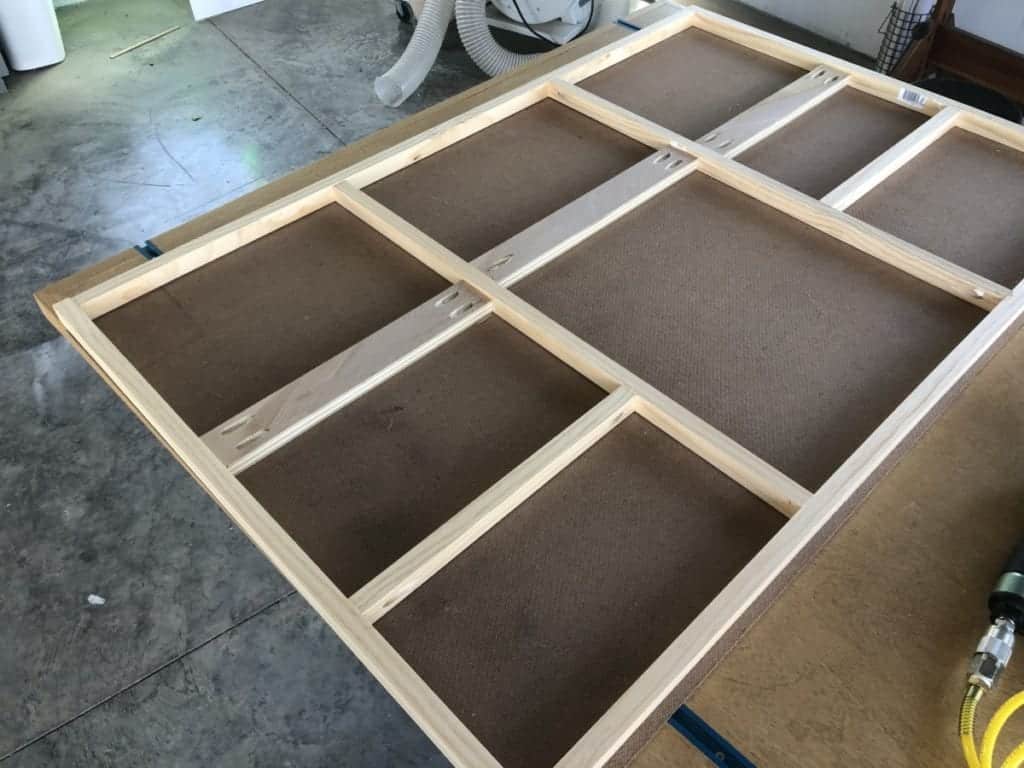
I started with the bases and worked my way back to the rear supports.
Once again, I had to be inventive since I wanted to keep this LIGHT.
I built a skeleton out of 1′′x 1′′ planks, adding a few 1′′x 3′′ boards here and there to connect my upholstered back (keep reading).
By using my glue-up technique, I was able to create an extremely STRONG and LIGHT frame on which I could adhere panels.
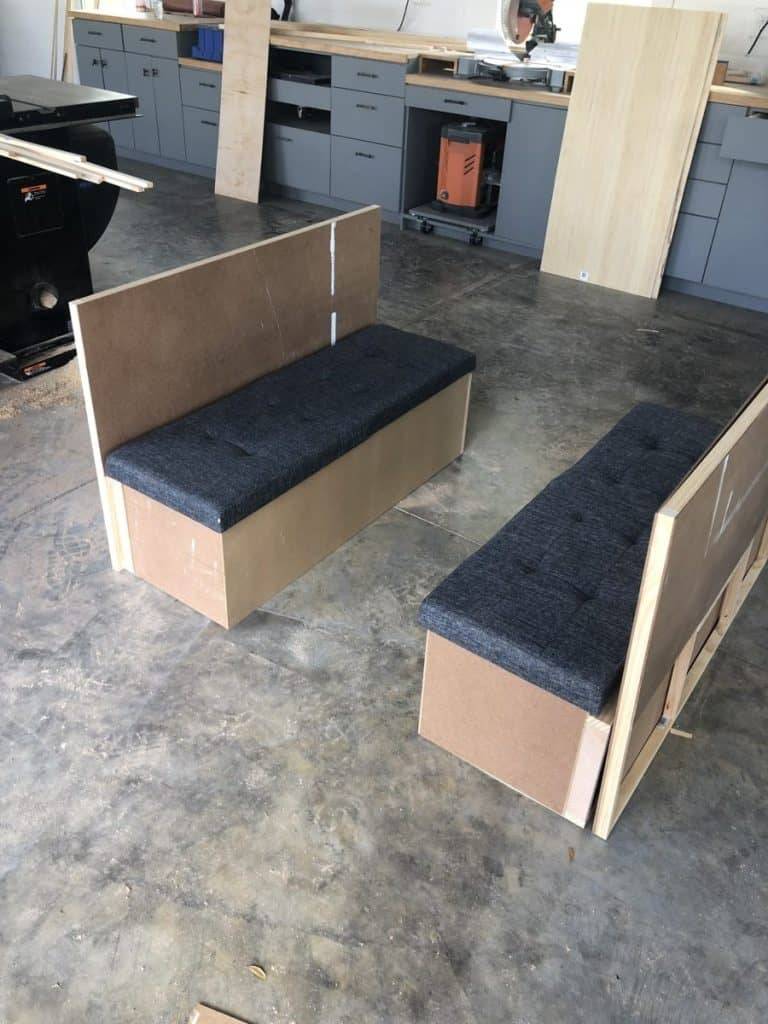
After the backs were linked, I turned my attention to the project’s aesthetics.
I wanted it to seem integrated.
I made the decision to include the theme I designed for the camper’s master bedroom.
(All the information is available here.) I wanted to move the faux shiplap through the dining room, living room, and hallway.
Additionally, adding shiplap to the benches would strengthen their structural integrity without significantly increasing their weight.
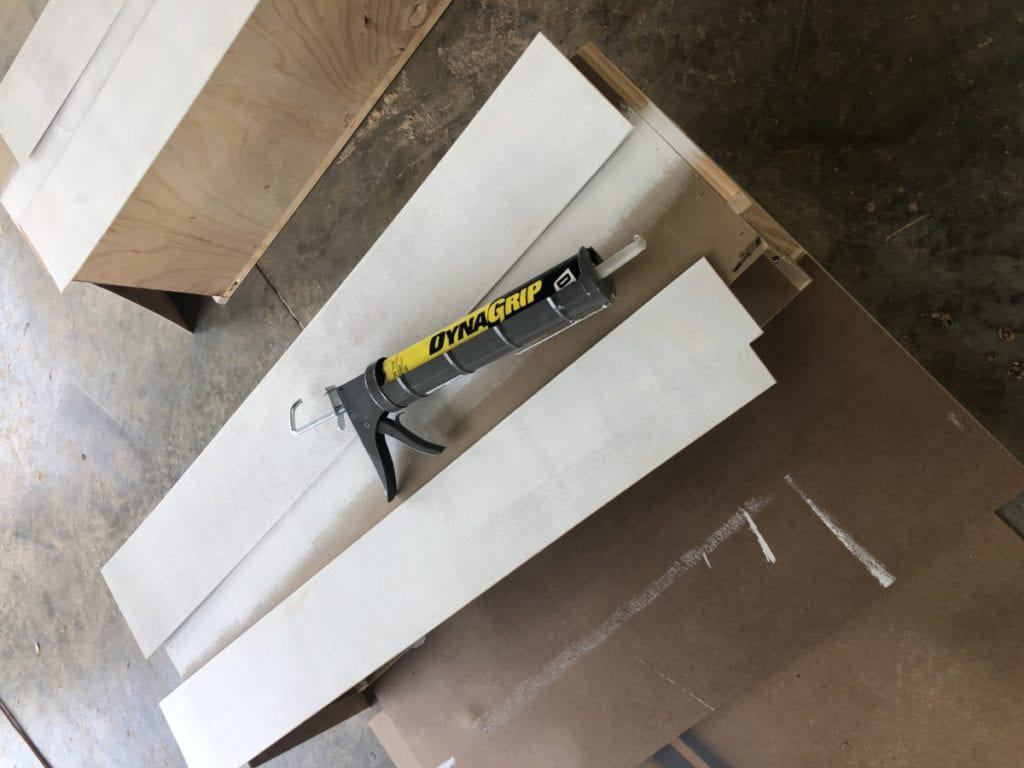
I DO prefer to use glue when installing shiplap.
I’ve discovered that DAP DYNAGRIP works very well from previous projects! (You can learn more about my approach for installing shiplap in this full guide.)
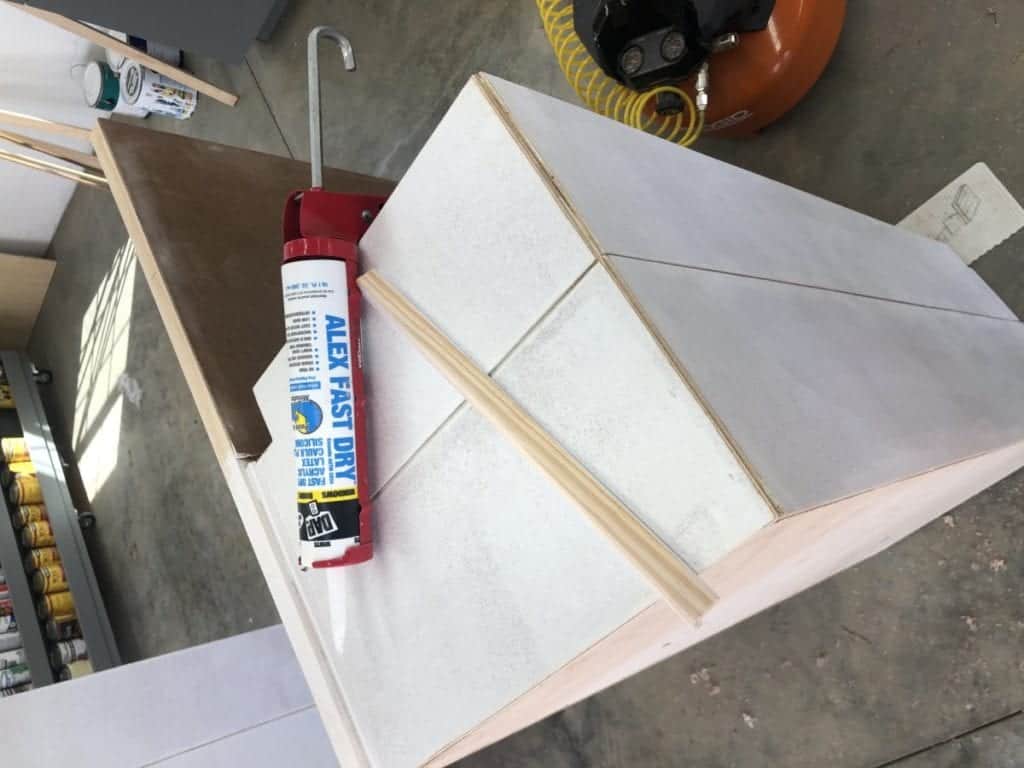
After installing all of the shiplap, I needed to trim it out to finish the appearance.
I SWEAR that these last, meticulous stages are when projects really start to appear professional! I prefer to always cut the corners of the pieces before applying a tiny bead of caulk.
The artwork has a pristine appearance after painting! Caulk is the Magic Eraser of the do-it-yourself world, I’m telling you.
I like using Alex Fast Dry since it has a wonderful finish, is simple to apply, and, of course, dries in only 20 minutes!
I had to add some kind of back cushioning next.
Recall the excess piece of cloth I tore off the ottoman’s base? This is the point when the cloth will be useful.
I drew “tufts” (the tiny depression of the cloth) onto a piece of paneling using the ottoman seat (shown on the left) as a pattern.
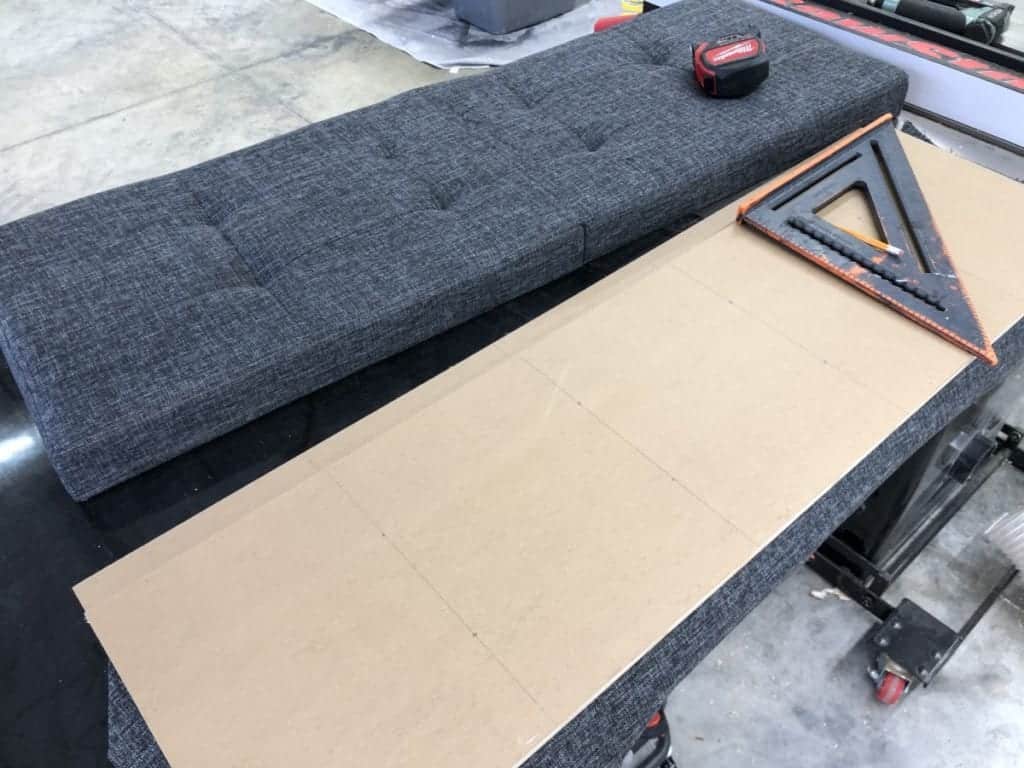
I next made tiny holes with a drill bit where I intended to make tufts.
I then put foam to the support/front panel’s side.
I next wrapped the additional fabric firmly around the framed panel and nailed it in place.
I had taken it from the ottoman’s base.
The back support could certainly be left alone, but I wanted to add tufts to make it match the seat.
I achieved so by making a few stitches through the already drilled holes on the back using an upholstery needle.
To keep the stitch tight, I clamped it with a little piece of wood.
I go into a bit more depth about the procedure if you watch my InstaStories.
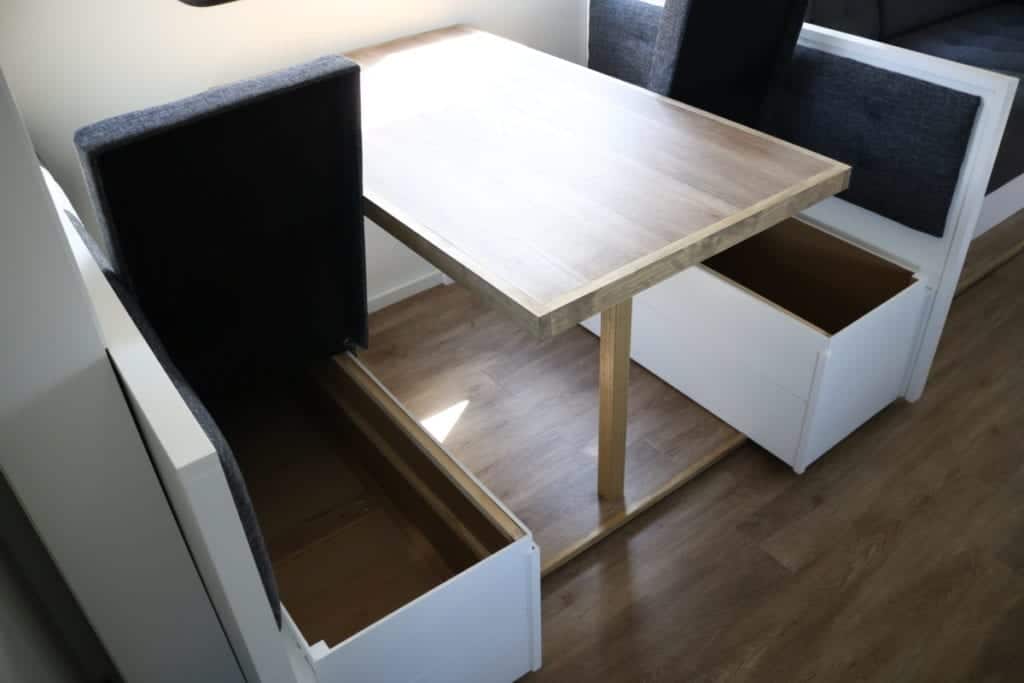
Table for a Tent
After completing the dining room benches, I turned my attention to the table.
If you read my last article on the camper, you may remember that I made some minor changes to the nightstands in the bedroom.
The spare floor planks I used for the table top in the end worked beautifully! Therefore, I made the decision to implement the same concept on a little larger scale by using flooring as my dinette table top.
All I had to do to do that was to decide on my ideal overall dimension and then deduct 1.5′′.
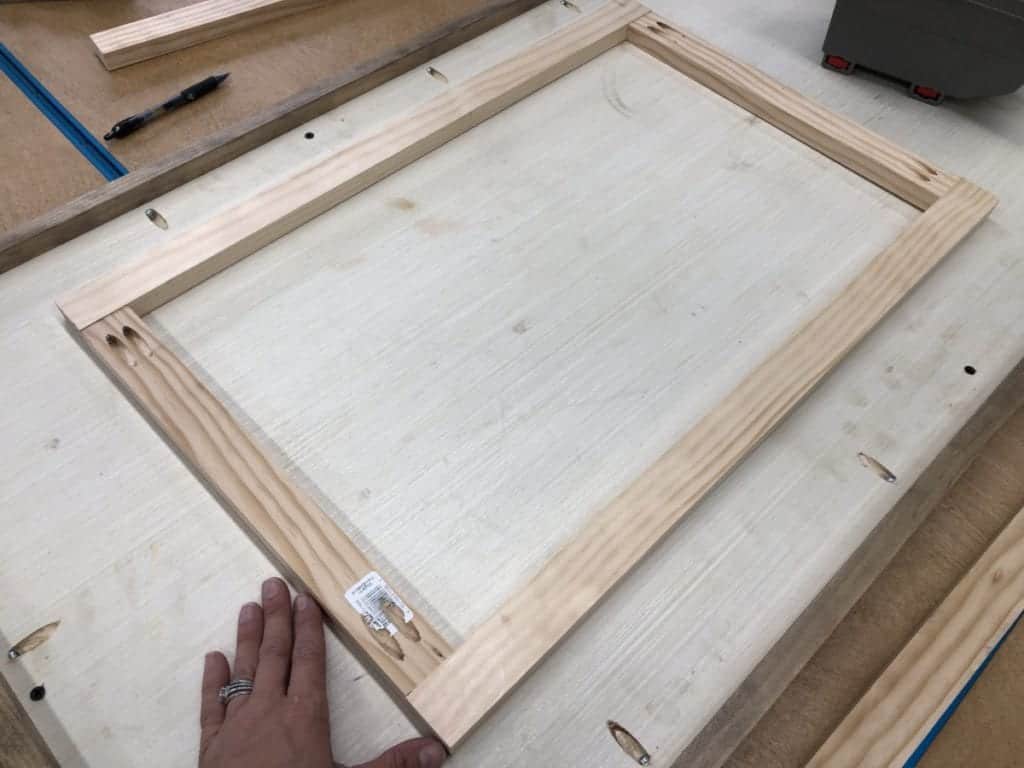
I could band the borders with a 1″x 2″ board using this 1.5″ of space.
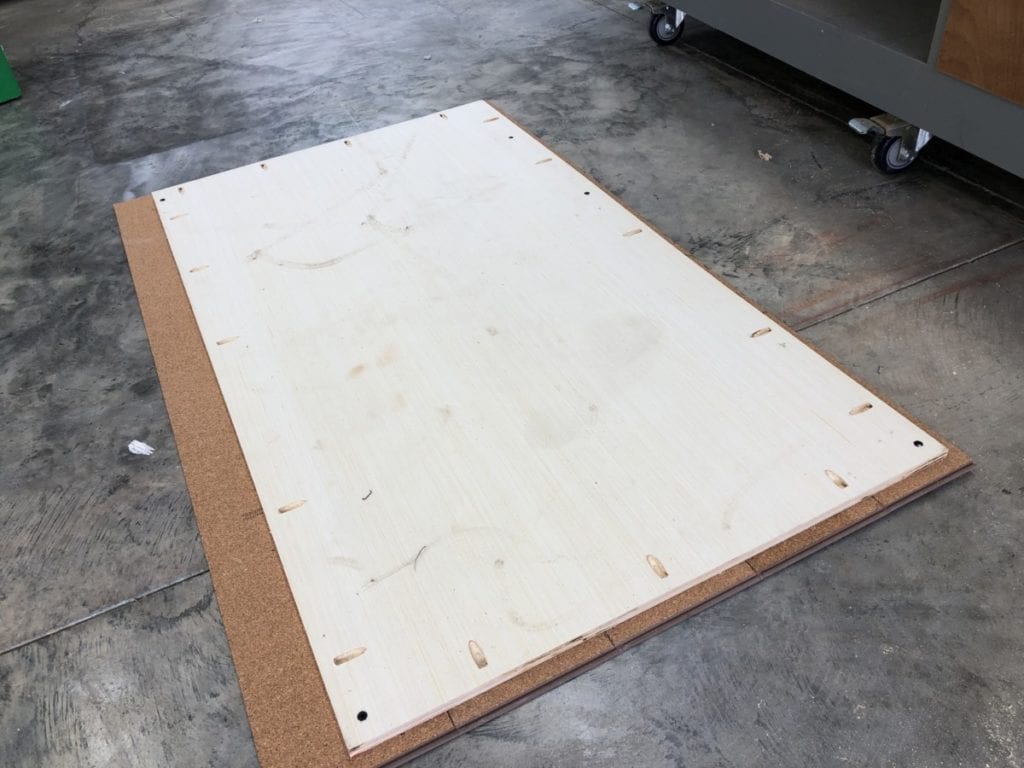
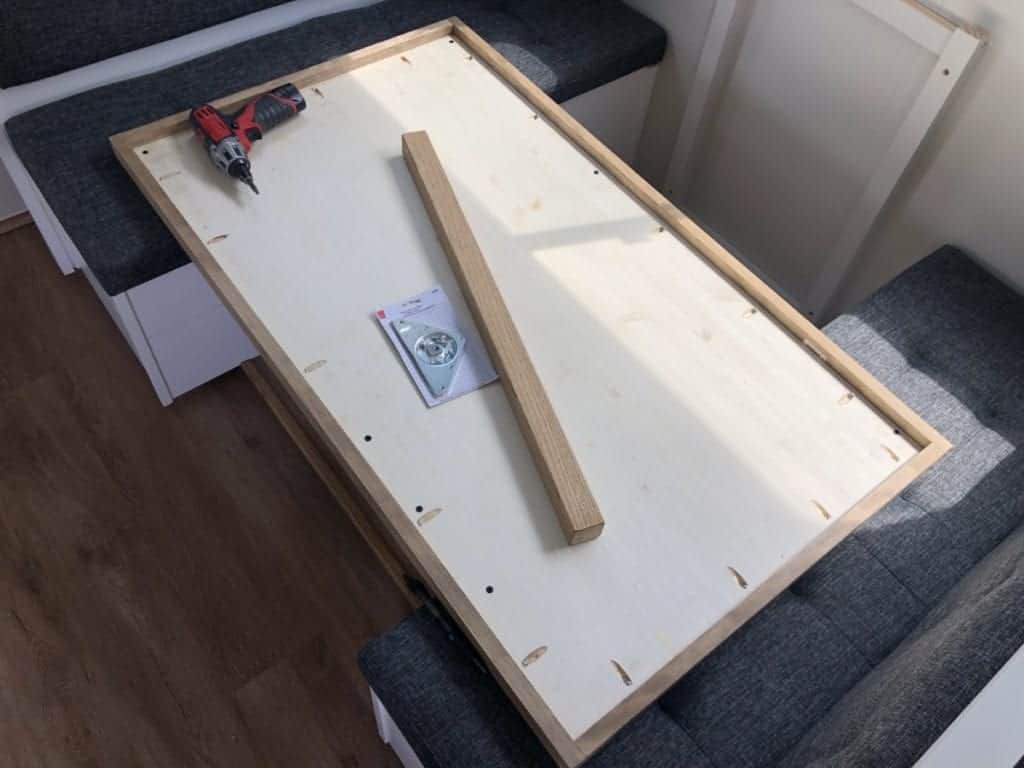
As the basis for my table, I utilized a 1/2″ board.
I drilled pocket holes all the way around the bottom side of the perimeter after having it cut to the aforementioned specifications.
(This enables me to subsequently attach the edge band.)
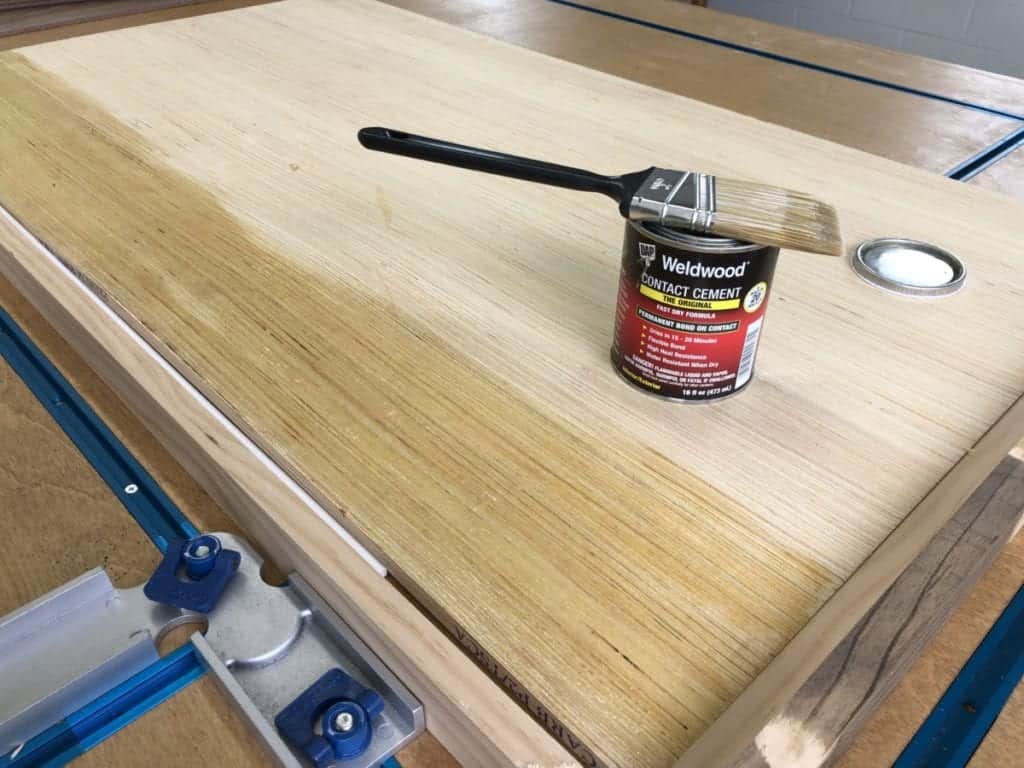
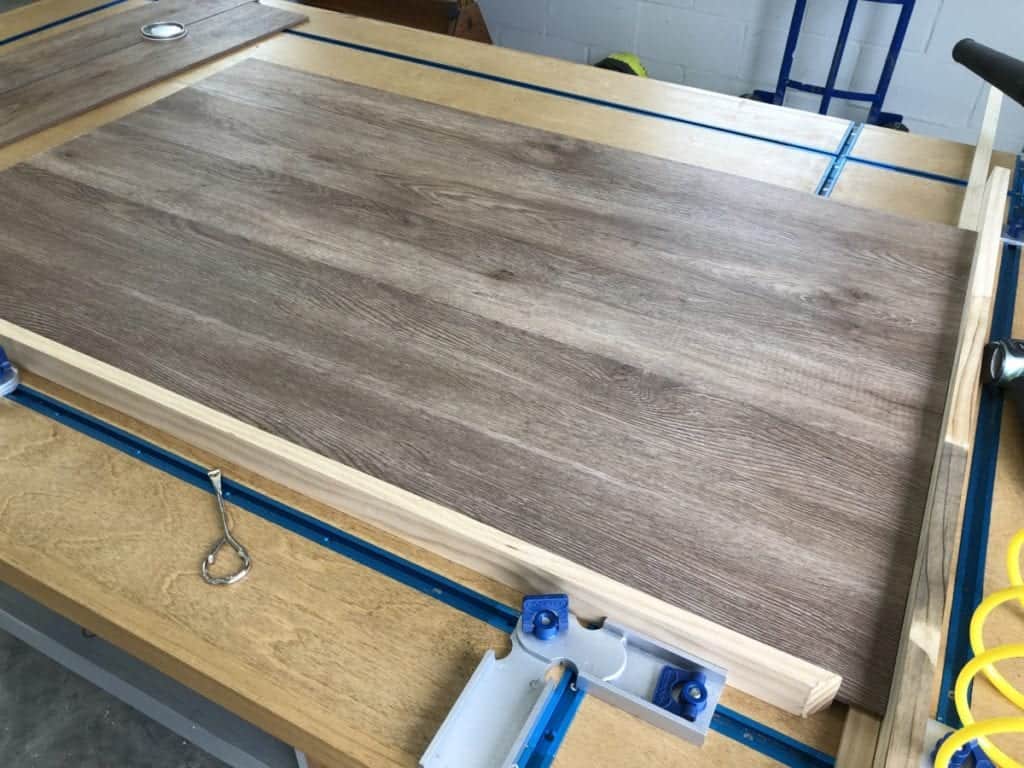
Making this straightforward piece of plywood seem like a unique table is the next basic step.
The flooring was simply pasted to the board.
Yes, it is that simple.
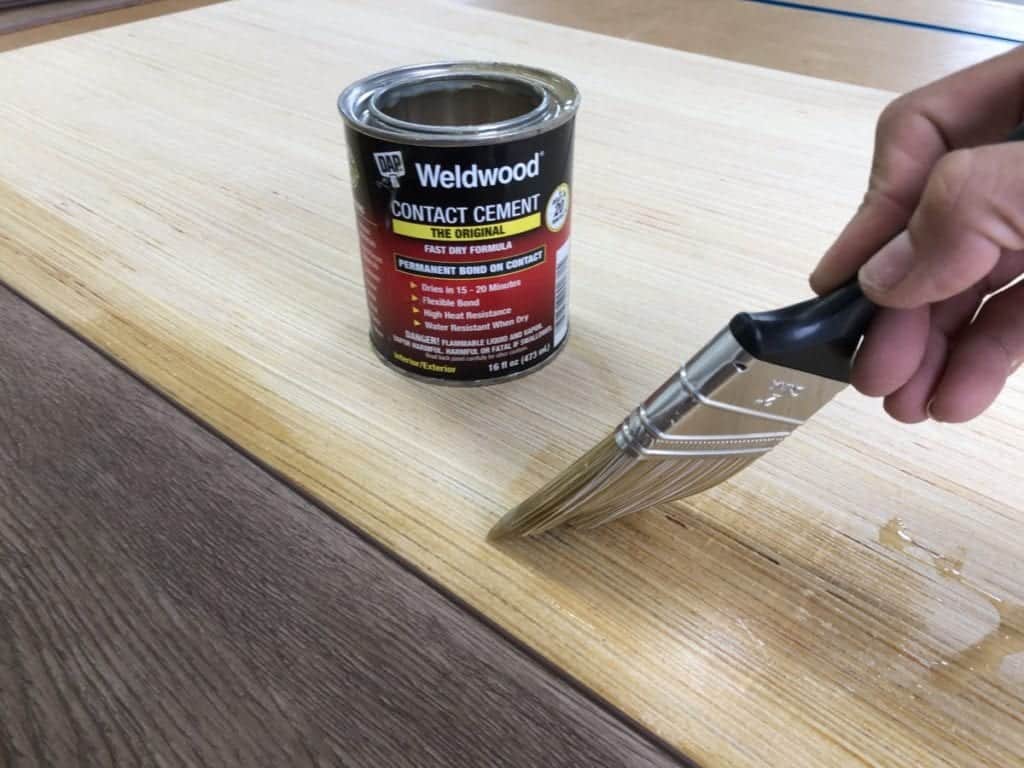
I applied a uniform coat of DAP Weldwood Contact Cement using a paintbrush to the area where I intended to install my first board or floor covering.
Following the installation of the first flooring/board, I painted on additional Weldwood before adding the second piece of flooring as if I were placing it on the floor.
The click-and-lock flooring I selected is waterproof and would be perfect for the table top since it is also click-and-lock.
Repeat the procedure up until the table’s whole surface is covered.
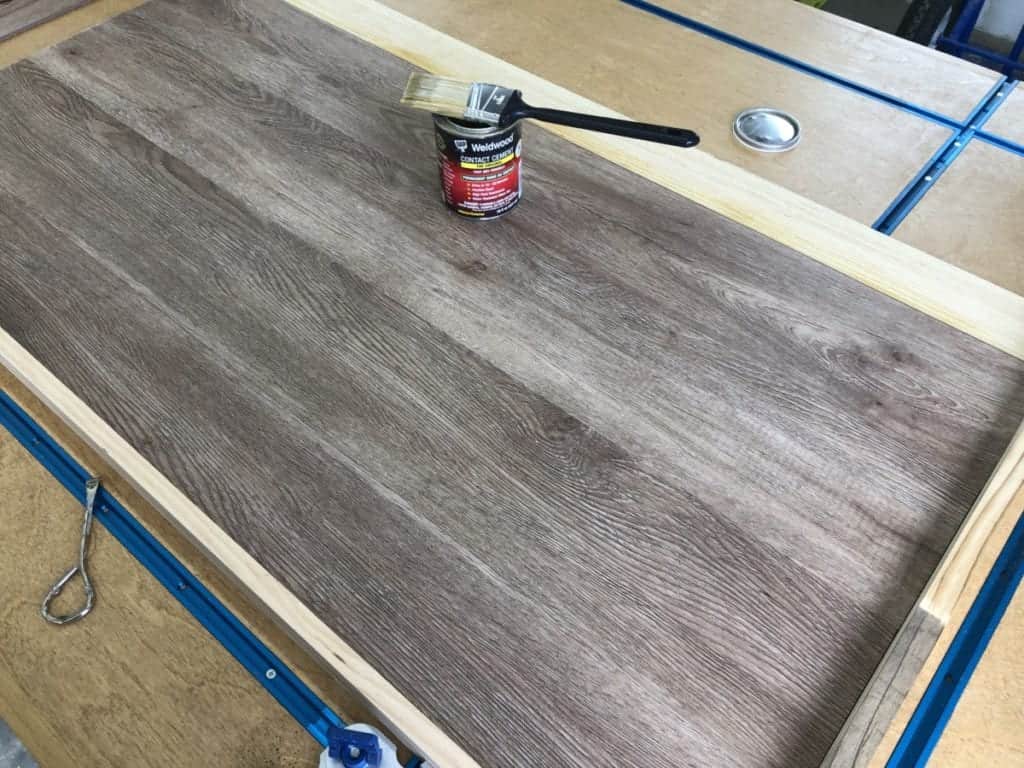
I deliberately left the flooring protruding on both sides so I could cut it down on both sides and have it flat with my plywood board.
To remove any extra board, I just used my tablesaw, which provided me with a lovely flat edge.
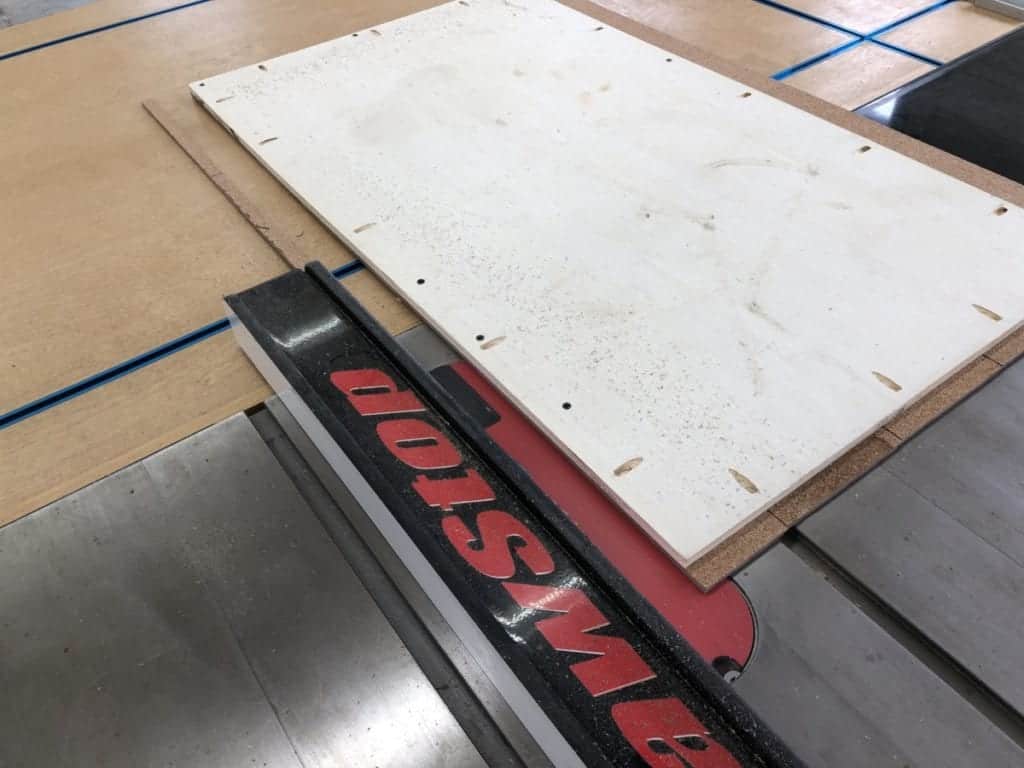
A 1″x 2″ board was then used to bind it.
I eventually managed to get a hue that almost matched the table top after experimenting with various layered stains.
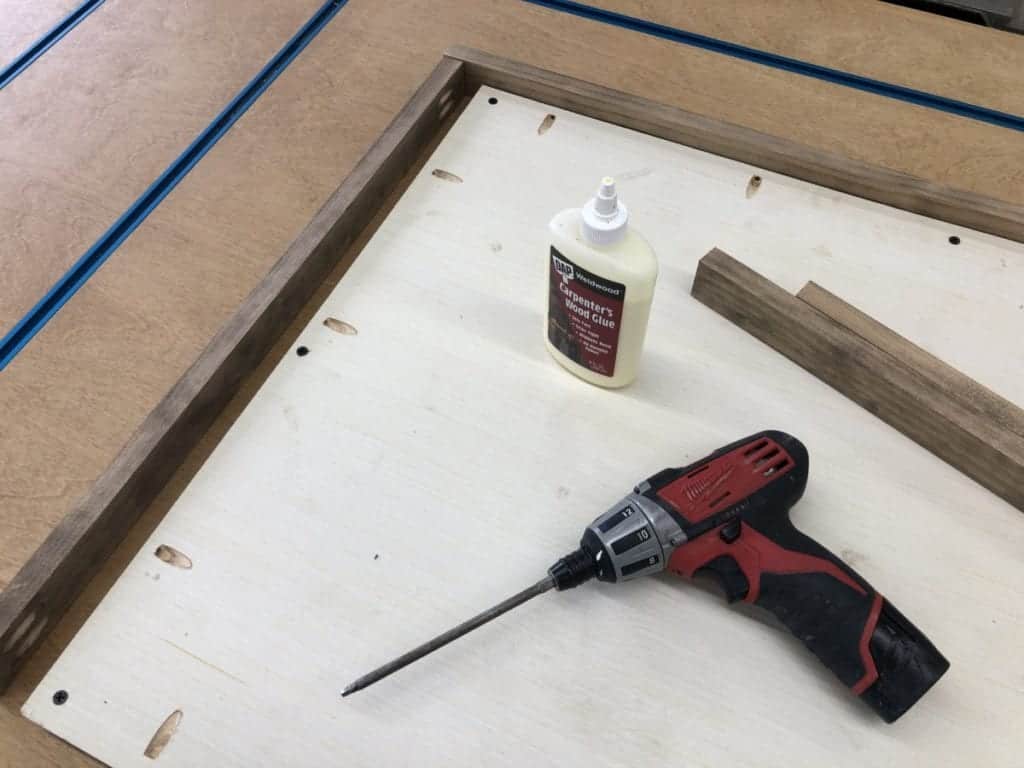
I then went on to stain all of my 1″ x 2″ boards and gave them time to dry.
After they had dried, I nailed them to the table’s edge using DAP Wood Glue and the earlier-drilled pocket holes.
This will give the table top some support and stiffness in addition to giving it a completed edge.
As soon as the table top was finished, I could start working on the legs and support.
Working in a camper might be challenging since you can’t always depend on the wall to hold any weight.
I had to think of a unique solution for the leg issue.
My intention was to have as few supports (under the table) as possible so that we wouldn’t have to often kick or smash them when seated at the table.
So I built a table leg that would link to the wall, but the table top’s whole weight would be supported by the ground.
I fastened the support/leg to the wall immediately.
Again, the camper wall is not actually capable of supporting weight on its own, but I was certain that a few screws would be enough to keep the leg firmly fastened to the wall.
I made the support such that the lip—the 1′′x 2′′ wood I used to band the table’s edge—would rest on the top of the wall support.
It performed flawlessly! The wall-mounted support was low profile and very durable, and the table’s whole weight was supported by the ground.
WINNING! I would still need at least one more point of support, no matter how fantastic my wall mount support was.
Using a plate designed to suit said limb, I simply constructed a very simple straight leg.
Simply secure the plate in place with a screw before attaching the leg.
My one piece of advice is to put a pokethole to the base or rear of your leg.
Once the table was set up and its leg was centered, I fastened it to the floor using the pocket hole.
Even if someone were to kick the table leg, it still functioned well and kept the table securely in place.
Isn’t it lovely? This table complements everything exactly, is really durable, and cleans up beautifully!
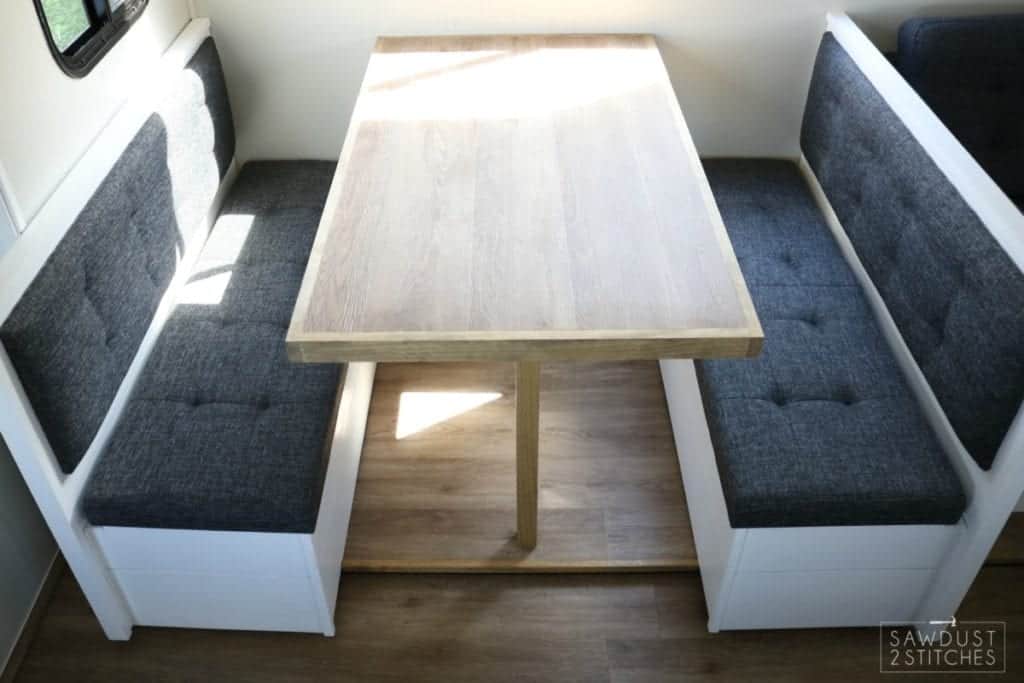
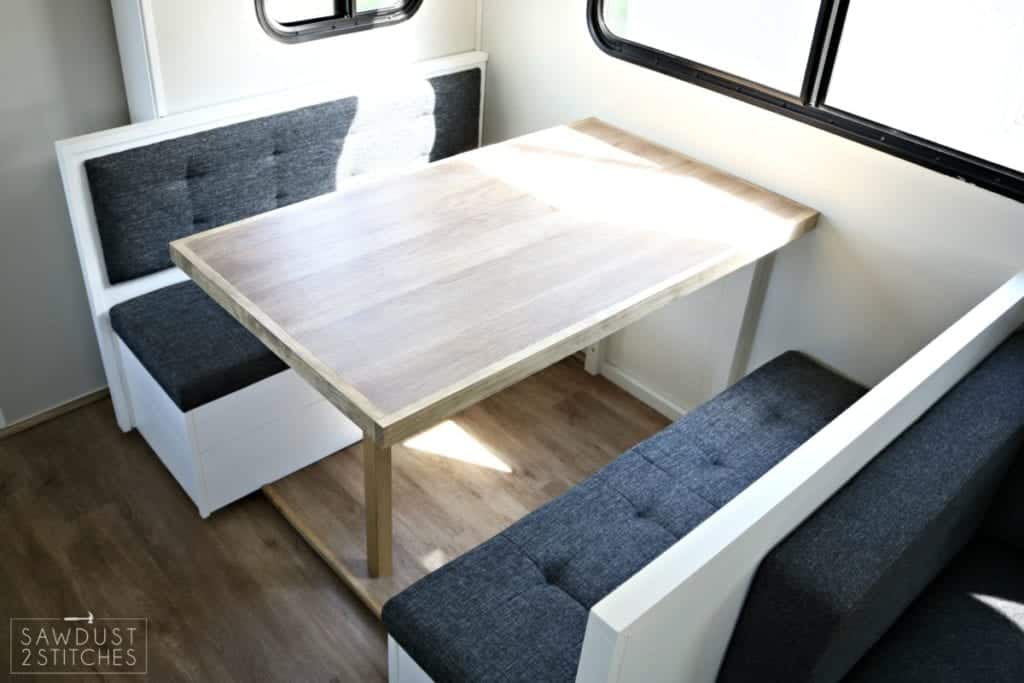
I’d think you have a pretty damned fantastic dinette set when you combine a stunning, reasonably priced table with excellent storage seats.
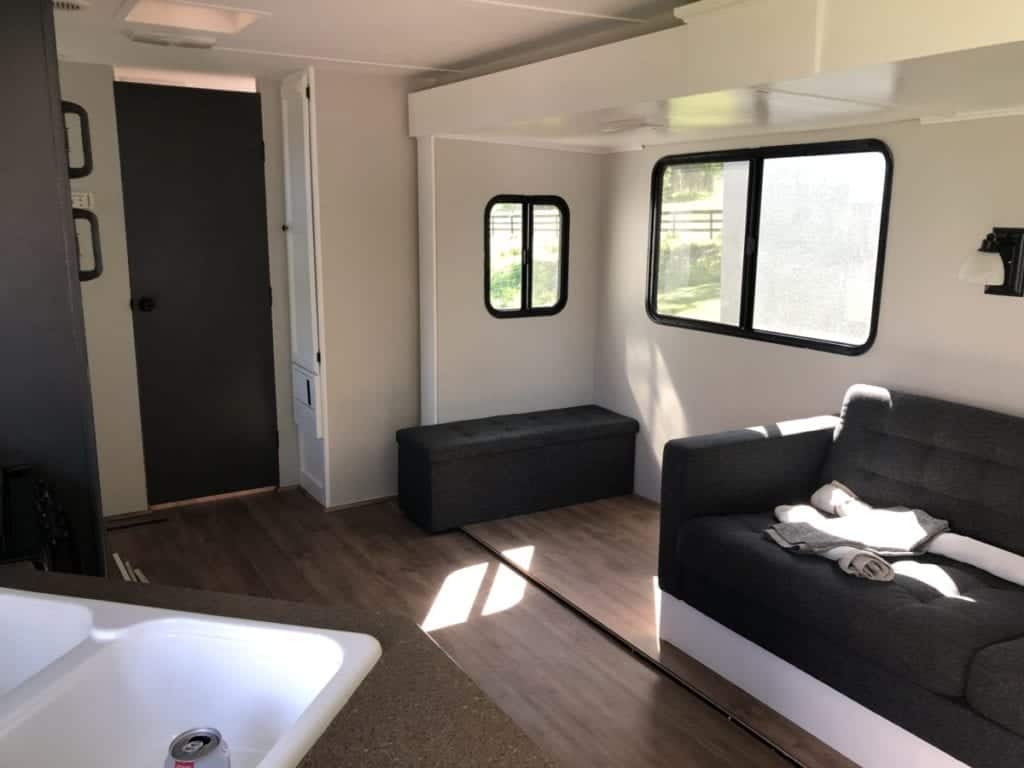
So let’s quickly review where we were when we first began, shall we?
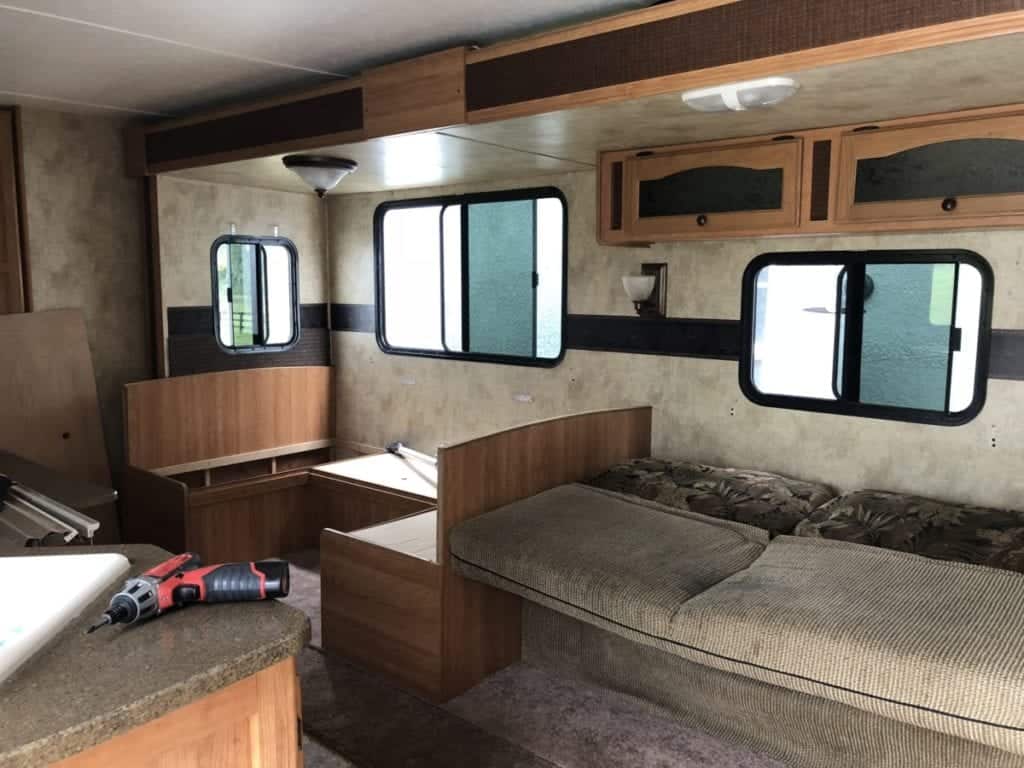
Now, how far has it come?
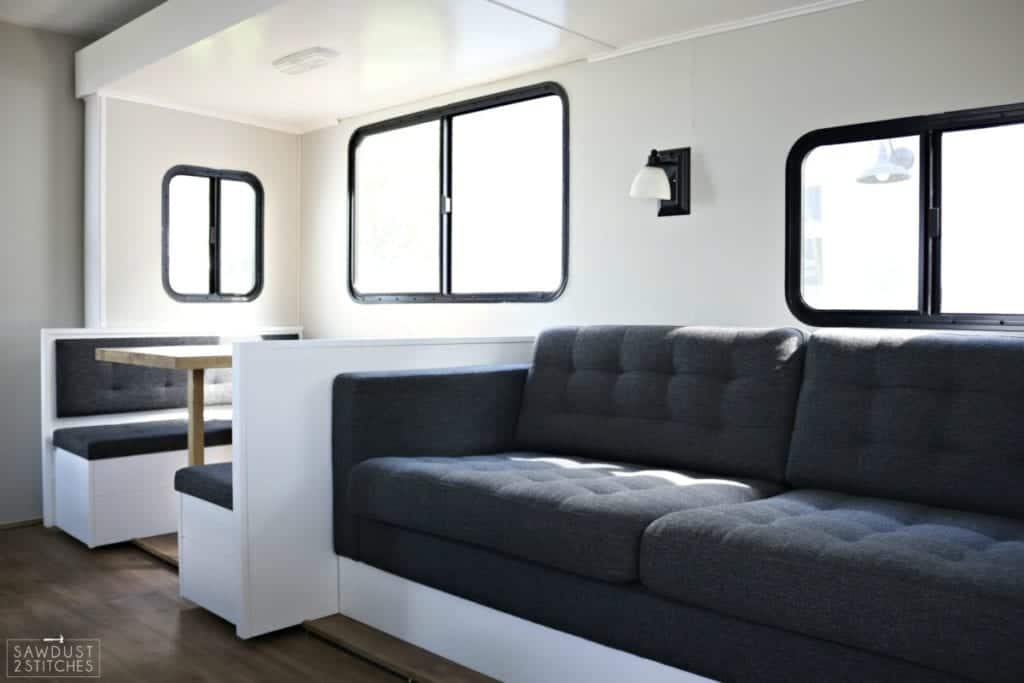
Amazing, huh? Guess what, though? The revelation will be coming shortly, but I still have a few tricks under my sleeve and some final touches to do.
Many thanks for following along.