Whether the water pump in your recreational vehicle (RV) is on its last legs or you just wish to upgrade from your old pump to a new one, changing it is a procedure that is both straightforward and affordable.
This do-it-yourself tutorial will take you through each stage of the procedure, beginning with removing the old pump and ending with putting in the new one.
It doesn’t matter whether you’ve been driving an RV for years or if it’s your first time—you’ll be able to execute the task with the same level of competence as an experienced driver.
But before we go into it, let’s determine whether or not you need to replace your pump.
When Should I Consider Replacing the Water Pump in My RV?
When the water in the system stops flowing the way it usually would, you will likely want to replace your RV’s water pump.
If the water pump does not start when the faucet is opened and the water does not flow out of the faucet when the faucet is opened, your water pump has most likely failed and will need to be replaced.
On the other hand, there are a number of different scenarios in which you may want to consider (or perhaps need) replacing the water pump in your RV.
These scenarios include the following:
- Pumps that leak water: If your pump is leaking water from the housing or casing (and it’s not simply a loose connection), it’s likely time to replace it since the problem is more serious than it seems. We have a series of methods that may be followed in order to solve this specific problem if you find that your RV water pump leaks while it is connected to municipal water.
- The pump is making strange noises: For peace of mind, you should replace the water pump before embarking on a lengthy journey, rather than risking it failing while on the road.
- Upgrade your RV water pump: Perhaps you just wish to upgrade to a more efficient or powerful unit.
We are here to help you through the process of replacing the water pump in your recreational vehicle, regardless of the reason why you desire to do so.
Let’s get started!
A Step-By-Step Guide to Replacing an RV Water Pump
We will need a few equipment and materials in order to begin the process of replacing the water pump in your RV, the majority of which you most likely already own.
In addition to that, you will, of course, need a new water pump.
We are confident in recommending Shurflo RV water pumps since they are undoubtedly the most well-known brand of water pumps for recreational vehicles (RVs) and travel trailers, they have excellent reviews from previous buyers, and they are quite affordable.
If you make a purchase after clicking this link and it results in a commission for us, there will be no extra cost to you.
Shurflo RV Water Pump 12v (3.5 GPM, 45 Psi)
Price:
Buy Now on Amazon
Buy Now at Walmart
What You Will Require
- A water pump replacement for an RV
- Drill or screwdriver, your choice.
- Wire cutters that also function as strippers and crimpers
- Spade connectors
- Bowl and a stack of towels
We can start the process of installing the new RV water pump as soon as you have all the necessary equipment.
A Video Guide on How to Replace the Water Pump in an RV
#1. Make Sure The Connection To The City Water Supply And The Water Pump Are Both Turned Off.
To begin, we have to disconnect the RV from the municipal water supply and switch off the water pump in the RV.
When you start to work on the plumbing system in your RV, this should be the first step that you take.
#2. Disconnect The Power Source For The Pump
The next step is to turn off the electricity supply to the water pump.
You have a choice between two approaches to take here:
- Take out the fuse for the water pump, which is situated on the switchboard for your 12-volt electrical system.
- To stop the flow of energy to the pump, you must first unplug the RV from the power source and then flick the button that disconnects the batteries.
Both of these options are viable.
#3. Evict All Of The Water From The Machine.
You should run a faucet in your RV until it is completely dry.
This will empty the water and release any pressure that may have been built up in the system.
#4. Disengage The Connection Between The Pump And The Latching Controller.
In the event that your recreational vehicle has a latching controller, we will have to detach it from the pump.
What exactly is it that a latching controller does? Because of this one-of-a-kind equipment, you will be able to install an on/off switch for your water pump in a variety of rooms and areas, such as the lavatory, the kitchen, and so on.
In most instances, the latching controller is situated in close proximity to the pump; however, this is not always the case.
If you still can’t discover it, the owner’s handbook for your vehicle should be consulted in order to determine its precise placement.
It is likely that the water pump in your RV does not have a latching controller if you just have a single control for it.
If this is the case, you will need to replace the water pump.
If you have a latching controller, search for a box that has multiple cables flowing into the different on/off switches that are located throughout your RV’s pumps.
A helpful hint: Take a photo of the controller in its “before” state before disconnecting any cords.
This will guarantee that you reconnect everything in the right order.
To cut power to the latching controller, the following steps must be taken:
- Take the ground wire out of the latching controller so it won’t interfere with the water pump.
- Take the latching controller’s positive lead out of the device. You may cut the yellow wire if you have one, since we will be attaching it to the positive line on the new water pump. If you do have a yellow wire, you can do this.
#5. Detach The Pump’s Water Lines From The Pump
A bucket or basin should be placed under the pump before it is removed, since it is possible that water will pour out of it.
A helpful hint: If you want to save the plastic fittings from becoming damaged, unscrew the lines by hand.
#6. Take the Pump Away From the Mount
After you have detached the input and outlet hoses, you can easily remove the pump from its mount by unscrewing the screws holding it in place.
#7. Transfer the Filter from the Old Pump to the New Pump
Following that, we will need to remove the input filter from the older water pump and then reinstall it in the more recent one.
The procedure is a rather easy one:
- Remove the filter’s screw, then open it up by turning its two halves counterclockwise and cleaning it out. It is possible to just replace it if it is exceedingly unclean or very old.
- First, unscrew the fitting from the old water pump and screw it into the filter. This will allow you to replace the filter on the new pump. It is necessary for us to attach the filter to the side of the water pump that has an arrow pointing in the same direction. It is important that both arrows point in the same general direction. Simply unscrew the red shipping cap, then screw the fitting into the space that was previously occupied by the shipping cap. After that, drop the clip down to its lowest position to secure the fitting within the pump.

RV Water Pump Strainer Filter Replacement (Compatible with WFCO or Shurflo Pumps)
If you make a purchase after clicking this link and it results in a commission for us, there will be no extra cost to you.
At this point, the only thing left to do is attach the fitting to the output side of the pump.
First, take off the red shipping cap, then screw the fitting into place, and last, slide the clip down to secure the fitting in its new position.
#8. Prepare The Wiring For The Latching Controller And Connect It.
Remove the wire insulation from the end of the black ground wire on the pump, then crimp a spade connector onto the end of the wire.
The exposed red and yellow wires should first be twisted together before a spade connection is crimped on.
Important: Depending on the brand and type of your recreational vehicle, the wiring may be somewhat different.
If this is the case, you should review the photo that you took before you started working on the project.
Both the yellow wire (which we clipped in the step before this one) and the red wire from the new pump need to be stripped.
Using a spade connection, join the two ends together and crimp the top.
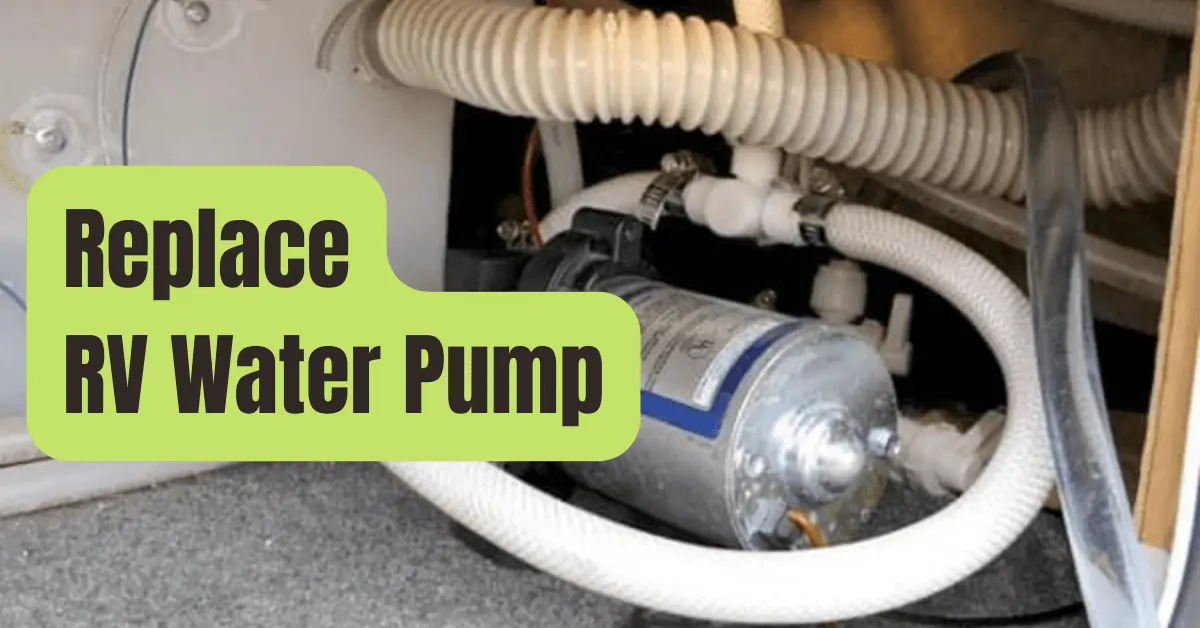
#9. Install the New Water Pump in the Tank
You are now able to prepare the new pump for installation in the same spot as the old pump.
The screw pattern on the new pump will often be the same as the screw pattern on the previous pump.
In such case, you may merely need to drill some fresh holes for the screws.
#10. Attach the Water Lines to the Pump.
Carefully attach the water lines that go into and out of the new pump using hand screws.
#11. Make That the Pump is Connected to the Latching Controller
If it is necessary to do so, reattach the positive lead to the latching controller.
In the video that was just embedded, the positive lead is represented by the red and yellow wires.
The ground wire, which is black, should then be reconnected.
#12. Put the Pump Through Its Paces and Look for Leaks
Now all that remains is to check that nothing is leaking and that everything is operating as it should.
Therefore, disconnect and then reconnect the power supply to the pump before turning it on and turning on a faucet.
It is possible that you may see some spitting from the faucet when the RV water pump primes.
This is merely air exiting the wires.
After you have confirmed that there is a steady flow of water from the pipes, you are free to turn off the faucet.
Last but not least, make sure that none of the pump’s connections have any leaks.
Adjust the tension as necessary.
That wraps it up! You’ve done an excellent job of replacing the water pump in your RV.
FAQs
How Long Does a Water Pump for an RV Typically Last?
When maintained correctly, the lifespan of an RV water pump may reach up to ten years.
It is possible to get the most use out of your pump by doing routine maintenance such as checking for leaks, cleaning the filter on a regular basis, and disinfecting the fresh water system after storing it for a long length of time.
What Are the Signs That the Water Pump in My Camper Is Faulty?
If your camper water pump begins to produce excessive and weird sounds, if it begins to leak from the pump itself, or if it stops operating entirely, you will know that it is on the verge of failing and will need to replace it.
How Much Does It Typically Cost to Repair the Water Pump in an RV?
If you do it yourself, replacing the water pump in your RV will cost you less than one hundred dollars on average.
That price is inclusive of the cost of the pump as well as all of the necessary components.
What Kind and Size of Water Pump Do I Need for My Recreational Vehicle?
A pump that can generate between 3 and 3.5 gallons of water per minute will be found in the average recreational vehicle.
Pumps with capacities of five gallons or more per minute are often seen in larger RVs.
You are free to choose any option.
If you are satisfied with the performance of your existing pump, you should look for the GPM rating on the pump’s label or in the owner’s handbook so that you may purchase a pump of a comparable size.
You have the option of purchasing a model with a higher GPM capacity if you are interested in upgrading and your finances permit it.