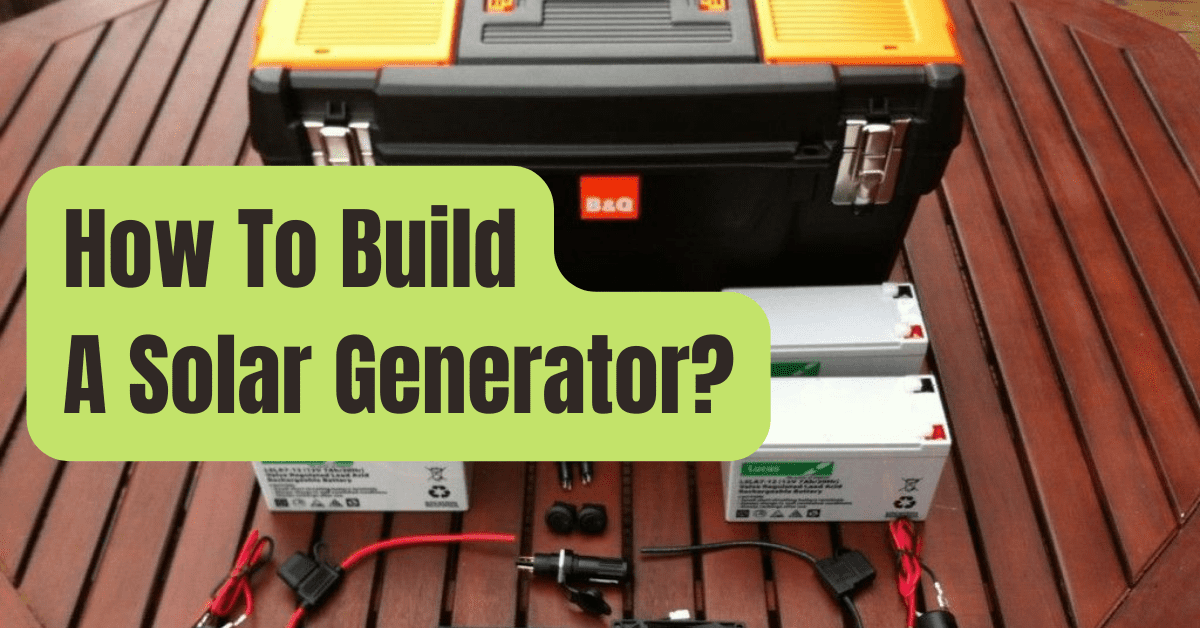
Have you ever wished to make your own solar generator? It may be the perfect moment to do it right now.
Solar energy will be the cheapest and most plentiful energy source in 2022.
One of its most distinguishing characteristics is its ability to scale up from the tiniest solar panel for household use to enormous solar fields capable of supplying power to a metropolis.
Because solar components are modular and safe to handle, anybody may construct a DIY solar generator.
In this post, we’ll walk you through the steps of constructing your own DIY portable solar generator so you can obtain dependable, clean electricity whenever you want it:
- First, we’ll go over what a DIY portable solar generator is for.
- Following that, we’ll go through the primary components of your solar kit.
- Then, based on your energy demands, we’ll give you three pricing estimates for your DIY solar power generator.
- Finally, we’ll walk you through a five-step method for installing the various pieces.
What Is A Solar Generator That You Build Yourself?
A solar generator is an electronic gadget that turns sunlight into power that can be used by our appliances at any time.
Do It Yourself (DIY) is a phrase that stands for “do it yourself This entails purchasing a pre-assembled item and putting it together yourself.
DIY allows you to save money while selecting the finest components and customizing your gadget to meet your requirements.
The allure of DIY is how much you learn while doing it.
The major functionalities of the DIY solar kit are:
- Solar power harvesting
- Energy should be saved.
- Convert solar energy into electrical energy that may be used.
It’s lightweight, plug-and-play, long-lasting, and doesn’t need any maintenance.
It may also be scaled to any size and power.
Calculate Your Solar Generator’s Requirements
Solar energy appeals to us since it may be built in a variety of sizes and for a variety of uses.
Even the tiniest of budgets can be accommodated.
Knowing your energy requirements is the first step in effectively choosing solar kit components.
We’ll look at three real-world applications to create three DIY solar generators in this section:
#1. A Camping Trip’s Energy Requirements
| Appliances/Electronic devices | Power | Hours of use | Total energy |
|---|---|---|---|
| 4*Led Lights | 20W | 6 | 120 W.h |
| 2*Phones and tablets | 30W | 3 | 90 W.h |
| 1*Drone and speaker | 30W | 2 | 60 W.h |
| 1*Laptop | 60W | 3 | 180 W.h |
| 1*Mini Fan | 10W | 5 | 50 W.h |
| 1*Mini cooler | 60W | 8 | 300 W.h |
| TOTAL | 210W | 800 W.h |
A total power of 210W is required for a camping trip, with an average daily energy use of 800 W.h.
#2. A Camper Van/Energy RV’s Requirements
| Appliances/Electronic devices | Power | Hours of use | Total energy |
|---|---|---|---|
| 6*Led Lights | 30W | 6 | 180 W.h |
| 3*Phones and tablets | 40W | 3 | 120 W.h |
| 1*Drone and speaker | 30W | 2 | 60 W.h |
| 2*Laptop | 120W | 3 | 360 W.h |
| 1*Mini Fan | 10W | 5 | 50 W.h |
| 1*Mini refrigerator | 60W | 24 | 800 W.h |
| 1*DC water pump | 50W | 2 | 100 W.h |
| 1*Led TV | 70W | 5 | 350 W.h |
| TOTAL | 410W | 2,020 W.h |
You will need 410W and a total of 2kWh each day to power your RV gadgets and small appliances.
#3. Your Home Backup Power Energy Requirements
| Appliances/Electronic devices | Power | Hours of use | Total energy |
|---|---|---|---|
| 10*Led Lights | 50W | 6 | 300 W.h |
| 3*Phones and tablets | 40W | 3 | 120 W.h |
| 2*Laptop | 120W | 3 | 360 W.h |
| 2* Fans | 120W | 5 | 600 W.h |
| 1* refrigerator | 120W | 24 | 1400 W.h |
| 1*power tool | 600W | 1 | 600 W.h |
| 1*large Led TV | 150W | 5 | 750 W.h |
| TOTAL | 1200W | 4,130 W.h |
A total power of 1200W and more than 4kWh of energy are required for a 24h home emergency power backup.
The Parts and Components You’ll Need To Make Your Own Solar Generator
Solar generators are basic devices that just need six key components to work properly.
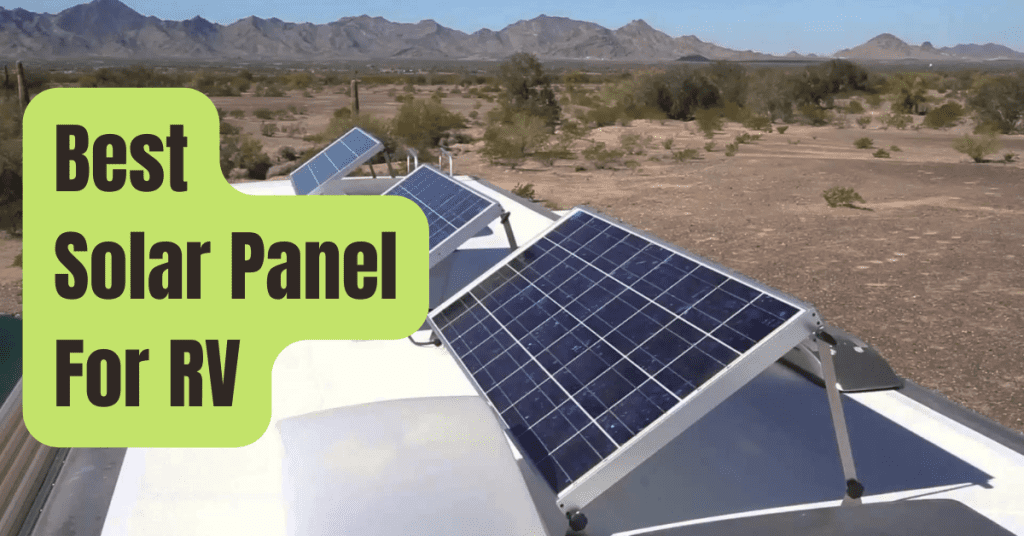
#1. Solar Panels on Wheels
Your DIY solar generator kit would be incomplete without a solar panel.
It will convert sunlight into DC power (Direct Current).
Choose solar panels that are foldable or portable.
They offer a unique, small, and robust design that is ideal for outdoor use.
Please take note:
Price changes affect the components needed to make a DIY solar generator.
| Type of DIY solar generator | Solar panel power | Our best choice | Price |
|---|---|---|---|
| Camping trip | 200W | LENSUN foldable solar blanket | 399 USD |
| RV-Camper van | 2*220W | Dokio 220W foldable solar panels | 480 USD |
| Home backup power | 4*200W | Renogy 200W foldable solar suitcase | 1600 USD |
#2. Charge Controller for Solar
An MPPT solar charge controller is required to get the most out of your solar panel.
It is the finest at tracking the sun’s fluctuating power and will charge your battery with a consistent and clean output current.
| Type of DIY solar generator | Solar charge controller | Our best choice | Price |
|---|---|---|---|
| Camping trip | 20Amps MPPT | Renogy Rover 20 | 109.9 USD |
| RV-Camper van | 20Amps MPPT | Renogy Rover 20 | 109.9 USD |
| Home back-up power | 40Amps MPPT | Renogy Rover 40 | 169.9 USD |
#3. Battery
A battery is required to use the electricity generated by your DIY solar generator at any time.
It will store solar energy and discharge it as needed.
Lead-acid and lithium-ion batteries are the two types of batteries available.
GEL and AGM are two different names for lead-acid batteries.
They are inexpensive to purchase and do not need any upkeep.
As a result, we strongly advise you to acquire a lithium battery instead.
When it comes to storing solar energy, Lithium-Ion batteries (also known as LiFePO4) are considerably better than GEL or AGM batteries.
Their initial cost is greater, but they outlast lead-acid technology in terms of longevity, dependability, and energy density (weight).
You will not be disappointed with your decision.
| Type of DIY solar generator | Battery size | Our best choice | Price |
|---|---|---|---|
| Camping trip | 500 W.h | Renogy 12V, 50AH LFP battery | 499.9 USD |
| RV-Camper van | 1000 W.h | FLYPOWER 12V 100Ah Lifepo4 | 486.9 USD |
| Home back-up power | 2000 W.h | KEPWORTH 24V 100Ah 2560Wh Lithium LiFePO4 Battery | 987.70 USD |
#4. Inverter (AC/DC)
Only DC power is provided by your portable solar panel and battery storage equipment.
Our household appliances, on the other hand, run on AC electricity (Alternative Current).
As a result, the inverter will switch from DC to AC (110V/220V, 60Hz).
For effective power conversion and a clean electrical supply, we suggest a pure sine wave inverter.
| Type of DIY solar generator | Inverter Power | Our best choice | Price |
|---|---|---|---|
| Camping trip | 1000 W | KRIËGER 1100 Watt 12V Power Inverter Dual 110V AC Outlets | 84.97 USD |
| RV-Camper van | 1000 W | Renogy 1000W pure sine wave inverter | 189.99 USD |
| Home back-up power | 2000 W | KRXNY 2000W 24V DC to 120V AC 60HZ Pure Sine Wave | 235 USD |
#5. Case
To guarantee that your DIY solar generator lasts as long as possible, keep it away from dust and humidity.
Furthermore, it combines all of the components into a single, easy-to-transport case that you can take with you on all of your journeys.
We’ve chosen three high-quality cases, ranging in size from the tiniest for camping excursions to the largest for home backup systems.
The battery and inverter are the most substantial components.
On average, your DIY solar generator will weigh less than 14kg (30.8 lbs) for a camping trip, less than 20kg (44 lbs) for an RV, and less than 30kg for home backup systems (66 lbs)
| Type of DIY solar generator | Our best choice | Price |
|---|---|---|
| Camping trip | Monoprice Weatherproof / Shockproof Hard Case | 92.99 USD |
| RV-Camper van | DEWALT Tool Box Tough System, Extra Large | 52.63 USD |
| Home back-up power | Monoprice Weatherproof / Shockproof Hard Case with Wheels | 308.99 USD |
#6. Electrical Wiring And Breakers
Electrical wire and breakers are necessary pieces for connecting your various components and ensuring that your DIY solar generator kit is safe.
RENOGY products are recommended:
- Set of 30A fuses
- Battery inverter cables with a gauge of 4 AWG
- Charge controller cords with a 12 AWG battery
- Extension cables for solar modules with a gauge of 12 AWG
You’ll also need an outside power outlet that can be simply put within the case wall, as well as a master switch for the whole system.
#7. Your Solar DIY Generator’s Total Cost
Let’s look at the entire cost of your DIY solar generator, which includes all of the above:
| Type of DIY solar generator | Power and Energy storage capacity | Total cost |
|---|---|---|
| Camping | 1100 W / 500W.h | 1250 USD |
| RV – camper van | 1000 W / 1000W.h | 1400 USD |
| Home back-up system | 2000 W/ 2000W.h | 3300 USD |
Please Take Note:
Some portable solar panel packages already contain a solar charger, cutting the DIY solar generator’s total cost.
Step-by-Step Instructions for Building a DIY Solar Generator
To assemble your solar generator kit quickly and simply, follow these five steps.
To make a DIY solar generator, you’ll need the following items:
- A hole saw and a drill
- Driver for screws
- Knife for everyday use
- Cutter for wires
- Tape for electrical connections
- Adhesive gun
- Sealant made of silicon
Step 1: Gather Evidence For Your Case
Because the solar generator is plug-and-play, you should be able to reach all of the outlets without having to open the casing.
With a hole saw, gently cut through the casing and install the outlet plug.
To seal it, apply silicon all around it.
A second hole is required to connect the solar panel to the solar charger.
We suggest utilizing silicon-sealed waterproof electrical connections.
Rep for additional external components such as the inverter remote control panel, led lights, and master switch using the same procedure.
Step 2: Put The Battery In
Because the battery is the most important component of your DIY solar generator kit, it should be installed first.
Although LiFePo4 batteries may be used in any location, we suggest putting them in a case corner.
A battery strap should be used to secure them to the case’s wall.
Step 3: Put the Solar Charge Controller in Place
The solar charge controller must be permanently attached to your case.
Make sure you have adequate room for the batteries and solar panels’ wiring.
Step 4: Connect the Inverter
The inverter, which is the second-largest component, may be mounted near the outlet on the wall.
Straps are recommended since they are easy to remove for maintenance.
Make sure there’s adequate room around the inverter for proper ventilation.
Step 5: Fuse and Wiring Installation
It’s time to connect your system now that all of your components are securely fitted in your case.
Connect the inverter to the outlet plug.
To connect the inverter to the battery and the battery to the solar charge controller, use 12 gauge wire (12 AWG).
Connect your solar panel’s extension cord to the solar charger (12 AWG).
Three fuses are required: one for the solar panel and the charge controller, one for the charge controller and the battery, and one for the battery and the inverter.
For appropriate wiring, refer to the figure below:
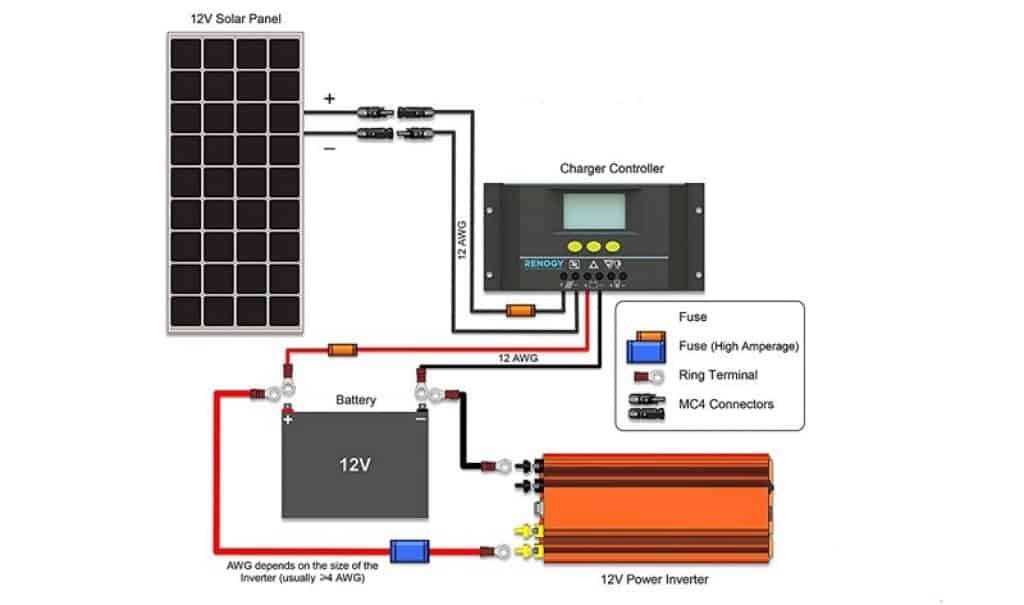
A DIY solar generator’s wiring diagram

Last Thoughts
You’re now ready to generate green energy anywhere, without making any noise or emitting any smoke.
Your DIY portable power station is small, lightweight, safe, and low-maintenance, and it will endure for years.
To get the most out of your DIY solar generator, make sure your solar panels are fully exposed to the sun and that you have a tiny blower within the box for cooling.

