This page includes affiliate links, just so you know.
At no additional cost to you, I could get a tiny compensation if you decide to buy anything after clicking on one.
These guidelines will teach you how to connect a solar panel to a battery, one of the fundamental abilities required to create your own DIY solar power systems.
By the end, you’ll be using free solar energy to charge your 12 volt battery or a higher voltage battery.
(If that doesn’t make your heart race… I’m unsure of what will.)
Alright.
Let’s start now!
Materials & Tools
Materials
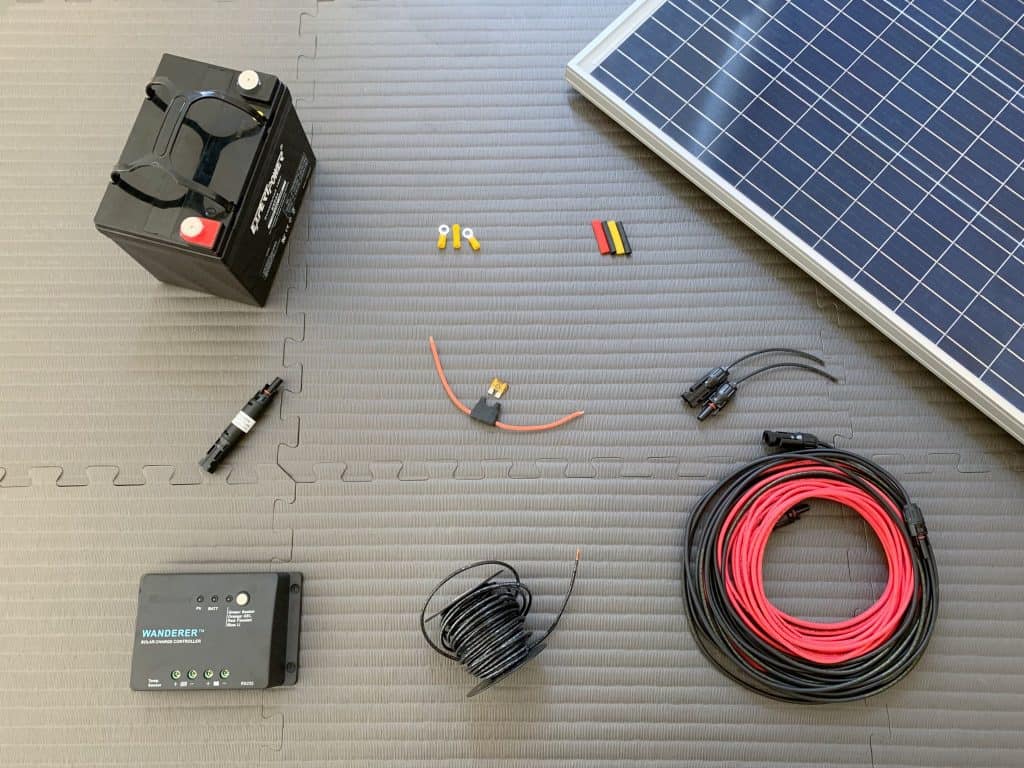
Note: I’ve mentioned the sizes I used and provided links to materials that are either compatible with my setup or match the precise materials I purchased.
You are welcome to use my setup.
If not, make sure your component sizes are appropriate for the amount of current that will be passing through your system.
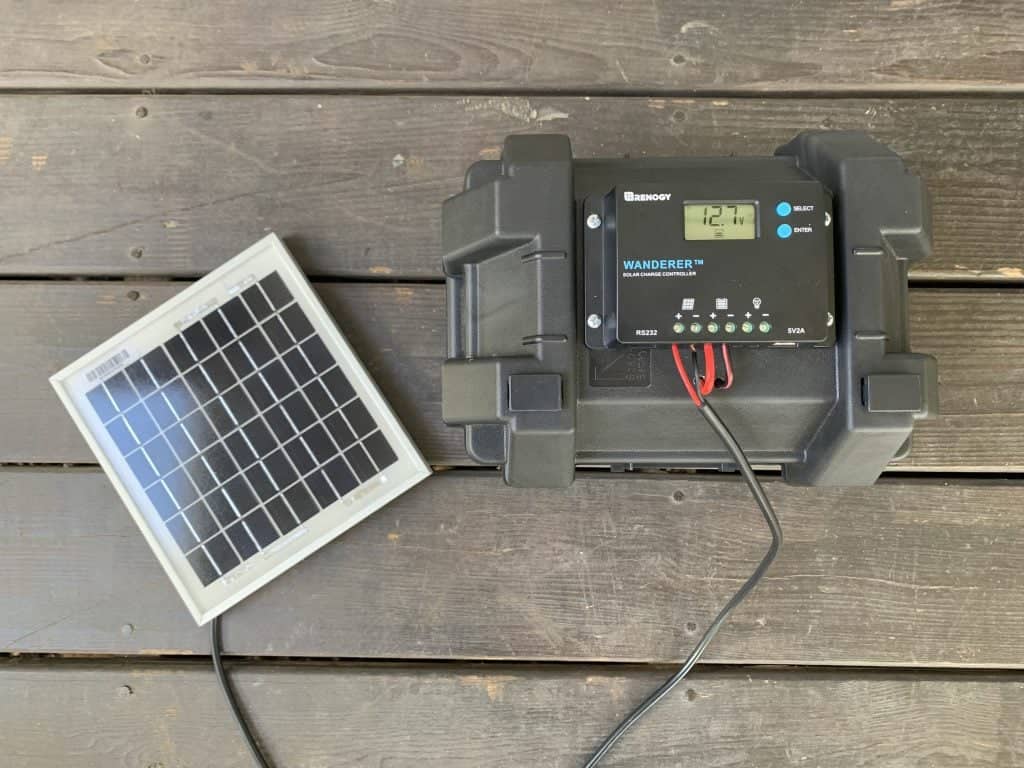
- 100 watt 12 volt solar panel
- 12 volt battery
- Renogy Wanderer 30A solar charge controller
- 12 gauge wire
- 12 gauge wire connectors
- MC4 solar adapter cables
- MC4 solar extension cables (if necessary)
- 15 amp MC4 inline fuse
- Inline fuse holder with 20 amp blade fuse
- Heat shrink tubing
- Gloves
- Safety glasses
Tools
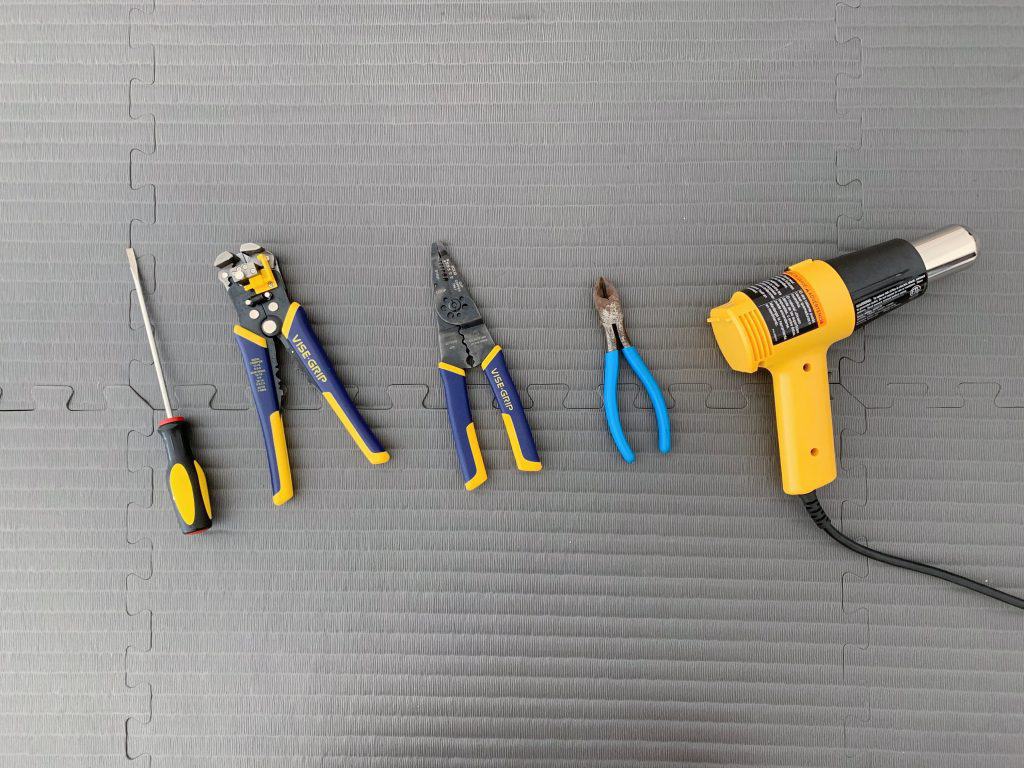
- Screwdriver
- Wire stripper
- Wire crimper
- Wire cutter
- Heat gun
Step 1: Comprehend The Wiring Diagram.
The following wiring schematic demonstrates how to link a solar panel and battery:
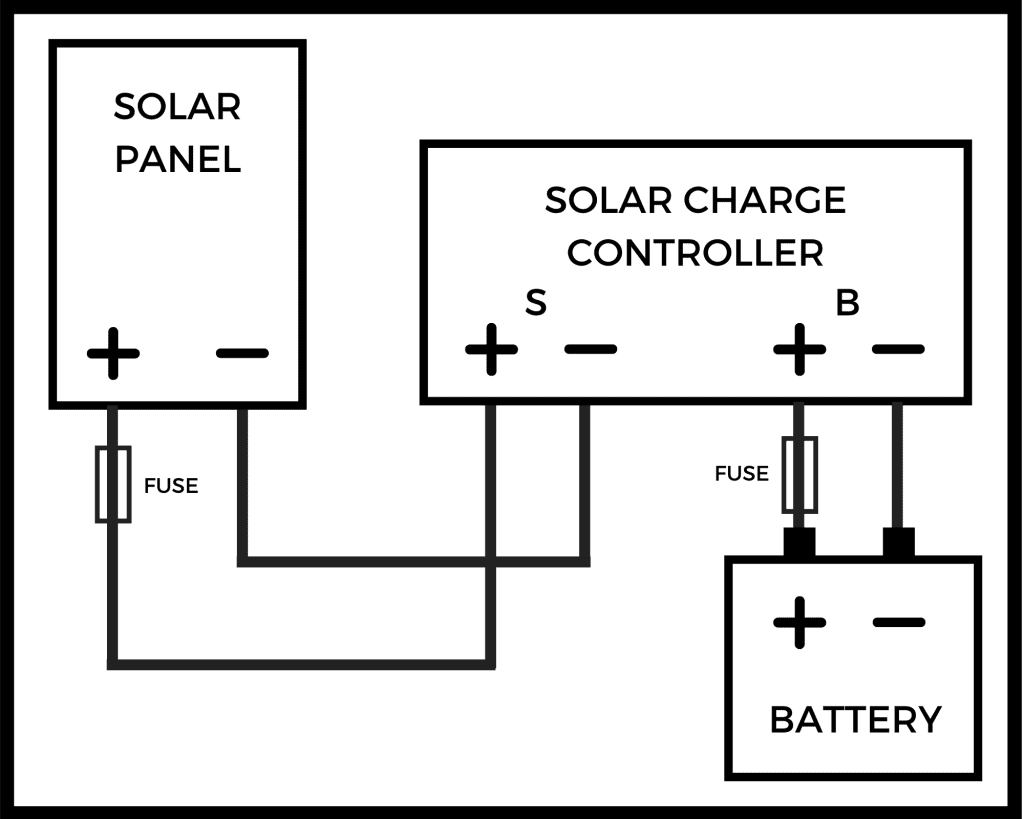
It’s critical to realize the following:
- Avoid connecting a solar panel to a battery directly. This might harm the battery. Instead, attach a solar charge controller to the battery as well as the solar panel.
- It is suggested that you fuse your system. Best safety habits, everyone! Put a fuse between the charge controller and the positive battery connection. another should be positioned in between the charge controller and the positive solar panel wire.
Step 2: Make The Battery Cables
Battery wires weren’t something I had laying around.
I made the decision to create my own after saving some money.
It turns out to be rather simple.
What I did was as follows:
Strip the ends of two wire sections after cutting them to the desired length.
(I shortened one somewhat to accommodate for the fuse I’ll be attaching to it.)
In the fuse holder, place the fuse.
To determine the correct fuse size, utilize our fuse size calculator.
Use your preferred wire connection to attach one of the fuse holder’s wire leads to the shorter battery cable.
(I used a butt splice connection that is 12-10 gauge.)
Using heat shrink tubing and a heat gun, shrink-wrap the connection.
Before crimping the terminal connections, slide a piece of heat shrink tubing onto each battery cable (don’t forget until later, as I did).
After that, shrink-wrap the connections and crimp the battery terminal connectors onto the battery wires.
To determine which size connections to use, have a look at your battery terminals.
1/4″ ring terminals are what I use.
Completed battery cables!
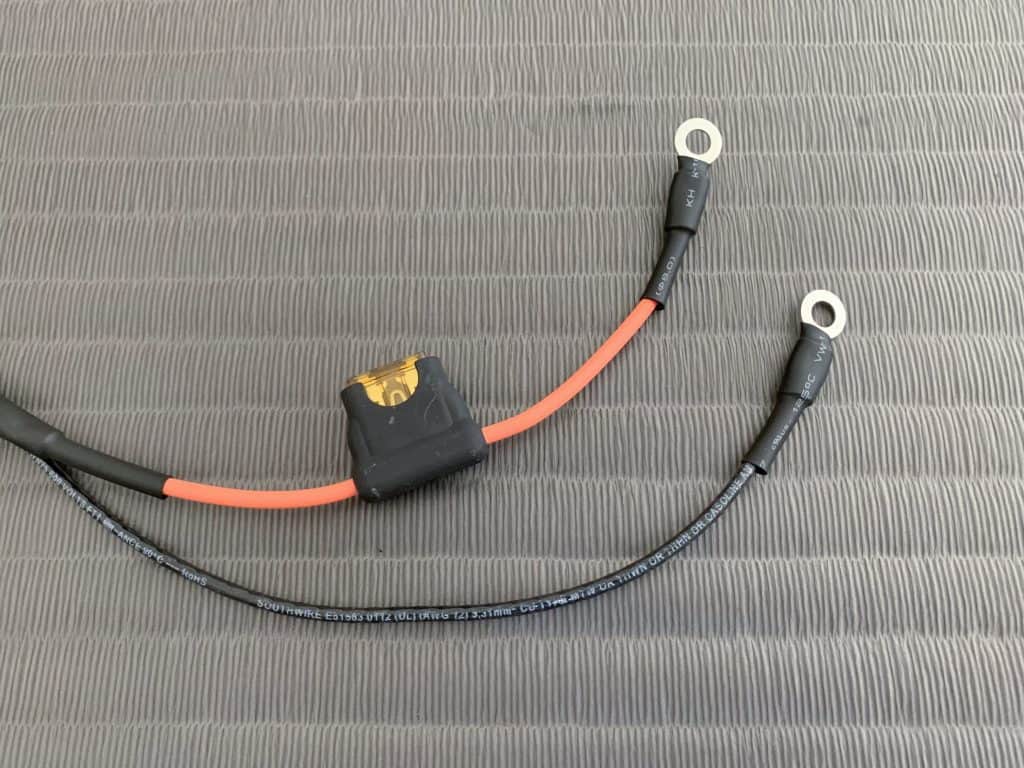
They are now prepared for connection.
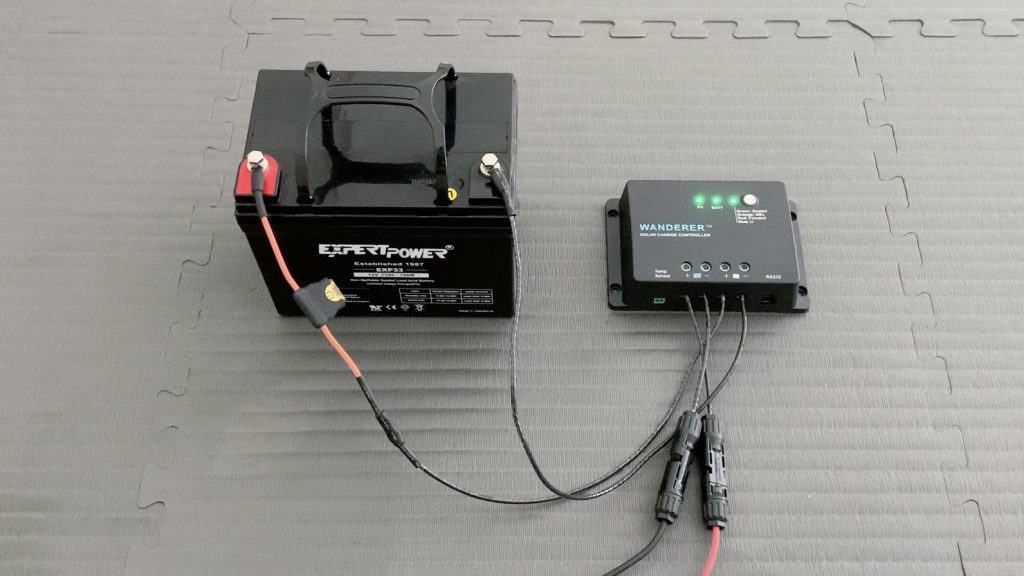
Step 3: Connect The Battery To The Charge Controller
Note: Because businesses like Advanced Auto Parts advise wearing them while dealing with batteries, I now put on my gloves and safety eyewear.
To connect your charge controller to the battery, according to the directions in the handbook.
I’ll demonstrate how to connect the Renogy Wanderer charging controller I used.
Connect the negative battery cable—the one devoid of a fuse—to the charge controller’s “-” battery connector.
The “+” battery terminal should receive the positive battery cable (the one with the fuse).
Renogy advises connecting the battery wires to the charge controller first before the battery (to avoid short circuits).
Negative and then positive battery wires should be connected to the battery terminals.
I prefer to touch the positive wire to the positive battery terminal first before connecting it since sometimes there will be a little spark.
If the battery is connected correctly, your charge controller should turn on or light up to let you know.
My room, for instance, has a light that activates.
Now that the battery is connected!
Depending on the battery type, voltage, etc., you have, your handbook may now instruct you on how to setup the charge controller.
I can push a button on mine to see the battery type.
The one I’m now using, sealed lead acid, is the default.
I just maintained it on the current setting.
Step 4: Connect The Solar Panel To The Charge Controller
The solar panel’s connection is the next step.
The majority of solar panel cables have MC4 connectors already installed.
MC4 solar adapter cables are required to connect a solar panel to a charge controller.
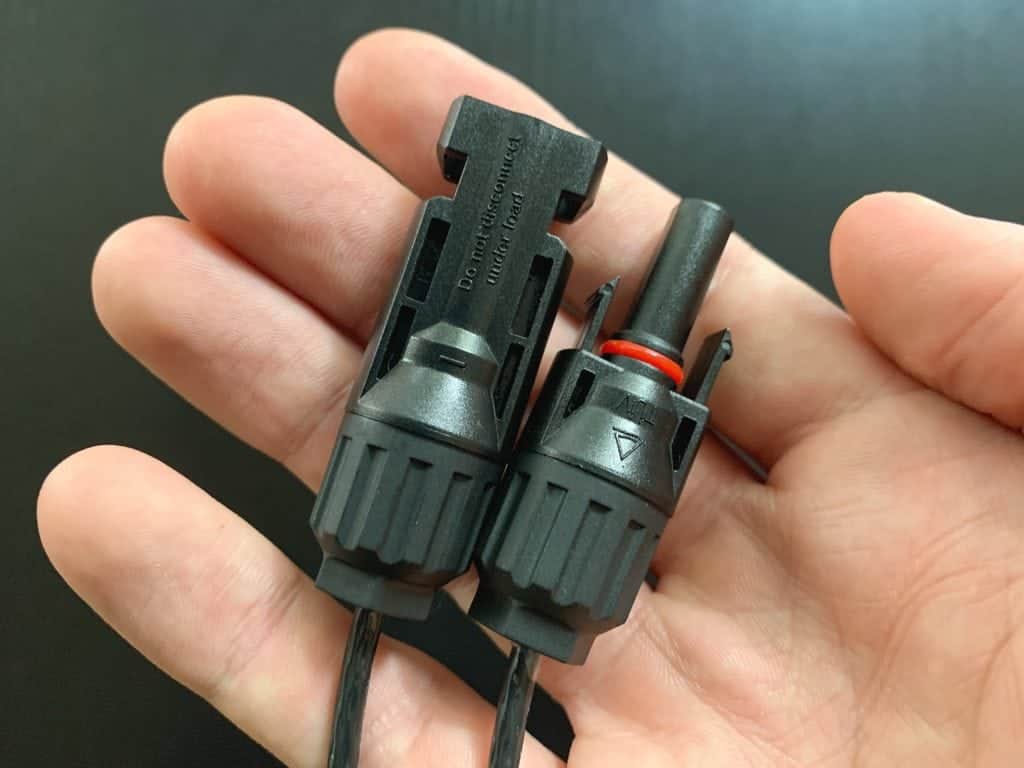
(These are essentially a length of solar PV wire that is stripped at one end and has an MC4 connection on the other.
I built a male and female MC4 connection on my own for my setup.
MC4 solar extension cables were also purchased.
Depending on how far away your solar panel and charge controller are, the extension wires may not be necessary.)
Connect the MC4 inline fuse, positive extension cable (if using), and finally the MC4 adapter cable to the panel’s positive cable.
Connect the MC4 adapter cable first, then the negative extension cable (if using) for the panel’s negative cable.
Keep the exposed wires apart!
To connect your charge controller to the solar panel, refer to the handbook that came with it.
I’ll demonstrate my connection here.
Connect the positive solar wire after the negative one has been connected to the charge controller.
When the panel is correctly connected, your charge controller should turn on or light up to let you know.
Now everything is connected!
Simply one more step…
Step 5: Put The Solar Panel In The Sun
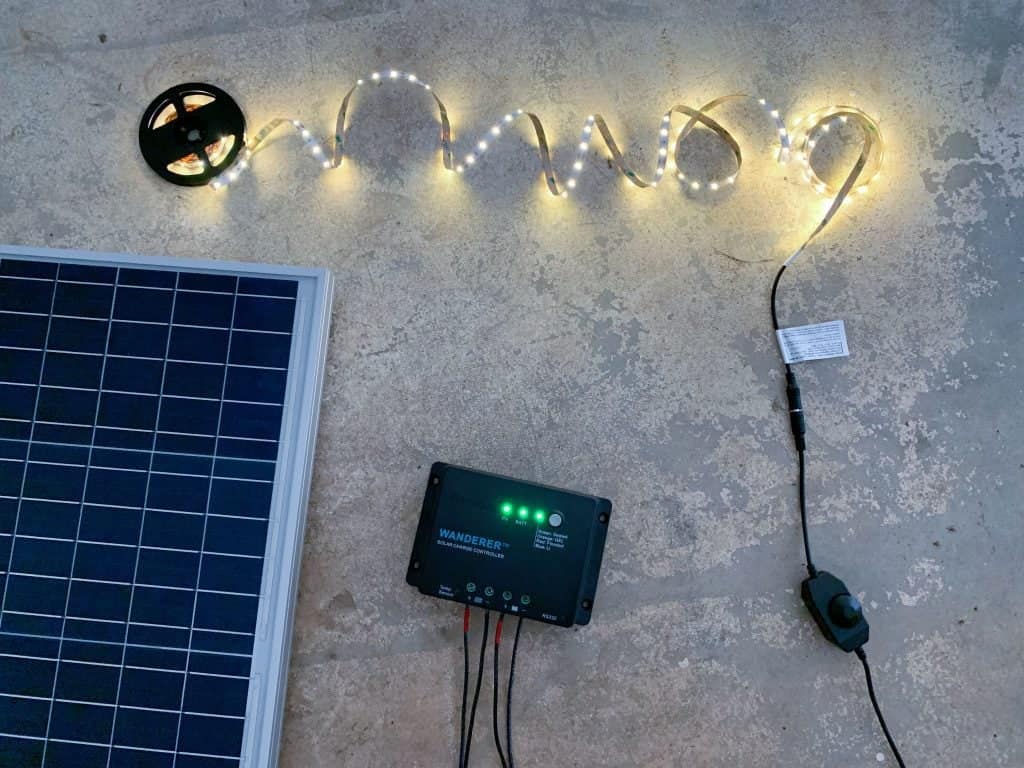
Your charge controller should then show that the battery is charging once you have done this.
In my case, while the battery is charging regularly, a light flashes.
You’re finished there and then.
You now understand how to use a solar panel to charge a battery!
Allow the solar panel to gather all of that cost-free electricity while you relax.
Once the battery is fully charged, the charge controller will stop.
How Long Does It Take a Solar Panel to Charge a Battery?
To find out, use our solar battery charge time calculator.
There are several variables that affect the answer.
Here are the specifications for the system I used as an illustration:
- 100 watt solar panel
- 12V, 33Ah lead acid battery
- PWM charge controller
Our calculator estimates that, in this configuration, it will take around 7 hours of direct sunshine to completely charge the battery from a state of discharging to 50% (the recommended depth of discharge for lead acid batteries).
The charge time will vary if you alter any aspect of the arrangement, such as adding a 50 watt solar panel, a lithium battery, or an MPPT charge controller.
So, for that query, the calculator is definitely advised.
Try it out:
Determine Charge Time
Three Simple Solar Energy Projects You Can Build Right Now
You just finished building your first solar panel system.
That is significant!
Here are some other projects I believe you may be interested in constructing now that you have reached that milestone:
#1. A Solar-Powered Car Charger
You may create a solar 12V battery charger by connecting a solar panel to a 12V battery.
Car batteries are 12V batteries, thus you could just as easily solar charge your vehicle’s battery using the system you just built, or a nearly similar one detailed in this guide.
#2. Selfmade 12 Volt LED Lights Powered By Solar
The mechanism you just constructed is basically used by these solar-powered LED lights.
Now all you have to do is attach a battery and some LED strip lights, and you’re ready to go.
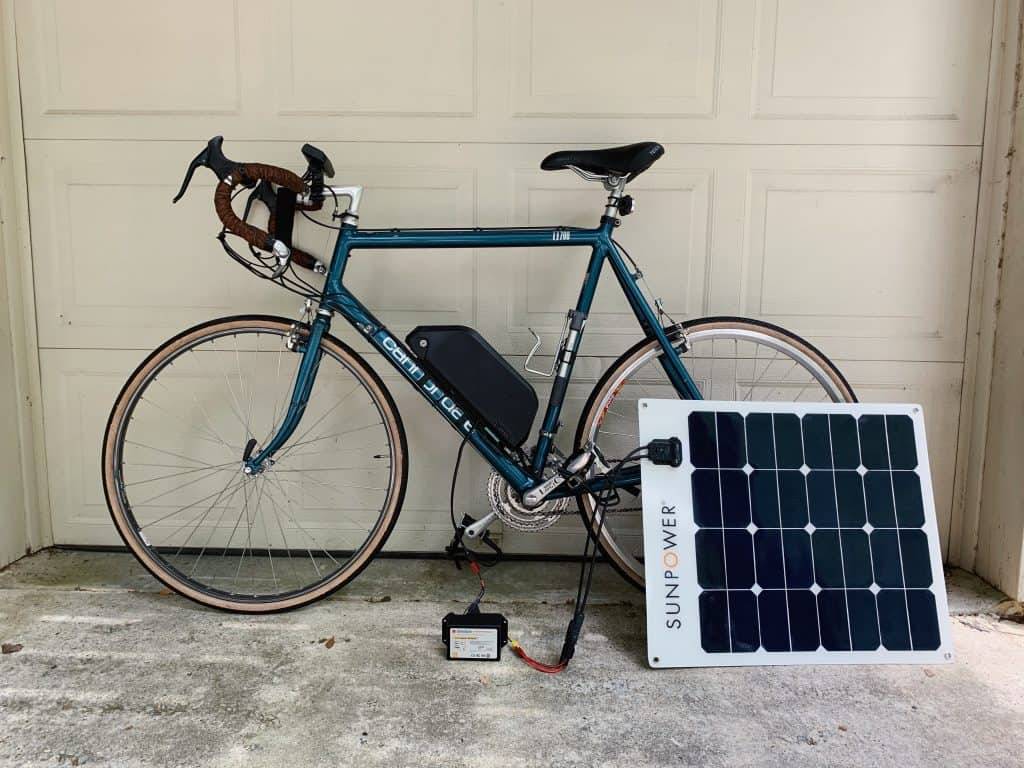
#3. Electric Bike Solar Charger
To sun-charge an electric bike, you may construct a modified version of the solar charging system you just created.
You may also just put your 12 volt battery into an inverter and use the standard e-bike charger.