It is easy to physically install and connect your Spotlight Cam Solar Panel to your Spotlight Cam Battery.
Scroll down to see a step-by-step tutorial.
Note: Before installing the Spotlight Cam Solar Panel, you need finish configuring your Ring app’s Spotlight Cam Battery.
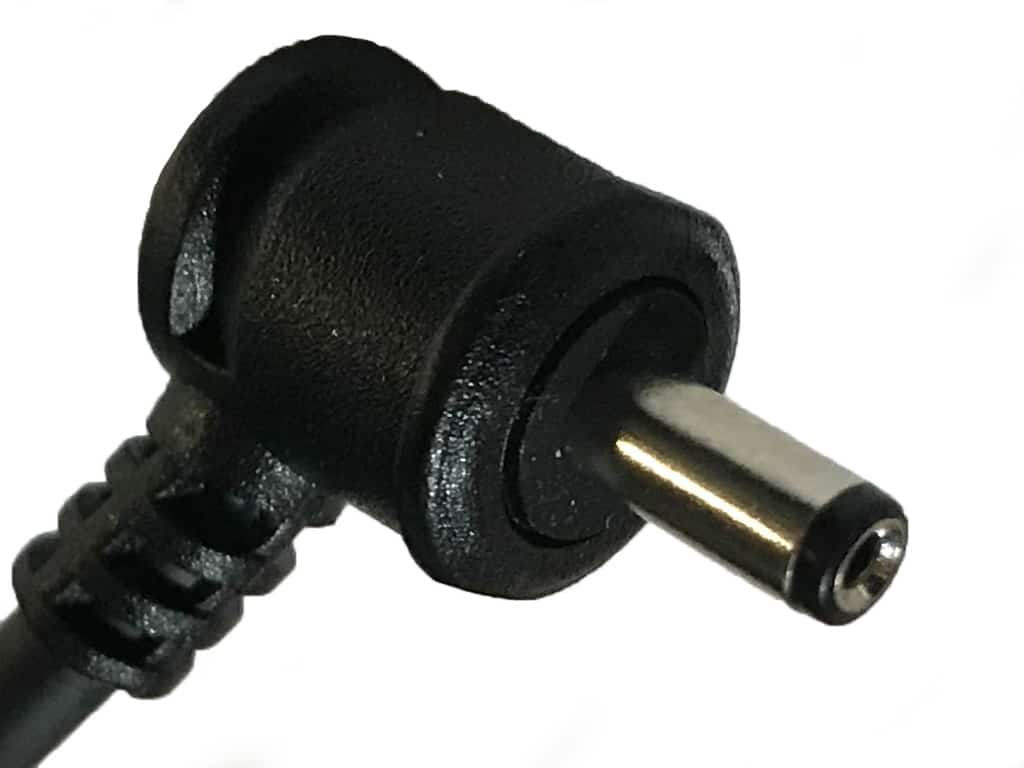
Attention! A “Weather Resistant Barrel Connector” may be sent to neighbors who purchase a more recent solar panel.
This connection does not comply with our earlier manuals or instructions.
Step 1: Decide Where To Install It.
Make careful to find a location for your installation that receives consistent daily Sun exposure.
With only a few hours of direct sunshine each day, the Spotlight Cam Solar Panel can keep your Spotlight Cam Battery charged.
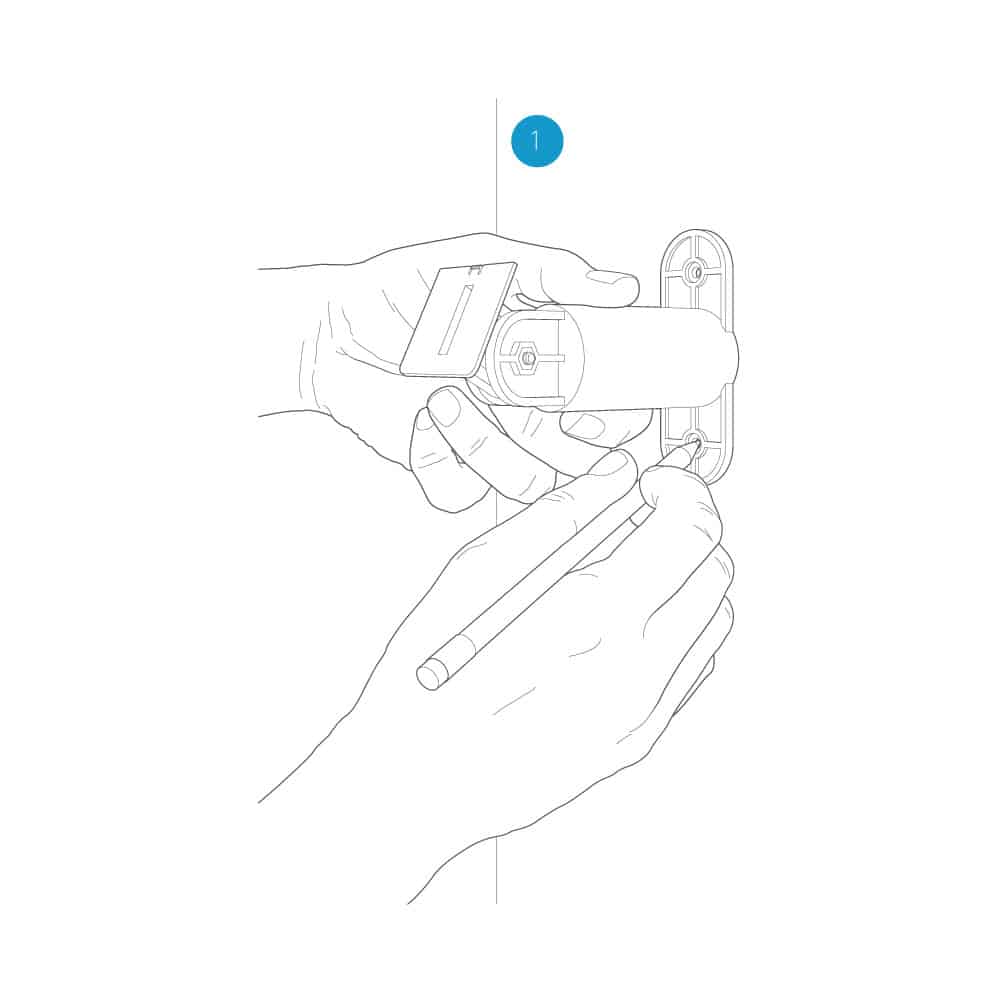
Step 2: Position The Spotlight Cam Solar Panel.
To position your Spotlight Cam Solar Panel correctly:
- Mark the screw holes with a pencil on the surface you’ve selected, using the Solar Panel mounting arm as a pattern.
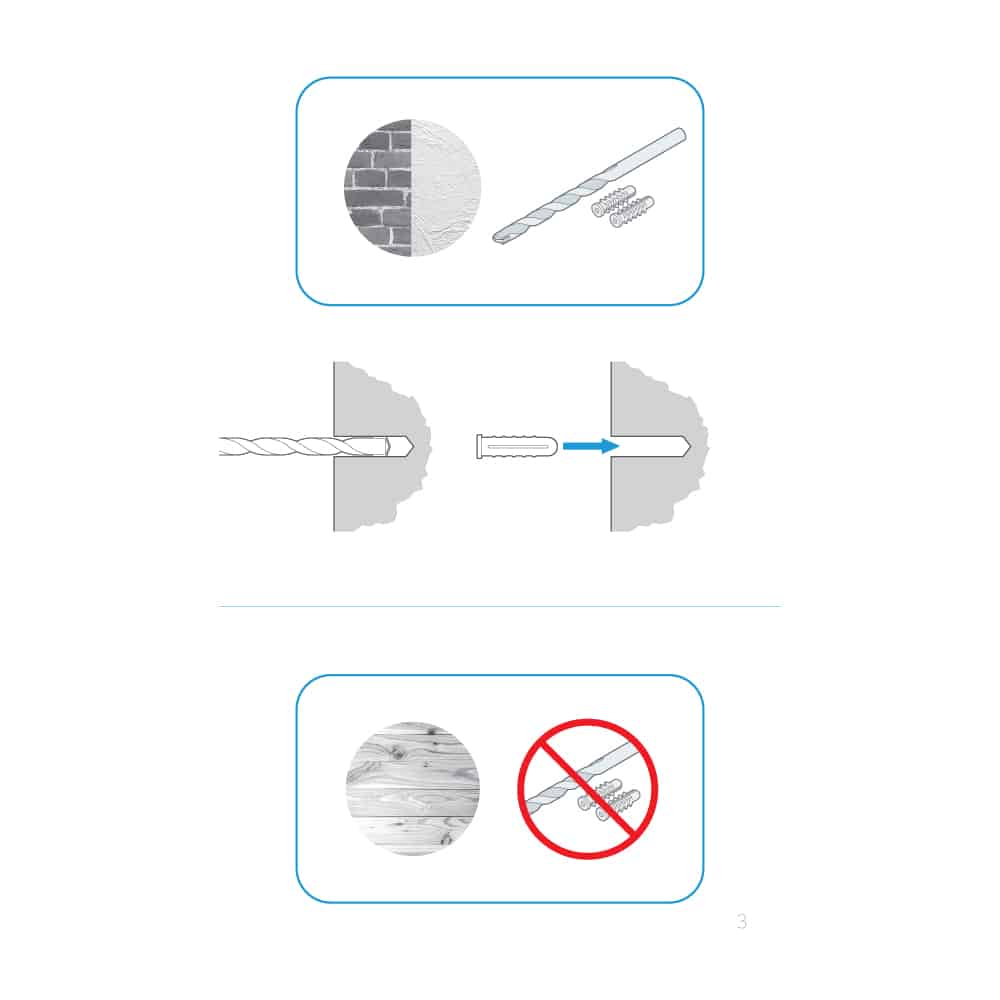
Step 3: Drill Holes
Optional: Use a drill to create holes where the mounting holes should go.
- Use the plastic anchors that are included to secure the Spotlight Cam Solar Panel to brick, concrete, or stucco. For the anchors to go in, you may need to use a hammer.
- Use just the provided screws to attach the bracket on wood or vinyl.
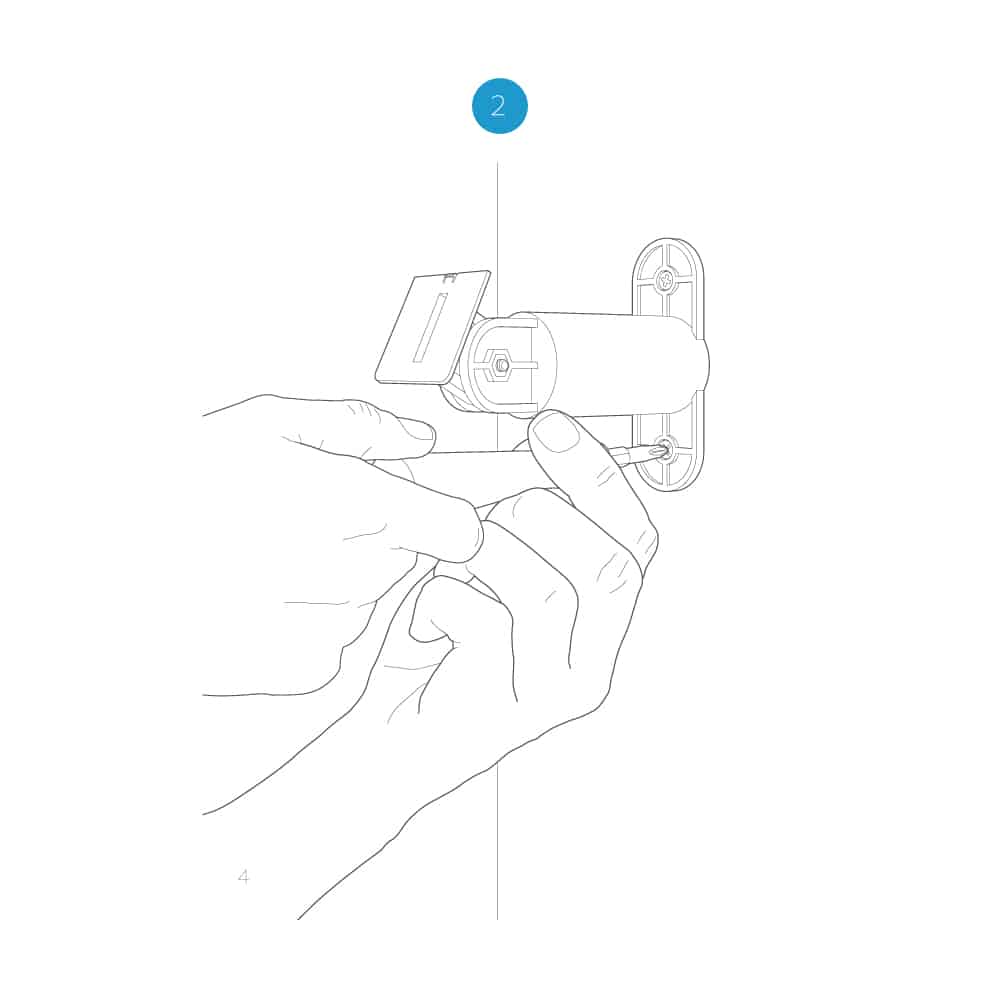
Step 4: Raise The Mounting Arm
Utilize the supplied screws to attach the mounting arm to the wall. until snug, tighten.
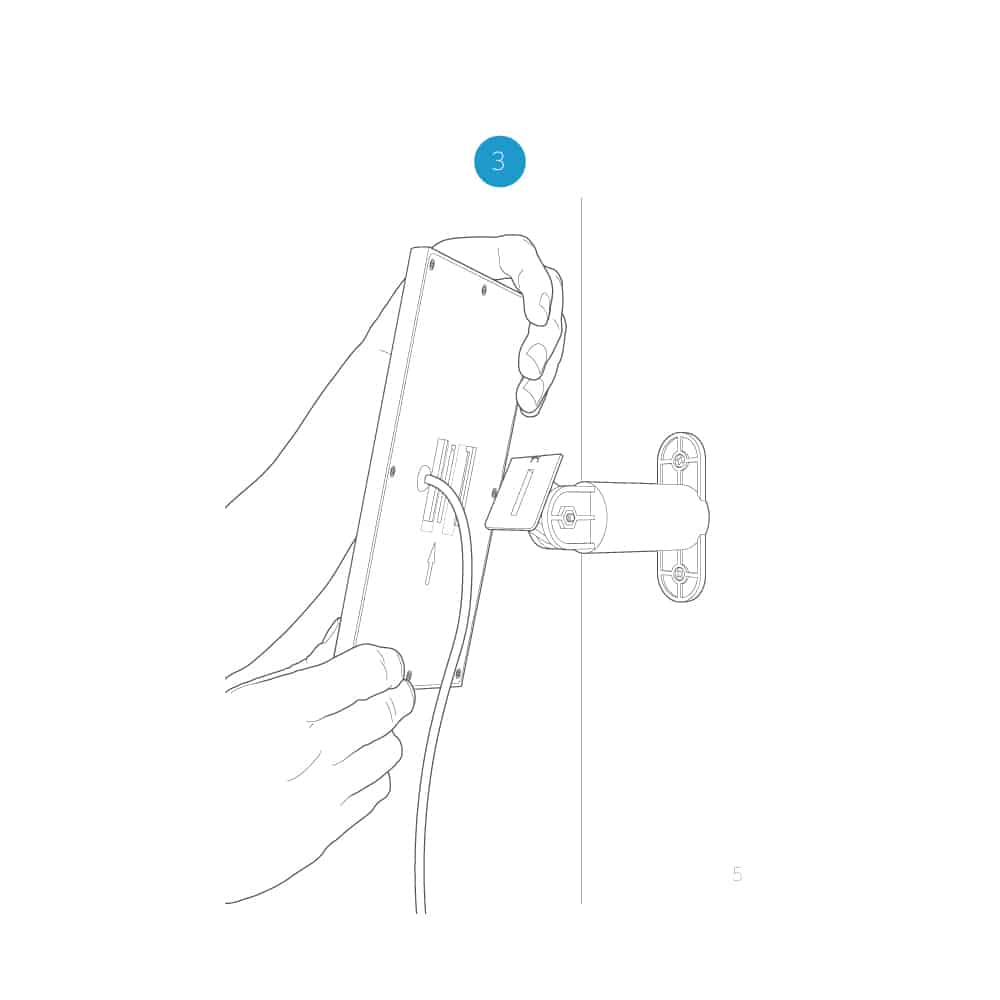
Step 5: Put The Solar Panel Up
The solar panel should be slid onto the mounting arm.
Make sure it is firmly seated.
Note: Retighten the adjustment screw on the mounting arm after setting the required angle if you want to modify the angle of the solar panel for optimal Sun coverage.
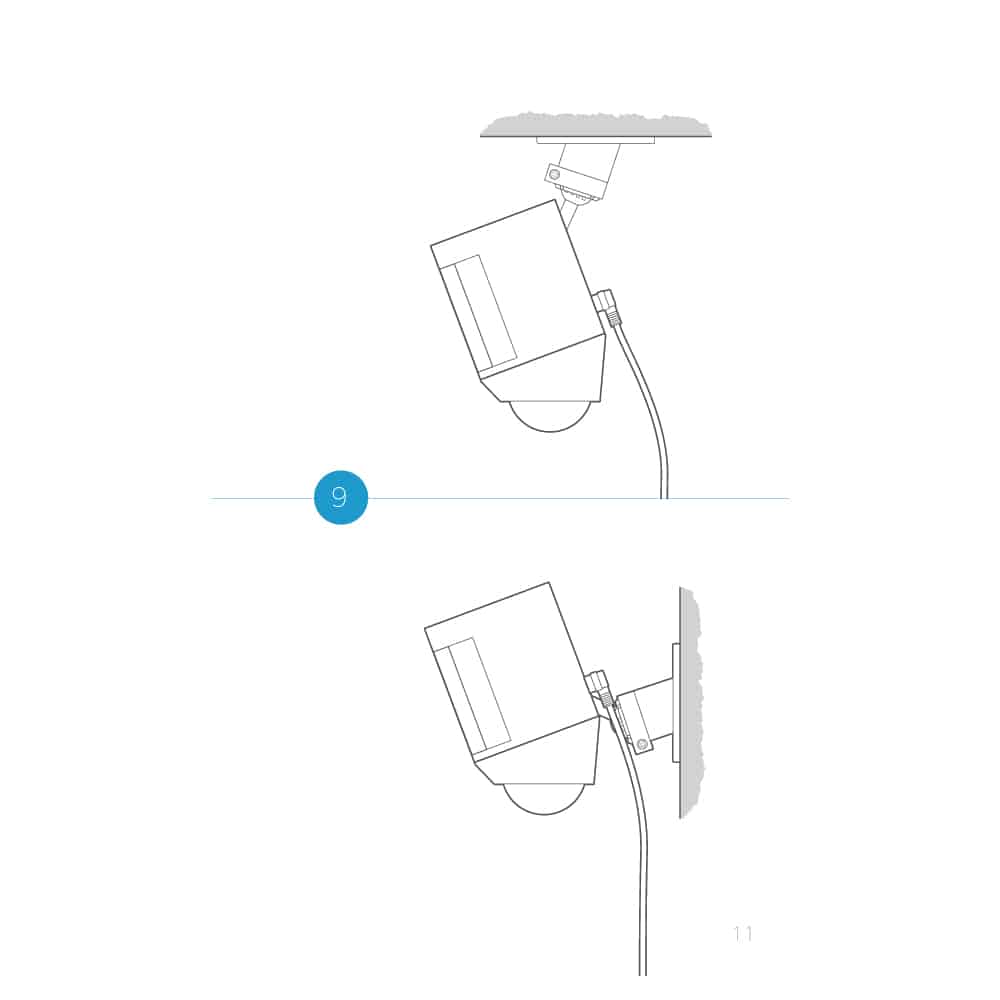
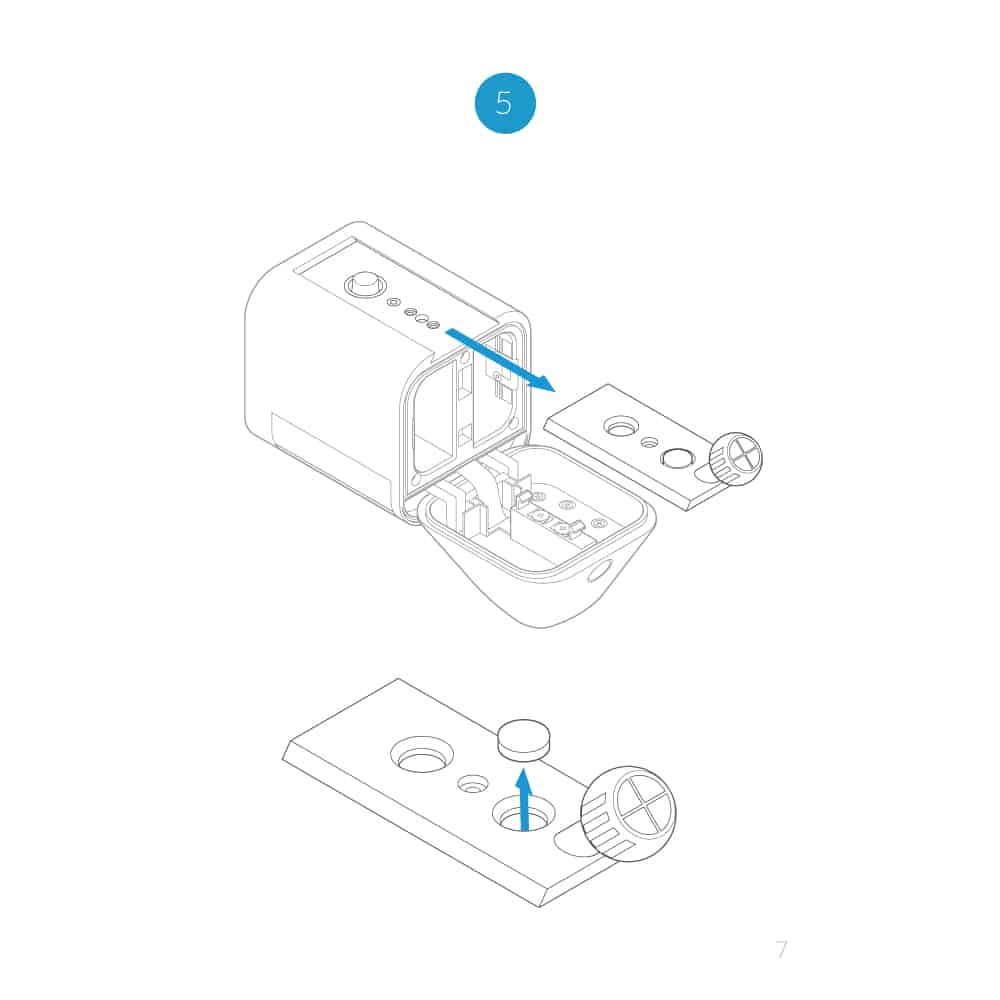
Step 6: Disengage The Waterproof Plug.
Your spotlight cam’s mounting plate has to be taken off so you may remove the weatherproofing plug and then reinstall it.
- To access the battery compartment, push the button on the bottom.
- The mounting plate will move out of its slot when you press the button on the Spotlight Cam’s rear.
- Pull the rubber weatherproofing plug from its hole on the mounting plate.
- Reposition the mounting plate until it snaps into place on the rear of the Spotlight Cam.
Step 7: Connect The Spotlight Cam’s Solar Panel Charging Wire.
- Connect the solar panel’s charging cord to the spotlight camera’s power connection.
- Dispatch the central plug.
- Connect the snap ring barrel charging cable to the Spotlight Cam’s power connection.
Step 8: Mount The Spotlight Camera
Spotlight Cam should be inserted into the mounting bracket, adjusted to the proper angle, and then the adjustment screw tightened.
Note: Please remember to charge and assemble the battery in your Spotlight Cam.
Although it doesn’t replace your battery, the Spotlight Cam Solar Panel keeps it charged.