This page includes affiliate links, just so you know.
At no additional cost to you, I could get a tiny compensation if you decide to buy anything after clicking on one.
Everything you need to know about testing solar panels is in this lesson.
You’ll discover:
- How to use a multimeter to evaluate a solar panel
- How to gauge the output of a solar panel
- Even more
Let’s get going.
#1. How to Use a Multimeter to Check a Solar Panel

If you’re testing solar panels, your multimeter is your best buddy.
It may be used to gauge:
- Voltage on an open circuit (Voc)
- Current in a short circuit (Isc)
- Running current
How? Read on.
What You Need
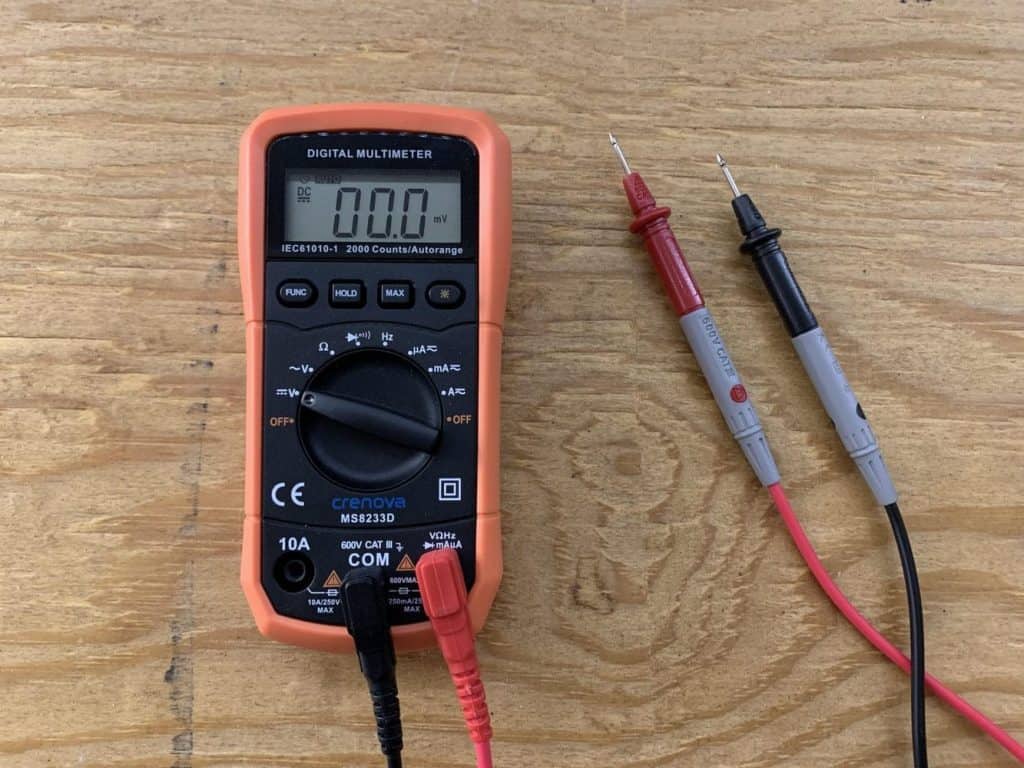
- Multimeter
Step 1: Measure the Open Circuit Voltage
On the specifications label on the back of your solar panel, find the open circuit voltage (Voc).
Keep this number in mind for later.
I’m using a Newpowa 100W 12V panel for this instruction.
It has a 19.83V Voc.

Set up your multimeter to detect DC voltage.
To achieve this, connect the black probe to the multimeter’s COM terminal.
Into the voltage terminal, insert the red probe.
If your multimeter isn’t auto-ranging, set it to the DC voltage setting and the appropriate voltage range.
A solid line is placed over a dotted line adjacent to the letter V to denote it.
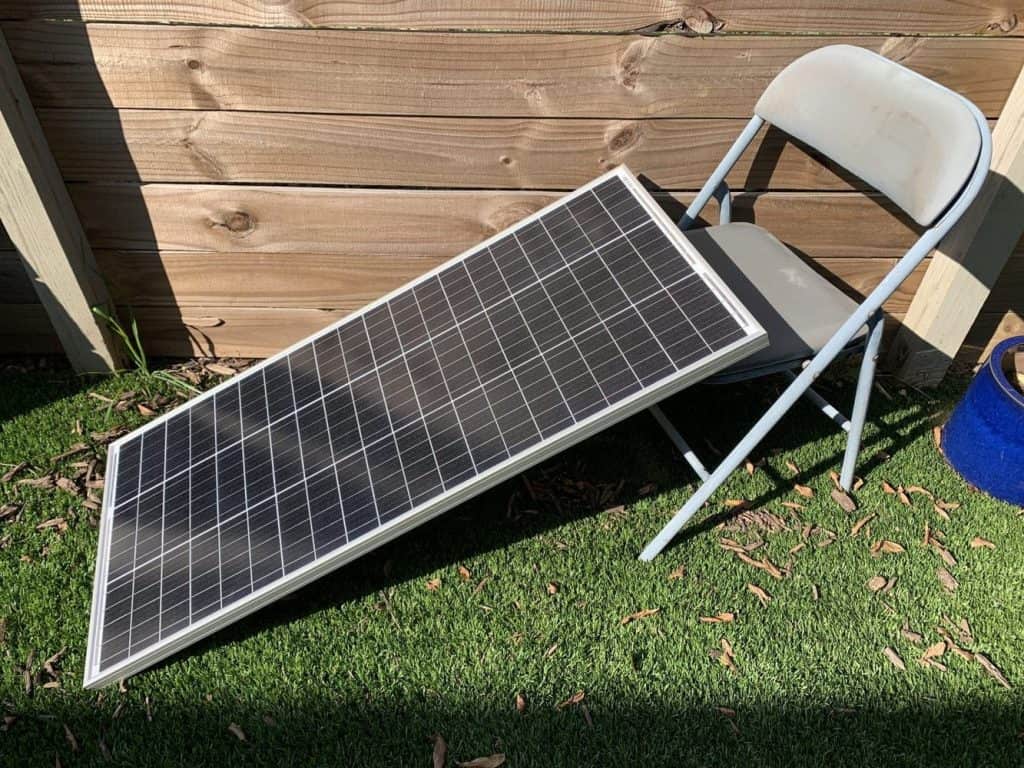
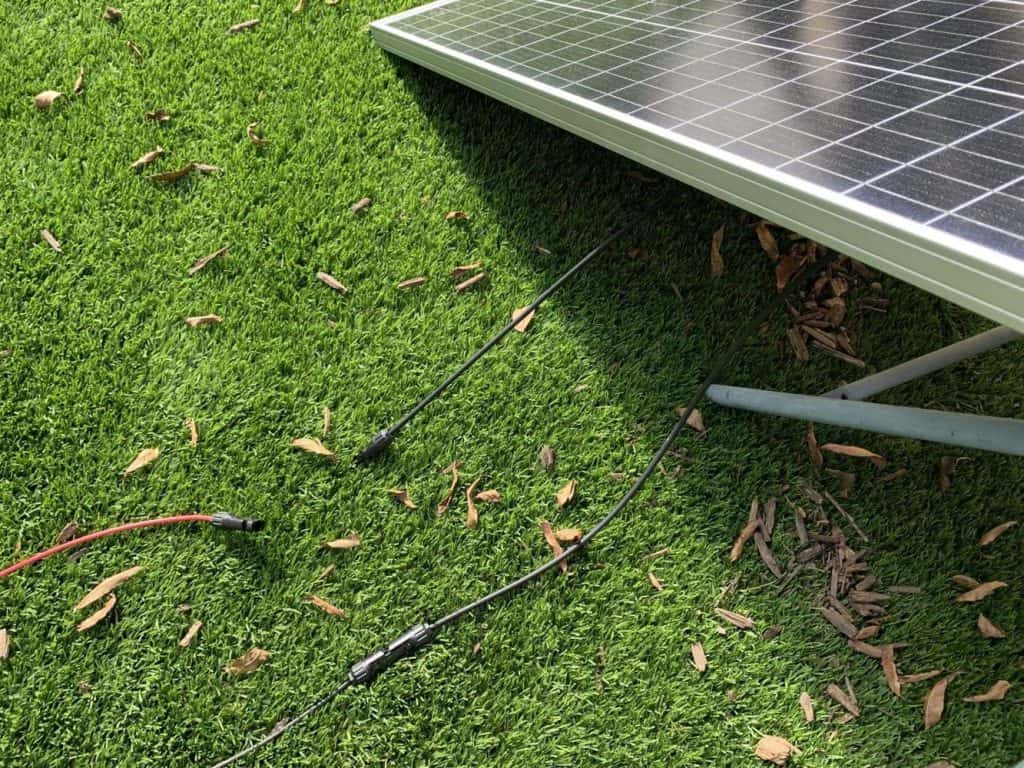
Bring your solar panel outdoors, and position it in the sun.
Aim it toward the sun for optimal effects.
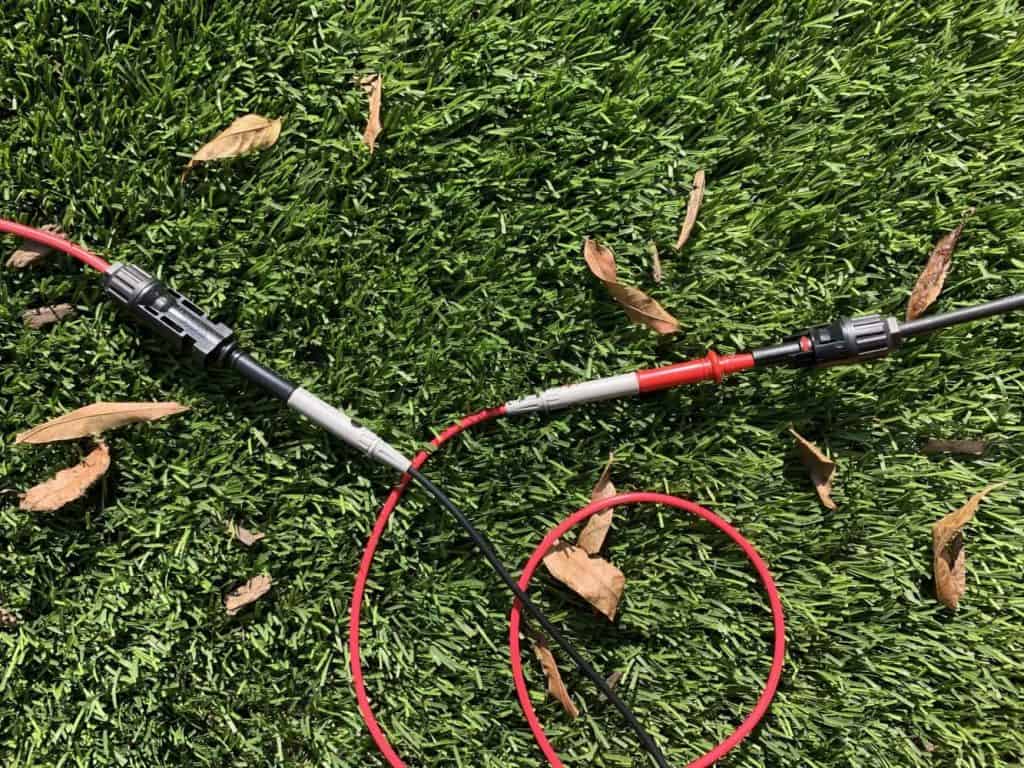
Find the positive and negative cords for the solar panel.
Usually, the cable with the male MC4 connection and the red ring surrounding it is the positive cable.
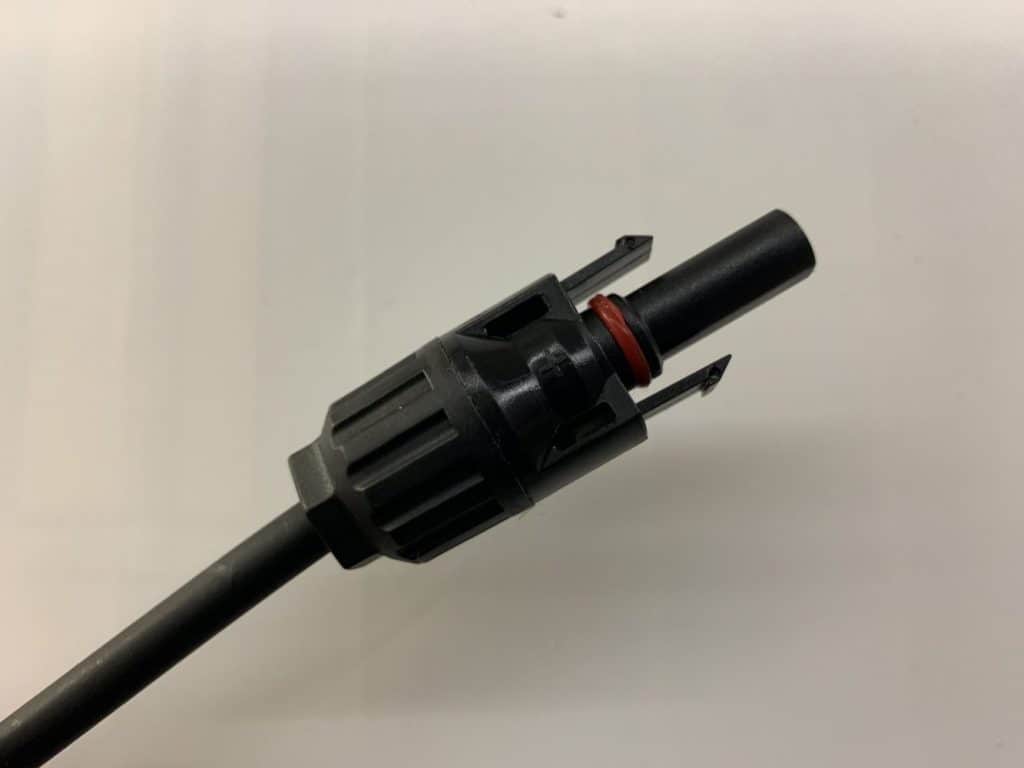
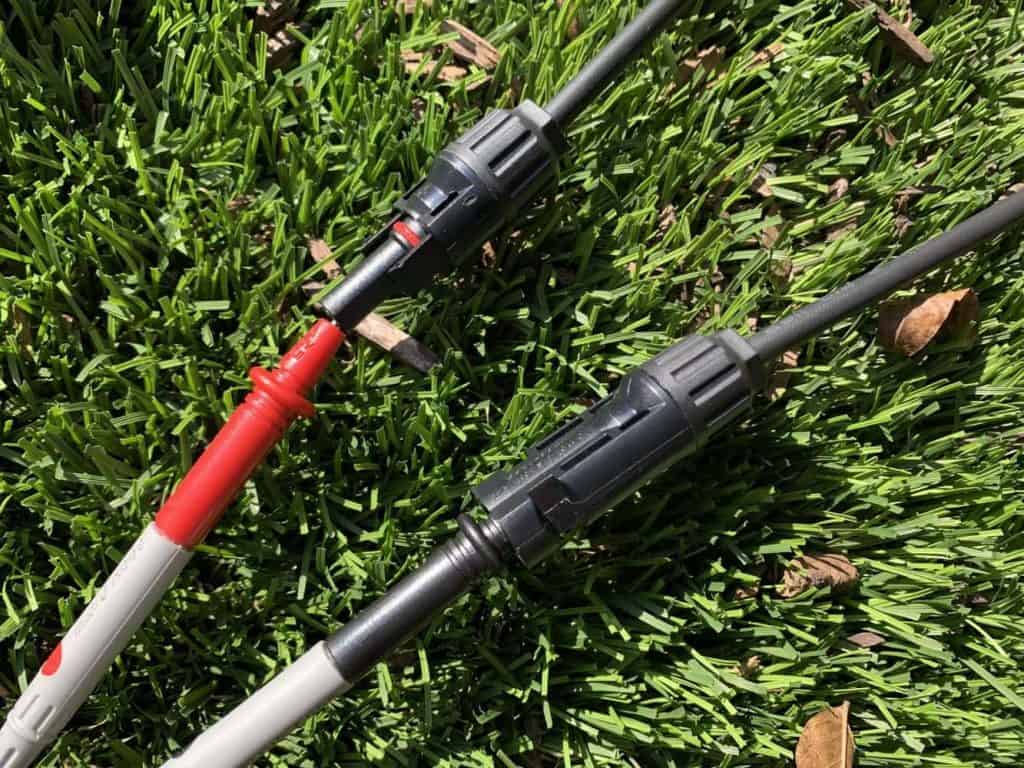
Put your multimeter’s red probe on the metal pin located within the positive MC4 connector.
Connect the black probe to the negative MC4 connector’s metal pin.
Compare the voltage you read on your multimeter to the open circuit voltage (Voc) specified on the panel’s back.
(Reverse the probes and retake the measurement if your voltage reading is negative.)
On my panel, I recorded a Voc of 19.85V.
We are accurate since the stated Voc for this panel is 19.83V.
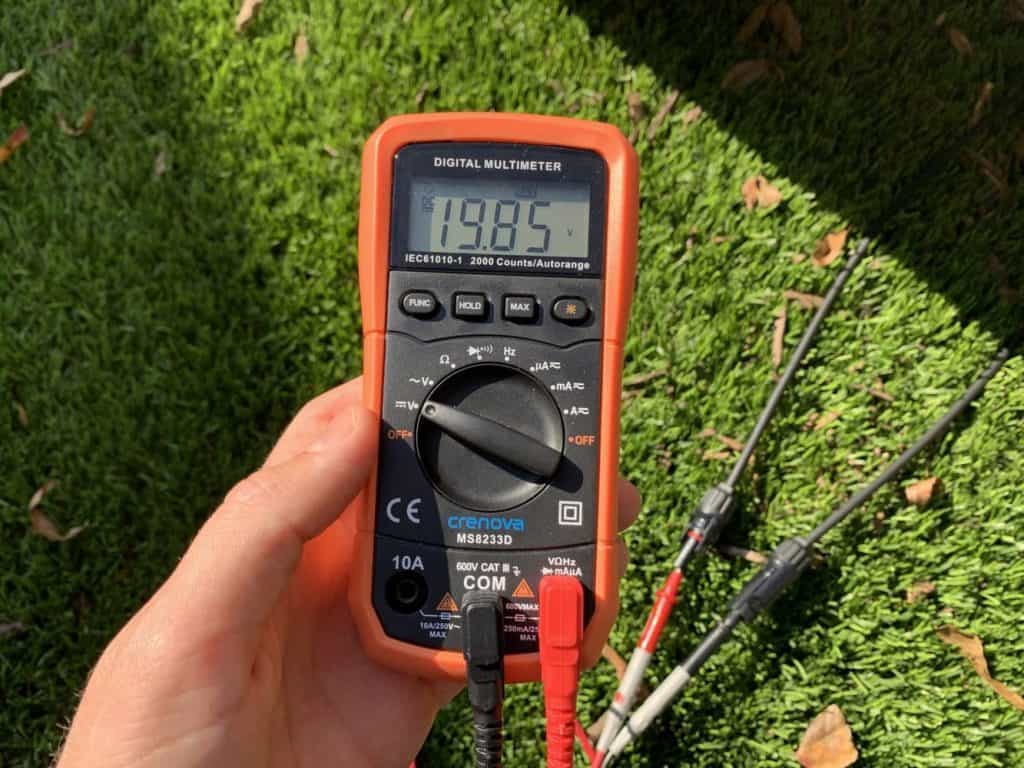
The voltage your multimeter reads should be quite close to the open circuit voltage shown on the panel’s back.
But it doesn’t have to be the same.
If they are comparable, your panel seems to be in fine shape thus far.
The next step is to measure the short circuit current.
Try the following, then remeasure, if the voltage you measure is much lower than the Voc:
- Make sure the panel is oriented toward the sun, in direct sunlight, and on a sunny day.
- Make sure the solar panel is not in any way shaded.
- Solar panel cleaning
Your solar panel can be harmed if your measurement is still incorrect.
Step 2: Measure the Short Circuit Current
Find the short circuit current (Isc) on the panel’s rear specifications label.
Keep this number in mind for later.
Isc of my panel is 6.56A.
Set up your multimeter so it can measure amps.
Move the red probe to the amperage terminal to do this.
If your multimeter isn’t auto-ranging, set it to the amp setting (A) and choose the appropriate limit.
Warning: Ensure that the fuse size on your multimeter is more than the short circuit current on your panel.
Ordinarily, the fuse size is noted above the amperage terminal.
For instance, the fuse size on my multimeter is 10A, and the Isc on my panel is 6.56A, so I’m good to go.
Bring your panel outdoors and place it in the sun.
Put your multimeter’s red probe on the metal pin located within the positive MC4 connector.
Connect the black probe to the negative MC4 connector’s metal pin.
Warning: When you finish the connection, be aware that there can be a spark.
That is typical.
Compare the current shown on your multimeter to the short circuit current (Isc) specified on the panel’s back.
Your measured short circuit current should be quite close to the value shown on the panel’s back.
However, it is not required to be the same.
For instance, while my panel claims that the Isc is 6.56A, I only detected 6.08A.
However, there was some haze in the sky when I conducted the test, and it was also 11 AM on a November morning, so I’m okay with the results.
It should seem quite similar to the Isc at midday on a clear summer day.
It’s fantastic if your dimension matches the Isc indicated on the panel’s back.
Your panel is operating properly.
For the majority of individuals, checking that your solar panel is in excellent working condition just requires monitoring open circuit voltage and short circuit current.
You have the option to stop testing.
There are further methods to test a solar panel with and without a multimeter, however, if you want to stay at it.
Continue reading to learn how.
If your measurement is significantly off from the stated Isc, try the following and retake your test:
- Make sure the panel is exposed to direct sunshine on a sunny day.
- Closest to midday is ideal for testing the solar panel.
- Position the solar panel with the sun in mind.
- Make sure the solar panel is not in any way shaded.
- Solar panel cleaning
Solar panel production is also impacted by the time of year.
It may not be your solar panel if your measurement is only a little off from the Isc.
Perhaps it’s simply the winter sun.
Step 3: Measure Operating Current
Note: Connecting the solar panel to a charge controller, which I cover in method #2 below, is another way to monitor PV current.
Yes, you can measure how much current your solar panel is producing with a multimeter.
However, you’ll need some more tools:
- Solar charge regulator (e.g. this cheap PWM charge controller)
- Battery (e.g. this cheap 12V 33Ah lead acid battery)
This is how:
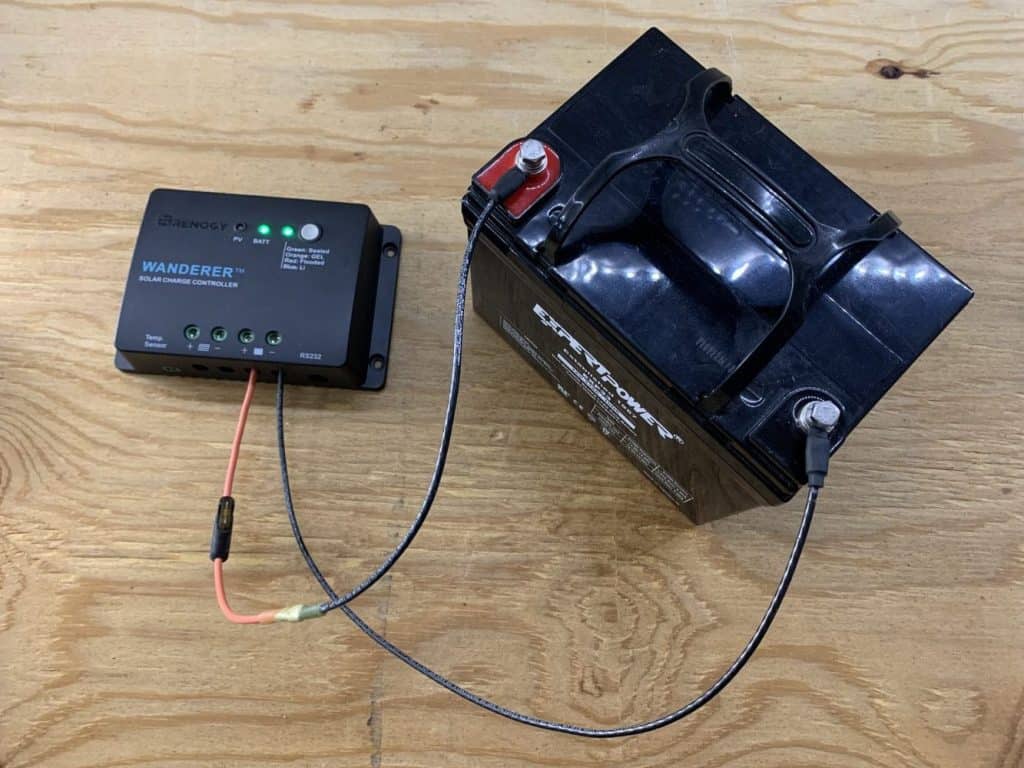
Connect the battery to the solar charge controller.
Tutorial: How to attach a charge controller to a battery
Cable adapters must be connected to the charging controller.
Tutorial: How to attach a solar panel to a charge controller
The negative solar cable should be connected to the negative adapter cable.
REMOVE the positive solar wire from the system.
As in step 2, set up the multimeter to measure amps.
To prevent the solar panel from producing any electricity, cover it with a towel or lay it face down on the ground.
Put the red multimeter probe on the male MC4 connector’s metal pin (the one connected to the solar panel).
To complete the connection, press the black multimeter probe on the metal pin on the female MC4 connector (the one attached to the charge controller).
To determine how much current your solar panel is generating, remove the towel from it (or turn it face up).
Then, check the amperage on your multimeter.
My panel produced 4.46 A.
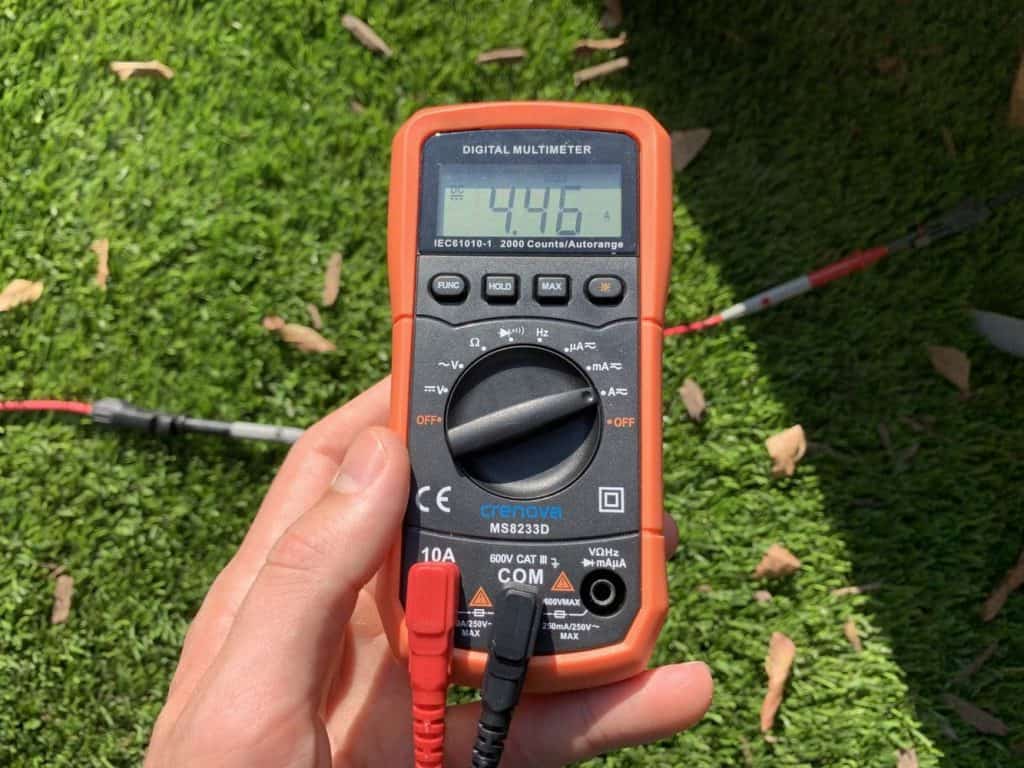
Really nice
To determine how the tilt angle and orientation of the panel effect output, you may experiment with them.
To determine how near your solar panel is now to reaching its maximum output, compare this figure to the current at maximum power (Imp) on the rear of the panel.
For instance, the current I measured was 4.46A even though my panel’s Imp is 6.26A.
Even though it may look far away, this is really not that awful.
Solar panels generally provide between 70 and 80 percent of the rated power output, barely approaching 100 percent under perfect circumstances.
(In addition to the testing taking place later in the year and the haze in the sky at the time.)
Since 4.46A is 71 percent of 6.26A, this measurement is accurate.
So:
You now know how to use a multimeter to test solar panels.
It’s time to discuss how to gauge the production of solar panels.
You’ll discover how to determine the precise number of watts your panel is generating.
#2. Using a Solar Charge Controller to Measure Solar Panel Power Output
By attaching solar panels to a solar charge controller, you may test them as well.
When linked, you may gauge:
- PV power
- solar current
- Watts of power generated
This is simpler to implement with certain charge controllers than others.
Some feature LCD screens, for instance, that display system specifications like PV current and PV voltage, which may be used to compute watts.
Others may link to your phone through Bluetooth, allowing you to track system performance and assess output.
Some devices can’t tell you how much electricity your solar panel is producing since they have neither function.
Steer clear of them.
What You Need
- An inefficient solar charge controller
- PV voltage and PV current are shown (for example, Renogy Wanderer 10A), or
- Possess Bluetooth (e.g. Victron SmartSolar or Renogy Wanderer 30A with Renogy BT-1 Bluetooth Module)
- Battery (e.g. this 12V 33Ah lead acid battery)
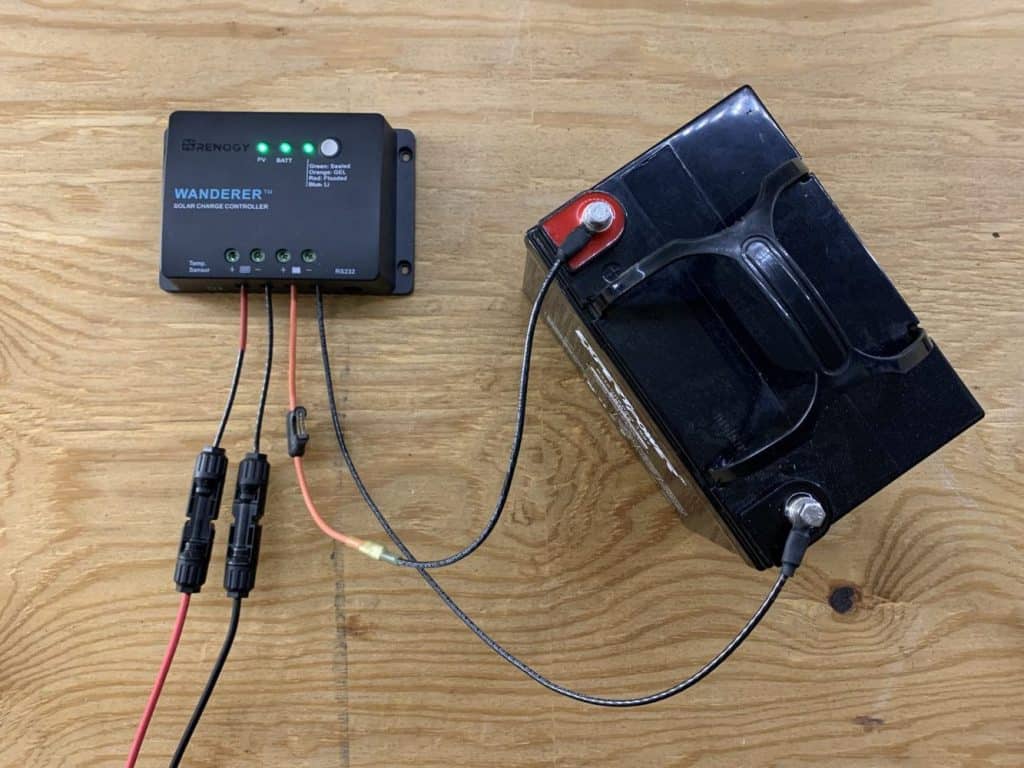
Step 1: Connect The Battery To The Charge Controller
Your charging controller and battery must be connected.
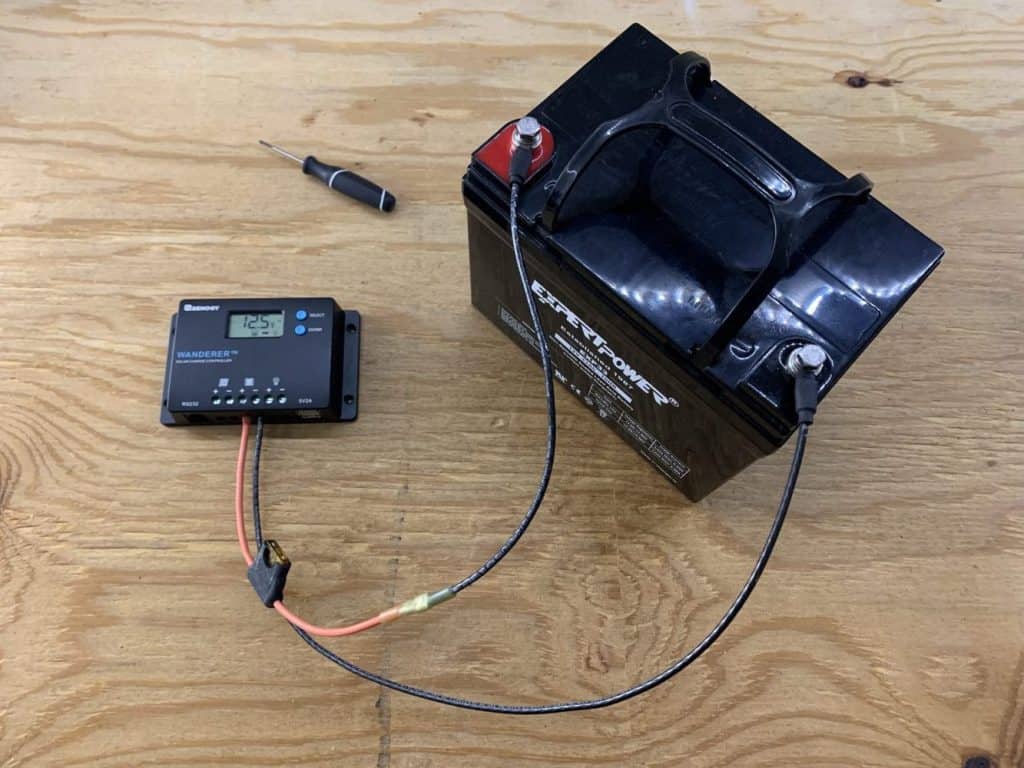
I utilized this 12V 33Ah lead acid battery, the Renogy Wanderer 10A, and some connection cables for my setup.
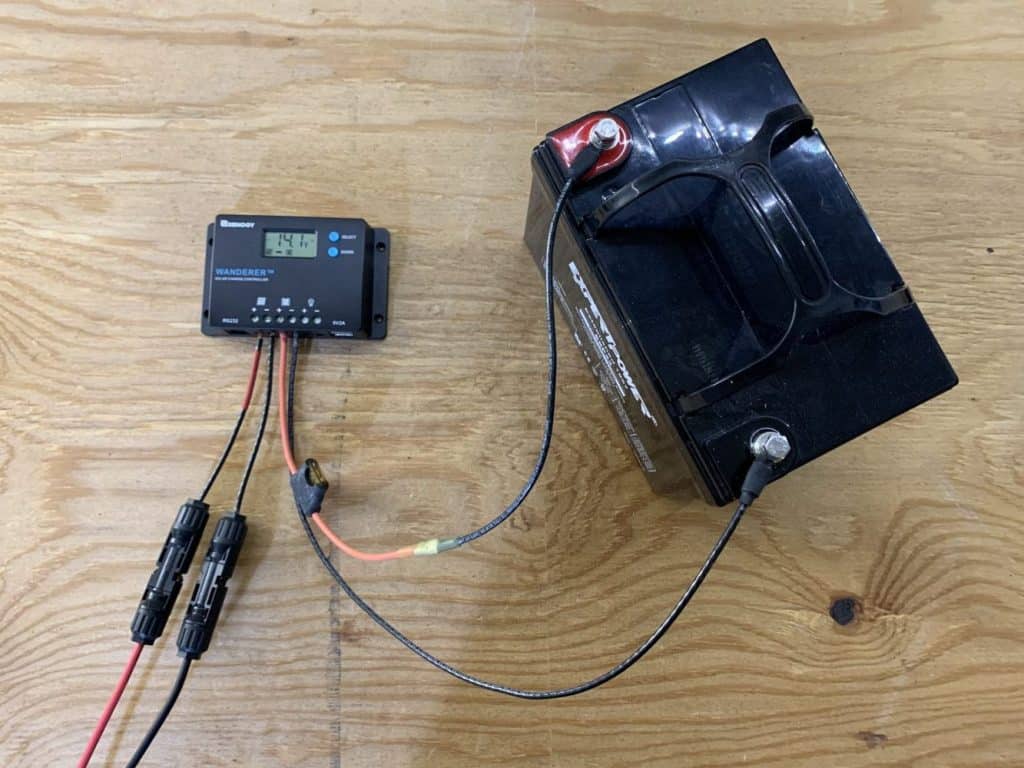
Step 2: Connect The Solar Panel To The Charge Controller
Connect the charge controller to your solar panel next.
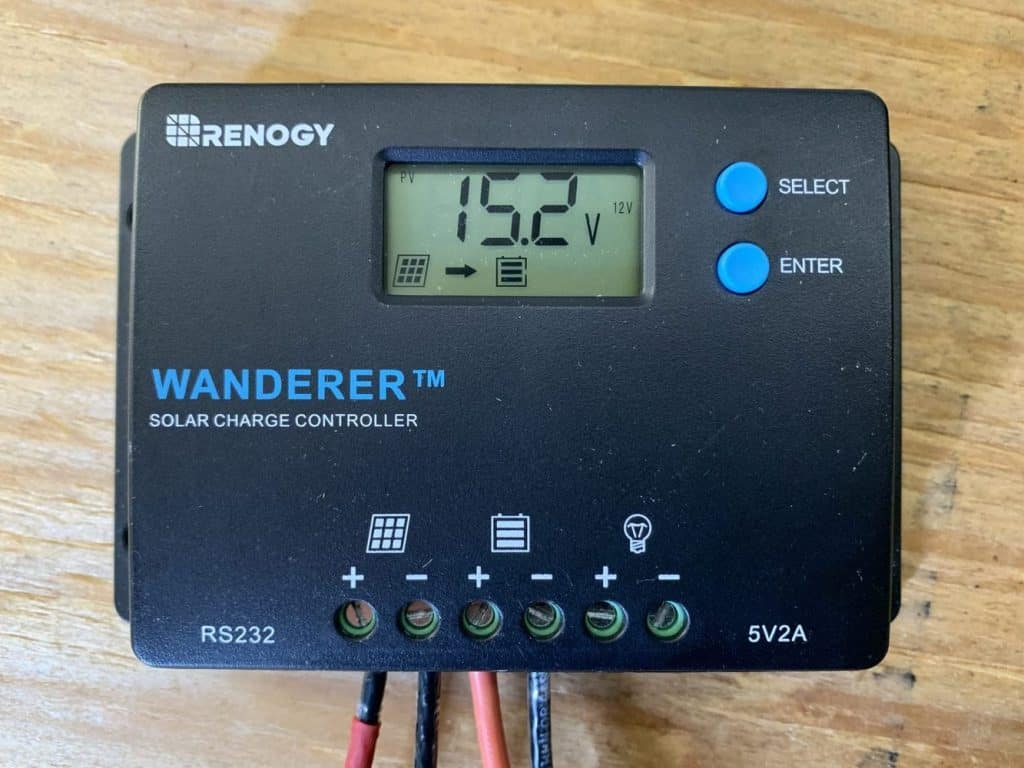
Step 3: Calculate Power Output
You must go through the display displays to discover the PV voltage.
15.2V was mine.
Find the PV current next.
Mine scored 4.5A.
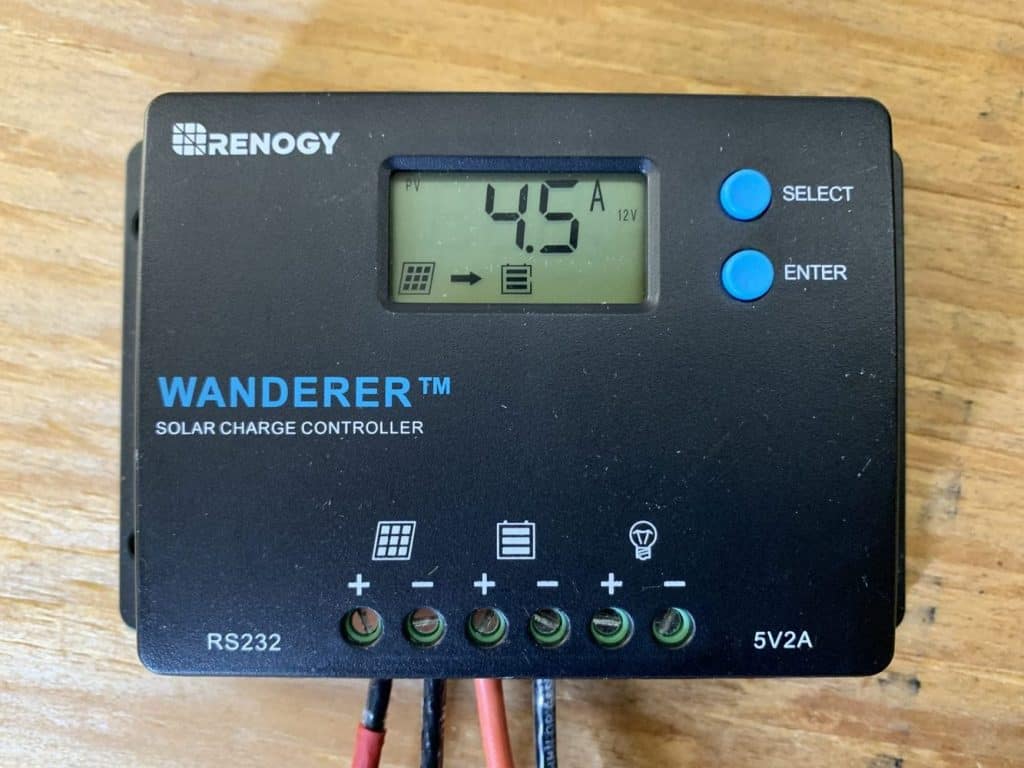
Simply multiply volts by amps to obtain watts in order to get the solar panel’s wattage:
15.2 volts * 4.5 amps = 68.4 watts
The output of my solar panel was 68.4 watts.
On a cloudy November day, a 100 watt solar panel performed well.
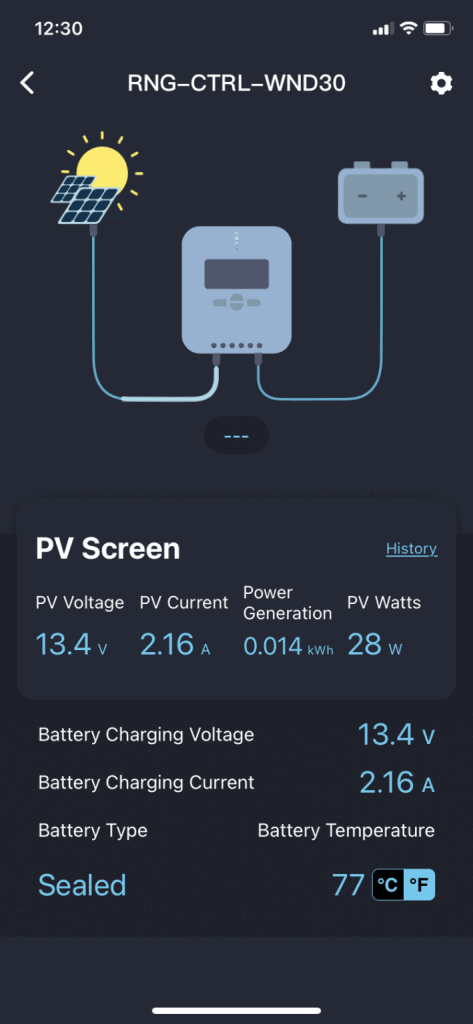
You may measure the output of your solar panels from your phone using the brand’s app if your charge controller has Bluetooth functionality.
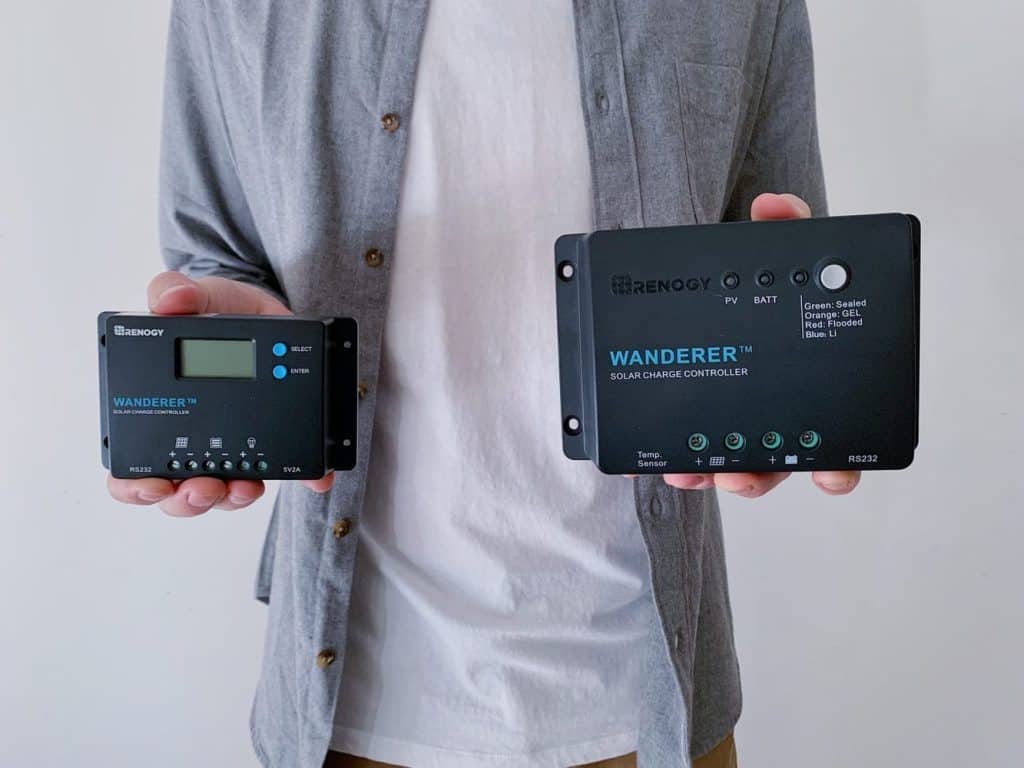
Say, for illustration, that you are using the Renogy Wanderer 30A.
As you can see, it lacks an LCD display, making it impossible to determine the output of the solar panels by looking at it.
We’ll need to utilize Bluetooth to find out.
Some charge controllers feature Bluetooth built-in, such as the Victron SmartSolar.
The Renogy BT-1 Bluetooth module, on the other hand, is compatible with the Wanderer 30A and is available for purchase.
I linked the charge controller to my phone using the Renogy DC Home app after plugging the BT-1 into my Wanderer 30A.

Then, when I launched the app, I could see a variety of system specifications, including the power output in watts.
As I was installing this system, the clouds began to sweep in, so my 100 watt solar panel was only producing 28 watts.
My preferred method of calculating solar panel output is to use the charge controller’s mobile app.
It’s simply so practical.
In my view, Bluetooth is a good improvement.
Additionally, programs like these monitor the evolution of solar energy output automatically.
We’re chatting now!
But:
Don’t worry if your charge controller is unable to measure the power output from your solar panels.
Another option exists.
#3. Using a Watt Meter to Measure Solar Panel Output
This device measures power in watts:

On Amazon, you may get them at a low price.
One will monitor voltage, current, power, and more when connected in line between your solar panel and charge controller.
This is how you employ one.
What You Need
- Solar charge regulator (e.g. Renogy Wanderer 30A)
- Battery (e.g. this 12V 33Ah lead acid battery)
- Power meter
Step 1: Connect The Battery To The Solar Charge Controller
Battery and charge controller should be connected.

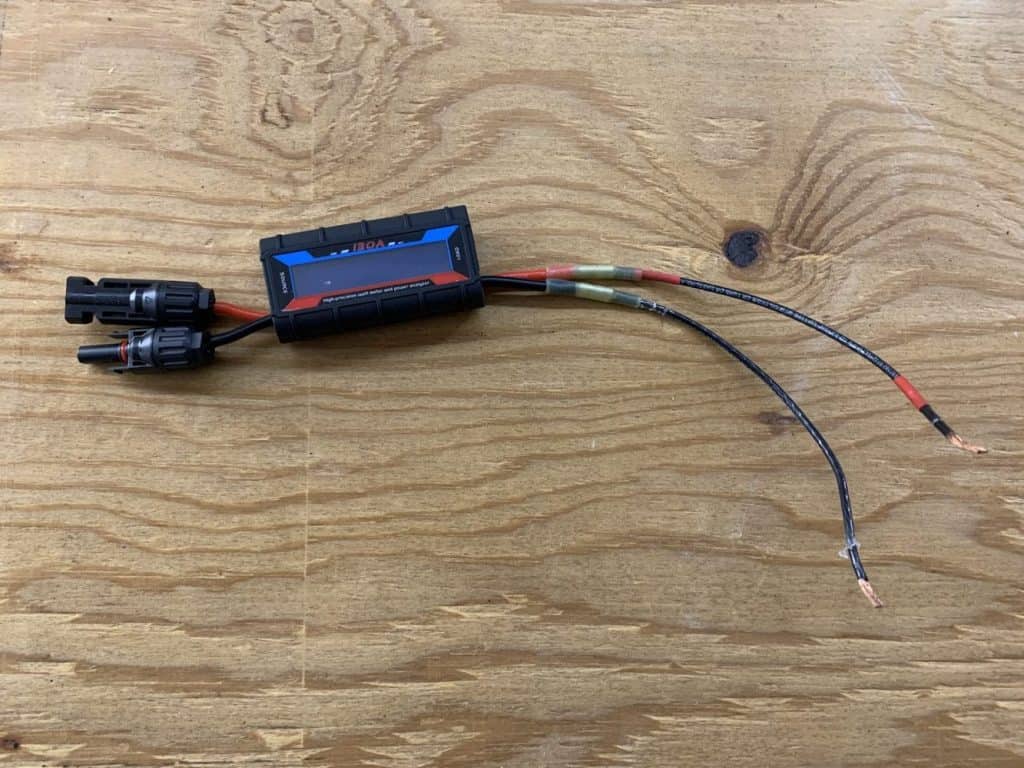
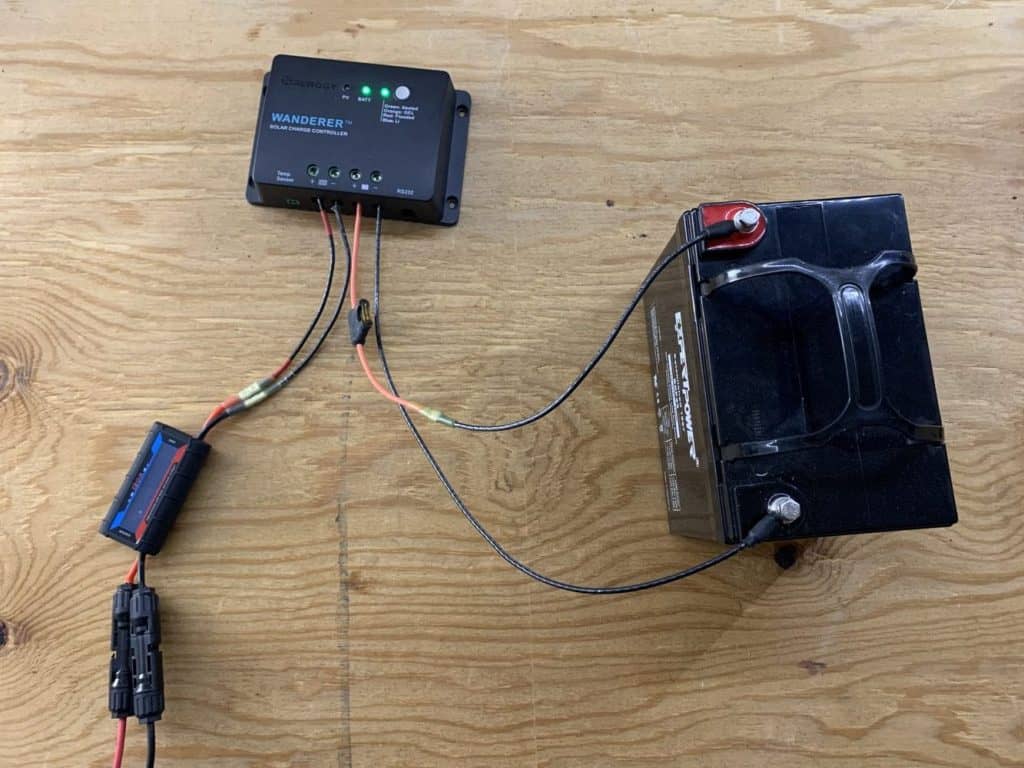
Step 2: Connect The Adapter Cables To The Watt Meter
The charge controller adapter wires should be connected inline with the watt meter.
As you can see, I connected a piece of wire to one end and the MC4 connections to the other.
Tip: If you don’t want to mess with crimping wire connections, you may get this watt meter with MC4 connectors.
Connect the adapter wires to the charging controller using a watt meter.
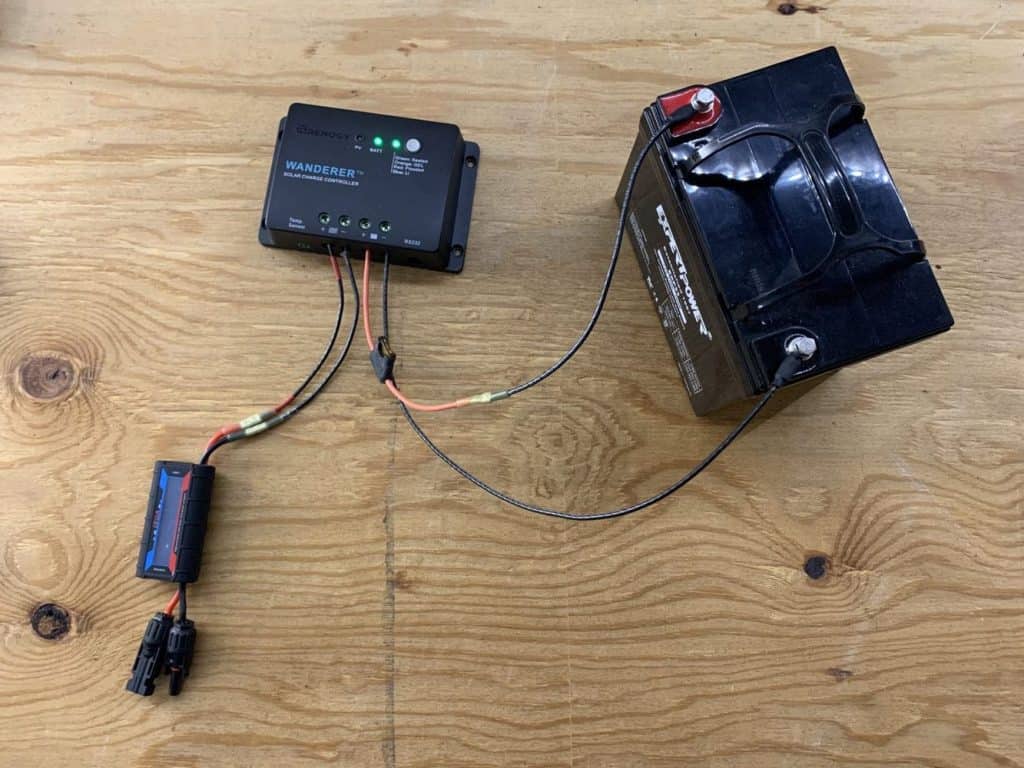
Step 3: Connect The Solar Panel
Connect the adapter wires from the charging controller to the solar panel.
Step 4: Measure Power Output
Place the solar panel in full sunshine outdoors.
When you do, the watt meter will immediately switch on and begin calculating the electricity output of your solar panel.
My watt meter recorded a reading of 24.4 watts from my 100 watt solar panel at this time of day since the clouds were expected to linger for the whole of the day.
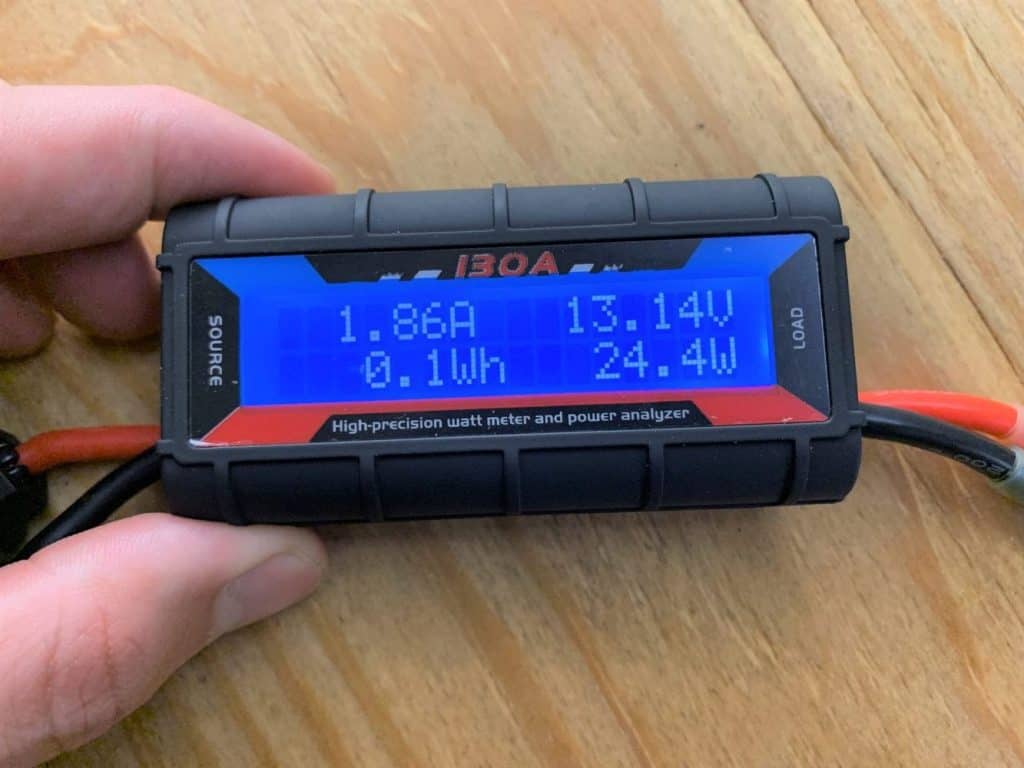
A helpful indicator for determining how much electricity your solar panel produces each day is total watt hours, which the meter also monitors.
Note: When the solar panel stops producing electricity, this watt meter automatically shuts off.
The totals will all be reset to zero when it comes back on.
I advise purchasing a charge controller with Bluetooth, such as the Victron SmartSolar, if you wish to track the energy output of your solar panels over time.