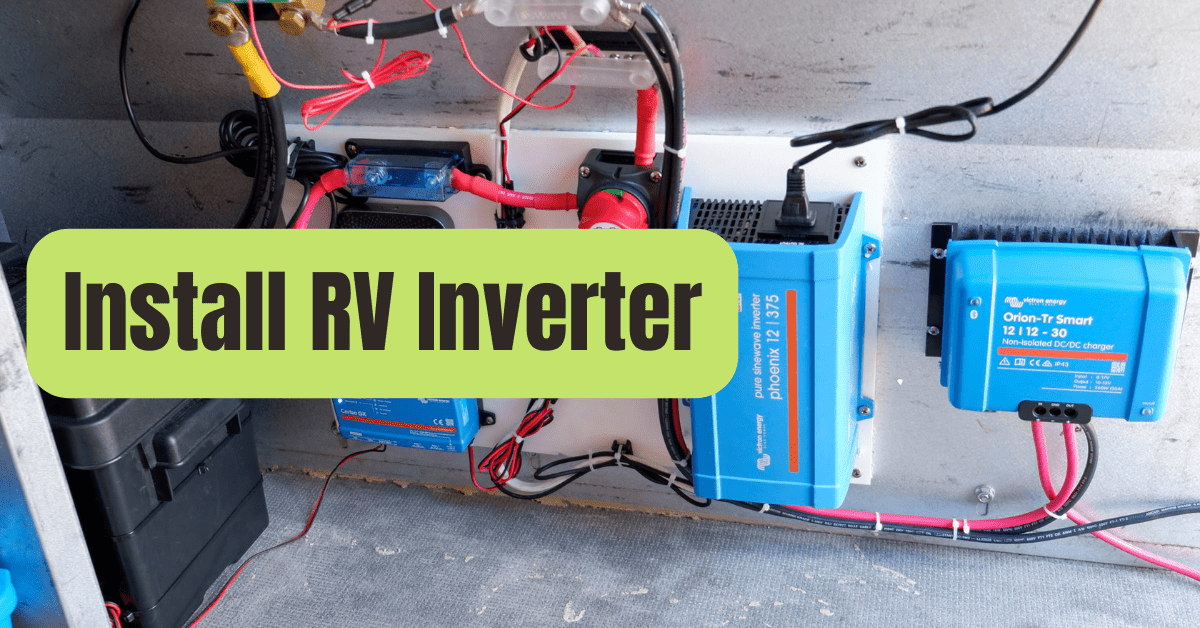
There are a few different approaches to installing an inverter, whether you’re swapping out an old one or adding one for the first time to your camper’s electrical system.
We’ll go over everything you need to know about installing an inverter in an RV camper in this post.
It offers safety recommendations, installation suggestions, and a list of required equipment.
We’ll go through each installation choice step by step and include a wiring schematic for an RV installation for each.
Before we begin, it should be noted that this article is a part of our mini-series on RV inverters.
If you have arrived here but aren’t yet ready to install your inverter, check out our previous articles to learn how to receive AC electricity in your camper while off the grid:
Before You Begin Installing An RV Inverter
#1. Make Certain You Purchase A Compatible Inverter.
You must get a model that suits your requirements since not all inverters are compatible with all RV electrical systems.
In our purchasing guide, we go into greater depth, but in a nutshell, watch out for:
- It produces the proper voltage (110v or 240v)
- Needs the proper input voltage (12v or 24v),
- If you’re using delicate electronics, a pure sine wave version (not modified sine wave),
- Has a high ranking for efficiency, and
- A low consumption rate when idling.
#2. Examine the User’s Guide.
Although it may seem apparent, the manufacturer is the best place to get detailed instructions on installing your inverter.
Anything you may read in this article is superseded by anything they say in their handbook.
They are more knowledgeable about their items than we are.
Important safety information, installation advice, and operating instructions are often included in the handbook.
Therefore, before beginning the installation, we advise reading the instructions from cover to cover.
#3. Select A Location For The Inverter Installation
As an electrical appliance, an RV inverter must be installed in a dry location far from any water source.
If you’re converting a van, you should build your water system to be as far away from the center of your electrical system as possible.
Inverters should be put in a space with good ventilation since they produce heat while they’re running.
Some bigger inverters, like the Renogy 3000w inverter, have a built-in cooling fan, and for it to function properly, it needs a clean area around it.
To reduce any cable voltage losses, try to place the inverter as near to the battery bank as you can.
The demand for higher cable diameters increases with battery distance; larger wires cost more and take up more room.
#4. How to Ground an RV Inverter
DC current is converted into AC via inverters.
It is recommended to avoid making any installation mistakes since AC current might hurt (or even kill).
Your safety depends on properly grounding your RV inverter.
There is often a specific ground connection on the inverter shell, however it may also sometimes be grounded via the negative return wire.
Many inverters for campers have this feature.
That ought to be linked to the grounded chassis point of the car.
Specific information about your model will be available in the manufacturer’s handbook.
Pay close attention to their instructions—it could well save your life!
#5. Fuses
The recommended fuse size will be stated in the manufacturer’s instructions, so heed their advice.
If the manufacturer doesn’t give the necessary safety information, we advise picking a different brand.
You might figure out the fuse size the device requires (watts system voltage).
#6. Cable Sizes
In order to function, a standard RV inverter requires 12 volts; a 24 volt version will need 24 volts.
Along the wire, the voltage is transferred from the 12v battery bank to the inverter.
How much of the voltage actually reaches the appliance depends on the environment, including temperature and wire length.
The proper wire diameters to use across certain distances should be determined by the manufacturer’s specifications.
To minimize voltage losses, try to utilize the biggest wire size possible.
You will need to compute the wire size if the manufacturer doesn’t offer it.
To size the wires, you may use our wire gauge calculator or double-check that the manufacturer’s recommendations are larger than the minimal wire size for the circuit’s fuse rating and length.
Based on the current demand and the length of the cable run, determine the appropriate wire size for the inverter power supply.
The voltage drop across the wire’s length will be too great if the cables are too tiny, and you may even create enough heat to ignite a fire.
You may read the chapter on Transmitting Electricity in our Campervan Electrics Handbook if you’re not sure why this is significant.
Safety Advice
- Only basic information on installing an RV inverter is provided in this article. The process for installing a converter, inverter charger, or any other equipment is different. For certain devices, we’ll provide specific instructions in other articles.
- Always turn off the electricity to the battery bank before installing the inverter.
- Use fuses and wires of the proper size at all times.
- Before starting, always read the manufacturer’s installation instructions. Their instructions usually take precedence over ours since they know their goods better than we do.
- Know your inverter’s needs for grounding and earthing.
- If you are unsure, choose an electrician who is qualified.
The Equipment And Supplies Required To Install An Inverter In A Camper
You’ll need the following tools to securely install an inverter:
- You have the necessary voltage, cable continuity, and basic electrical troubleshooting to validate the electrical source is turned off. Multimeter. Visit our page on using a multimeter to learn how; it’s not as difficult as it seems.
- Earth insulation tester or megohmmeter.
- Wire strippers: to carefully remove the wire’s plastic covering.
- Heat shrink and a heat gun are used to complete terminal joints and connections.
- To connect connections to the wire terminals, use a terminal crimping tool.
- Drilling is the process of creating holes for securing the inverter.
- Choosing the right screwdrivers to attach and put terminals and cables in position
- To assist secure cable runs, use cable ties or cable clips.
- Fuse holder and ANL fuses
- The right-sized wire (red for positive and black for negative)
- The right size for the wire and connecting posts is a ring connector.
- Before attaching the wire ends to a fastened terminal, precisely finish the wire ends with pin connectors.
Methods for Installing RV Inverters
There are three methods to install an inverter in a recreational vehicle:
- Installation of a cigarette lighter inverter
- To the battery bank immediately
- AC distribution box directly
The inverter type and how you want to utilize the AC power it supplies influence which installation option is ideal for you.
This article solely discusses the first two techniques.
A separate article should be devoted to the more difficult process of installing an inverter to the AC distribution box.
You can read that in-depth guide on installing an RV inverter transfer switch here.
Installation Of A Cigarette Lighter Inverter
The Bestek 300w inverter is an excellent example of a compact inverter that may be used directly with a car’s cigarette lighter.
The inverter’s usage is limited by this installation technique.
The circuit for the lighter will have a tiny fuse, maybe a 20A fuse installed by the car’s manufacturer, however it might be as low as 10A.
The inverter has a 40A rating.
The lighter circuit’s fuse will explode if you use it to power a device larger than the vehicle’s fuse size.

Warning: You run the danger of utilizing the inverter to draw too much current for the vehicle’s wiring if you raise the manufacturer’s fuse size, which might cause a fire hazard.
It is NOT a good idea to increase the fuse size since it will lessen the circuit’s protection.
Furthermore, since the inverter draws power straight from the starting battery of the car, it is usually advisable to use it while the engine is running to prevent flattening the battery.
You’ll have to accept the restrictions if you choose this course of action.
In actuality, installing these inverters using the cigarette lighter may be OK for automobile camping or other situations when the necessity for an AC electrical source is restricted, but they’re certainly not a practical option for long-term RV habitation.
The fact that these inverters don’t need installation is an advantage.
Instead, all you need to do is put the supply line into the cigarette lighter, turn the inverter on (it likely has an on/off button), and your AC gadgets will be ready to connect.
How To Connect A Direct Inverter To The Camper’s Battery In An RV
An inverter is primarily used to power AC items while boondocking without access to a mains electrical source.
You may only have one or two dedicated AC circuits if the majority of your camper’s electrical circuits are DC and powered by your battery bank.
That’s how we converted our Sprinter vehicle.
We have a few dedicated AC circuits that we only utilize when we are hooked up to shore power.
We try to utilize efficient DC alternative appliances wherever feasible since we spend more time boondocking than on campsites.
As a result, we don’t need many AC circuits since we only have a few AC appliances.
If this is your circumstance, connecting your inverter directly to the battery bank of your camper is definitely the best course of action.
The installation of an RV inverter is covered in the parts that follow.
It may employ words that are unfamiliar to you.
Before starting a project of this kind, it is essential to understand the electrical system of your camper.
For those who are just learning about camper electrical systems, our Campervan Electrics Handbook is a great place to start.
#1. Diagram For Installing An RV Inverter.

#2. Step-By-Step Installation Of An RV Inverter
To add an inverter to your RV battery bank, follow these steps:
- Choose the fused circuit that you want to utilize. A normal blade fuse holder won’t be big enough if the inverter requires a fuse size larger than 40A. A bigger ANL fuse holder and fuse must be installed.
- By turning off the input and output cut-off switches, confirm that the battery bank is isolated.
- Disconnect off the generator and the shore electricity.
- Set the inverter in operation by securing it.
- As directed by the manufacturer, ground the inverter.
- Place the fuse holder next to the battery or the positive supply busbar for security.
- A red, positive wire should have one end connected to the ANL fuse holder and the other to the positive terminal of the battery or busbar.
- The negative black wire should have one end connected to the inverter’s negative side and the other to the earth busbar or the vehicle’s earth point. Note: Depending on the design of the earth busbar or earth point, use either a ring connection or terminal end crimp.
- Another red positive wire should be connected with one end to the positive side of the inverter and the other end to the output terminal of the ANL fuse holder.
- Verify that all connections are tight and secure.
- Place the fuse in.
- To enable electricity to pass via the new circuit, turn on the output battery isolator switch.
- Without attaching any AC equipment, turn on the inverter.
- Using a multimeter, verify that the inverter has a 12 volt DC supply.
- Connect an AC device to make sure it powers up as anticipated if everything is in order.
- To find the issue, you must troubleshoot the circuit if the multimeter doesn’t show a 12v supply. Note: There is a whole section in The Campervan Electrics Handbook devoted to troubleshooting DC circuits.
If you want to utilize your inverter by directly attaching appliances to it, you may stop here.
Your inverter has been installed successfully.
#3. Combining An Inverter And An Extension Cord

You might use an extension cable in place of connecting AC appliances to the inverter’s outlets.
- Install the inverter as previously mentioned, through step 15.
- Connect the extension cable to the AC appliance.
- Connect the inverter to the extension cable.
- Turn on the appliance first, then the inverter.
- If you verified the inverter was working properly in step 15, there shouldn’t be any issues unless the extension cable is the issue.
Observations On Connecting An Extension Cable To An Inverter:
- Always use an extension cable with a current rating greater than the total current you anticipate to deliver to the appliances at any one moment.
- Use a cable extension that has a GFCI built into it. A nice example is the Iron Forge cable.
- Because extension cords increase the circuit’s length, certain voltage losses are to be expected. However, utilizing a short extension cable will help to reduce the issue.
- Use of coiled extension cables should be avoided since they provide a fire risk.
If you intend to use your inverter with an extension cord, stop here.
Your inverter has been installed successfully.
#4. Using AC Receptacles or Sockets to Connect an Inverter
Connecting your appliances to such sockets rather than the inverter or an extension wire requires installing inverter wiring to fitting outlets.
Only after turning on the inverter will they get electricity.
You must wire these sockets to your RV’s AC distribution box if you want to be able to utilize them while connected to shore power as well.
Observations On Installing Ac Circuits
- You are working with AC electricity, which has the potential to be fatal. These recommendations outline the work to be done but do not take the place of a competent electrician. Always utilize a certified electrician if you don’t know what you’re doing.
- Always adhere to the color-scheme norms and wire size specifications set out by your local electrical rules.
- Between the live, neutral, and earth connecting points, no wires should ever be crossed. Live and neutral should connect with each other, etc.
- Cables should be routed via conduit to prevent crimping below paneling or corner wear. Unprotected exposed wires might result from this, posing a risk of fire and shock.
- Never run AC wires via the same conduit as your DC circuits.

- Install the inverter as previously mentioned, through step 15.
- Set the AC outlets/sockets in their operational locations. They must be tightly fastened. Without exception, wires or other internal connections shouldn’t be visible or accessible. Note: To ensure proper grounding or earthing of each component, according to your local electrical codes and the manufacturer’s guidelines.
- Take out the primary supply fuse for the inverter.
- Cables from the AC sockets should be connected to the appropriate inverter outlet connectors. It should be noted that you must choose an inverter with AC output terminals in order to connect it in this manner. The Renogy 3000w pure sine wave inverter is an example of an inverter you cannot connect in this manner; a far better example is the Victron Phoenix Smart 3000va.
- Verify the inverter circuit’s complete continuity with a multimeter.
- To make sure the circuit is isolated from Earth, use a megohmmeter or an insulation tester.
- If the inverter fuse is inserted and does not blow, turn the inverter on.
- Check the voltage of each installed AC outlet or receptacle using a multimeter to make sure it is 110v or 240v, depending on your arrangement.
- Check that each AC outlet or receptacle is powered properly by connecting a small AC appliance to each one in turn.
- As you gradually add additional appliances, up to the inverter’s maximum rated power, make sure the whole system is working properly.
- To make sure the system performs as you anticipate, keep an eye on the battery usage levels.
Consider constructing an AC distribution box with individual circuit RCDs if you are adding several AC circuits to run from the inverter.
Since the inverter already offers overall circuit protection, it is not necessary.
However, you should review the local laws in the area where you reside.
If an AC distribution box has to be installed, the wiring diagram will like this:

How To Install The Remote Switch For The RV Inverter
Some inverters can work with remote switches. They come in helpful if you placed an inverter in a difficult-to-reach location.
Installation is not that difficult. Always adhere to the manufacturer’s installation instructions, which are likely to read something like this:
- Remote switch that is secure while in use.
- Take out the circuit fuse for the inverter.
- Connect the remote switch to the connectors on the inverter remote switch.
- Insert the circuit fuse for the inverter, then check the remote switch’s functionality.