Have you ever drove in a great automobile but listened to poor music? Unfortunately, most automobiles have had this problem.
Many automobiles come with factory-installed head units that aren’t up to snuff.
This is due to the fact that most automobile manufacturers do not place a high priority on the quality of a vehicle’s sound and audio systems.
The most popular and best option is to replace the vehicle radio with an aftermarket radio, but how do you wire a car stereo from the ground up? Let’s have a look.
Removing the wiring harness and disconnecting the wires connecting the speakers and electricity is the first step in wiring a vehicle radio.
The cables must then be connected to the new harness or harness adapter and plugged into the new radio.
Test the vehicle radio once it’s been connected, and if it works, put it in the dashboard.
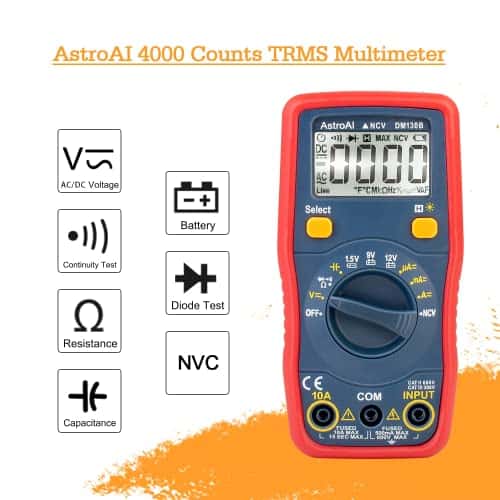
Tip: If you’re working on your car’s electrical system, you’ll probably need a decent multimeter.
You may quickly test the wires and their connections using this simple gadget.
The vehicle radio must be installed and wired during the replacement procedure.
In this tutorial, I’ll walk you through how to wire a vehicle radio step by step.
From Scratch: How to Wire a Car Radio A Complete Reference Guide.
Following the appropriate guidelines for wiring the radio, like other steps, guarantees that you have high-quality audio in your automobile.
Take your time and read each step carefully before acting.
Make sure you’re not in a rush and that you’re paying attention to what you’re doing.
Related: 10 Best RV Stereos of 2026
What Kinds of Tools Do You Need to Wire a Car Stereo?
You should have some simple but required tools ready before doing anything with the vehicle radio.
You probably have everything in your garage, but if not, I’ve included Amazon links to the tools I use and am satisfied with:
- Multimeter with digital display.
- Wire strippers are a kind of wire cutter.
- Crimpers.
- Speaker tester or 9-volt battery
- Electrical tape is a kind of tape that is used to connect
Step 1: Disconnect the Wiring Harness and Remove the Radio
Disconnect the wire harness from the old stereo and remove it from the dash.
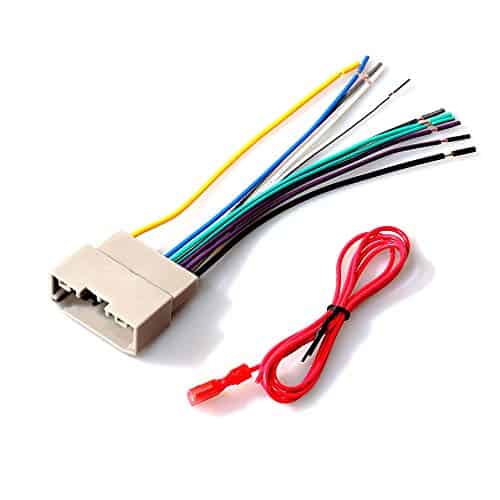
You may require a wire adaptor at this stage, depending on the new radio, to connect your new car radio to the current clip in the vehicle.
A wire adapter connects unique vehicle stereos to the automobile’s standard DIN connector and prevents misconnections.
Step 2: Remove The Battery.
You’ll have to work on the electrical system as part of the wiring procedure.
As a result, there is a risk of electric shock, which is why it is advised that the battery be disconnected before beginning the wire connection procedure.
In most automobiles, the battery is located beneath the hood, with a few exceptions where the battery is located in the trunk.
After you’ve found the battery, remove the black wire from the negative terminal using a hand or socket wrench.
Consider removing the bolt and pulling the cable down to the battery side to avoid damaging the positive wires.
If you don’t disconnect the battery, you or the car’s electrical components might be harmed.

Step 3: Wrap All Connected Wires
This is important since it secures their connecting points.
It’s critical to make the connections permanent after inspecting all of the wires and attaching them to the automobile.
Make sure there are no naked wires in the vehicle radio, and use electrical tape to distort the wire connections.
You may wrap wires in a variety of methods, but many people choose to use tape since it is the simplest, cheapest, and most frequent approach.
Step 4: Put Your Car Radio to the Test
After establishing and fastening the connections, you must reconnect the battery in order to test the stereo before permanently installing it in the dashboard.
It’s best to install the vehicle radio after double-checking that it’s in functioning order.
However, you must first examine all of its functionality, including the speaker connections.
Finding anything that isn’t operating properly suggests the wires aren’t linked correctly, and a common error is connecting the speaker cables improperly.
Related: How Much Does It Cost To Install A Car Stereo?
Step 5: Install the Wire Harness on the Dashboard
It’s now time to put wire within the dash after making sure all of your connections are tight and secure.
This includes attaching an antenna wire from automobile radio signal receiving equipment, which is commonly overlooked, so you can communicate well while driving!
Remember that there should be enough room in the dashboard for your radio, so make sure all cables are put into the dashboard.
This way, the stereo won’t get trapped when you attempt to relocate it or remove it later without causing damage!
Step 6: Insert The Car Radio Into Its Proper Location.
The vehicle radio should be positioned in an aperture inside the dash in most automobiles.
Make sure the vehicle radio fits correctly into the slot and that there are no excess cables that might obstruct free movement.
If you encounter resistance when putting the radio into place, don’t use too much effort.
Otherwise, you risk damaging the backside wire connections.
In this scenario, an adapter comes in handy for shifting the automobile radio into its right place.
Any electronics or auto parts shop will have an adapter readily hand.
Step 7: Put the Car Radio Back in Its Place
There are two major techniques for securing a vehicle radio.
- One of them is for spring clip-equipped automobile radios. The clamps shut and a click sound may be heard after the stereo is secured in the right position.
- The other, less frequent, requires brackets and bolts that must be properly secured. Bolting the radio in place is a good way to keep it secure.
Step 8: Set up the Dashboard
This is the last phase in the wiring procedure, and it entails putting together all of the trim pieces as well as the plastic clips.
At the same time, take care not to break any plastic components and double-check that the overlapping pieces are properly stacked.
If you come across any damaged plastic bits, you may glue them back together using hot glue.
Glue, on the other hand, is not suggested since the plastic components you repair may become difficult to remove in the future.
If the whole rim piece has been shattered, your only choice is to purchase a new.
Related: How to Connect Speakers to Your TV in 5 Easy Steps
How to Make Sure Your Car Radio Wire Is Connected Correctly
All cables must be in excellent working order and connected to the radio without fail.
I’ve included a list of basic tests you may do to ensure the stereo’s connection is correct:
Wire That Never Changes
This cable has a voltage of 12 volts and draws electricity straight from the battery.
The first thing you should do is turn off your ignition to see whether it’s functioning.
After that, ground the black wire and grab the red meter probe and join with the continuous yellow wire.
With a 0.5V differential, the constant wire should produce a reading of up to 12 volts.
Speaker Cable
A 9-volt battery is the easiest method to test the speaker wiring.
You may also test the speakers with a multimeter, but make sure it’s set to resistance first.
Accessory Strength
When the ignition is turned off, the wire reads 0 volts on a meter.
It reports 12 volts and 0.5 volts when turned on.
A Grounding Wire
After you’ve found the constant wire, it’s easy to find the ground wire.
The ground wire is then connected to the black wire following thorough testing.
It’s important to start with a red meter probe and constant wire, then go on to a black meter probe and the wire you’re testing.
The ground wire is identified by a reading on the meter that is comparable to the constant wire testing.
Related: How To Connect An Amplifier To A Factory Stereo
FAQs
What Is the Location of the Ignition Wire?
The ignition switch harness is positioned within the steering wheel column on either the left or right side, depending on the automobile.
The ACC wire is usually 18 gauge yellow or pink in color.
Having this cable installed by a local electrical professional will assist you guarantee that the installation is done correctly.
What Happens if a Car Stereo Isn’t Grounded?
It is impossible to use a vehicle audio without a properly fitted ground wire.
When the automobile is turned on, the right ground connection enables your radio to operate flawlessly.
When wiring a car stereo without a harness clip, how can I tap the wires?
The best answer is to consult the owner’s handbook for your vehicle.
If the manual isn’t accessible, you’ll have to trace each wire manually.
In this activity, using a multimeter is a smart option.
Because automotive electrical systems may be difficult to control, do not try to toy with them until you have a basic understanding of them.
Conclusion
With the aforementioned tips, there’s no excuse to remain in a great vehicle with a bad audio system.
Remember that installing a new car radio is a terrific way to give your vehicle a new lease of life.
However, in order for the stereo to function properly, you must follow the installation and wiring instructions.