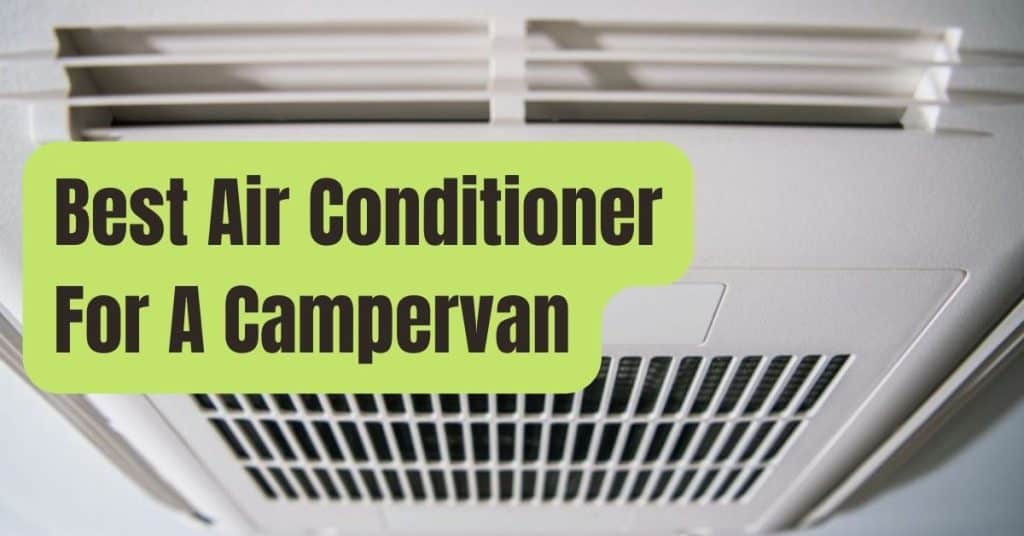
Do you ever get the feeling that your RV’s air conditioning system isn’t performing as well as it was a few years ago? When it rains, does it leak around the edges? Is it prone to leaking at times, particularly when there are no clouds in the sky?
Then hold off on updating your air conditioner.
It’s possible that the issue is just with the gasket, and that the remedy is as easy as purchasing the finest RV AC gasket to avoid energy waste.
While you may believe that any RV air conditioner gasket would suffice, the fact is that certain brands are much superior than others.
Make sure you obtain the greatest deal possible within your budget.
Below are some product reviews and suggestions to make things a little simpler for you.
After the evaluations, you’ll receive a purchasing guide, so you’ll know what to look for if you want to go hunting on your own.

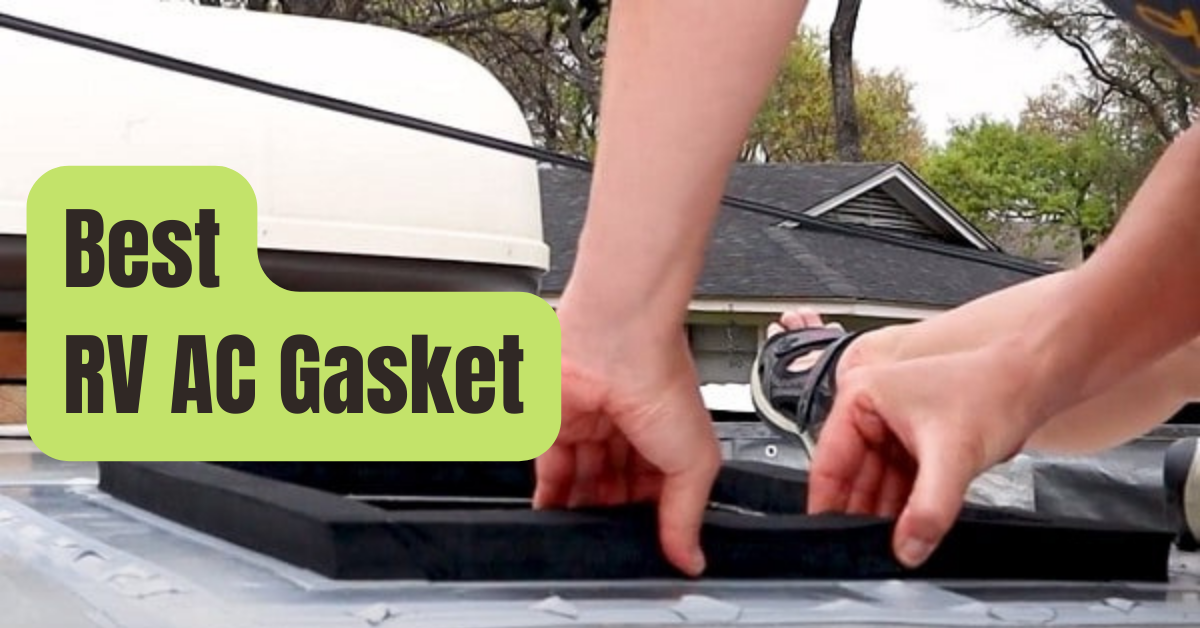
Reviews of the Best RV AC Gaskets
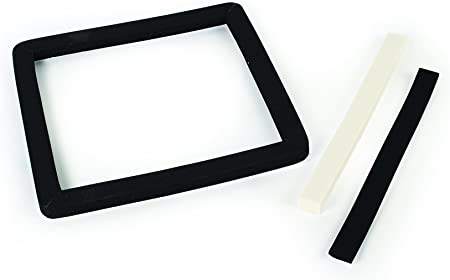
#1. Camco 25071 AC Gasket Kit
The Camco 25071 gasket set astounds me with its ease of use and ease of installation.
I assumed we’d need extra materials, such as sealant or butyl tape, to adhere this gasket to the bottom of the air conditioner.
However, the glue for this RV air conditioner seal was already included.
It’s so powerful that unless I use a scraper, I won’t be able to remove the gasket once it’s stuck.
The fact that this product contains exceptionally substantial rubber foam is appreciated by the majority of consumers.
Notably, the foam pads are flexible enough to conform to the precise dimensions of the air conditioner.
However, they are so thick that even the weight of the air conditioner will only compress them somewhat.
The gasket will gradually flatten out, but it might take a few weeks, if not months, before you can see it when you look below the air conditioner.
The fact that the gasket kit included two leveling pads is also a plus.
The one on the left is a little thin, while the one on the right has the same thickness as the gasket.
These pads are used to keep the air conditioner’s other components from hurting the roof.
Aside from that, the cushions may prevent the air conditioner from resting on the roof lopsidedly.
Another advantage is that this gasket kit is inexpensive.
Now, I do have a little quibble with this gasket, which is that it is made up of two seams rather than one continuous piece.
Despite knowing that the seams would not be a problem when the air conditioner’s weight compresses the gasket, I applied some sealer to them before attaching it to the air conditioner.
What We Enjoy
- With a self-adhesive bottom, installation is a breeze.
- The airtight seal is made of high-density rubber foam material.
- All conventional vent holes are compatible.
- Two foam leveling pads are included.
- While being reasonably priced, it yet maintains a high level of quality.
What We Don’t Care For
- There are two seams, which may need the use of extra sealant.
This is a simple air conditioning unit sealant that meets all of our needs.
When looking for quality, as this product demonstrates, you do not need a significant budget.
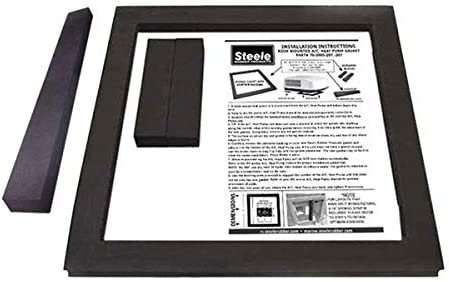
#2. Steele Rubber Products RV AC Gasket
Steele rubber RV air conditioner gasket is undoubtedly the greatest RV air conditioner gasket I’ve ever used.
Unlike other low-cost gaskets, this one is self-adhesive.
It makes it nearly permanently stick to the air conditioner’s base.
Once you’ve stuck it in, it’s hard to get it out without destroying the gasket.
The leveling stones that come with the air conditioner make it even simpler to replace it.
The leveling blocks are included in this kit, and there are two of them.
One option is to use a narrow strip that runs down the front of the air conditioner.
The other is constructed of the same material as the gasket and is as thick as it is.
It’s best to put them at the back, where the heavier components are.
They’ll be enough to protect the roof from the air conditioner’s weight.
The Steele RV AC gasket’s finest feature is that it is made of one solid piece of rubber foam.
It does not have any seams that might create leaks in the future.
Two strips of foam are bonded at the ends of several gaskets using super glue.
Although the majority of them will not leak after the weight of the air conditioner compresses the gasket, having a one-piece RV ac gasket provides a great deal of peace of mind.
Because the Steele rubber AC gasket fits all standard roof vent holes, it should work with practically any commercially available RV air conditioner.
With that in mind, you should have no trouble fitting this gasket onto your air conditioner.
Now, the problem I’m having with this RV ac seal may not be a problem for everyone.
It’s the fact that it’s on the upper end of my price range for me.
It costs at least twice as much as OEM gaskets.
What We Enjoy
- It has an adhesive backing for long-term usage.
- Two leveling blocks are included.
- Comes in a one-piece RV AC gasket that is straightforward and easy to install.
- All conventional roof apertures are compatible.
- Fits practically all common air conditioners
What We Don’t Care For
- A more expensive gasket set
This is one of the most effective air conditioner gaskets on the market right now.
It is a touch pricy, but given its quality and general performance, it is well worth the money.
#3. Ventmate 62901 AC Gasket
When you purchase the Ventmate AC gasket, you will not have such a difficulty fitting it, unless you have a custom-made air conditioning unit.
For example, you don’t need to buy a dual therm RV air conditioner gasket since this one will suffice.
Another feature I enjoy is the density of the gasket material.
When I looked beneath the air conditioner after a week, I could still see the gasket.
I have no doubt that the gasket will flatten out again after a few months, which is quite natural.
That simply indicates the gasket completely sealed the AC hole.
An adhesive backing material was also included with this gasket.
Simply peel off the backing paper and lay it over the air conditioner opening with care.
Because the glue is quite sticky and will not enable you to reposition the gasket once it is in place, you must take your time and be patient with it.
Despite the fact that the gasket comes in four sections, I have had no leaks thus far.
The air conditioner’s pressure pressed down on the gasket, creating a perfectly watertight barrier that rendered the little gaps between the foam pieces inconsequential.
If you’re worried about the seams splitting, use a little additional sealant before putting them on the AC.
Aside from the fact that it is made up of four parts, another concern I have with this gasket is that it lacks leveling blocks.
To balance the air conditioner on top of the new gasket, I had to shim up a side using leftover parts of the old gasket.
What We Enjoy
- All conventional vent holes are accommodated.
- High-quality foam rubber is used to make this item.
- It’s simple to put together and comes with an adhesive backing.
- It creates a waterproof seal.
- Fits practically all common air conditioners
What We Don’t Care For
- There are no leveling blocks in this game.
Despite the fact that the edges seem to be leaking, I can tell future customers that it will hold up well.
You may apply a little additional sealant to the seams if you want to be extra safe.
It’s a fine RV air conditioner gasket kit as it is.
#4. Dometic 3310718.006 AC Gasket
The reason I had to replace the gasket in the first place was because the sides of the air conditioner were leaking heavily.
Fortunately, the problem was resolved using the AC manufacturer’s Dometic model RV air conditioner gasket repair.
The Dometic RV air conditioner gasket repair, in particular, was a great match for my RV.
I like how much better this new gasket appears to operate than the previous one.
Even when my RV was younger, you could hear a slight whistling from the AC if a gust of wind struck the roof.
There is no longer any whistling now that the replacement gasket has been placed.
The gasket material is so thick that the air conditioner has yet to settle into its permanent place after a week or two.
But it only implies it will produce a watertight seal after it has settled fully.
This gasket may survive much longer than the original due to the thick rubber foam substance.
To put it another way, it won’t dry out and crack as rapidly.
Water will maintain the gasket pliable and flexible if it comes into touch with it.
This implies that you won’t have to replace it for at least a few years.
If it came with leveling blocks, this would have been an excellent option for an AC gasket set.
I was lucky in that my air conditioner balanced precisely on top of the new gasket, but I am still concerned that it may tilt to one side when driving.
What We Enjoy
- Fits all regular sized air conditioners
- It seals better than most OEM gaskets.
- Rubber foam with a high density
- It won’t dry out or crack easily.
- When compared to all of the low-cost competitors, it may last longer.
What We Don’t Care For
- There are no leveling bricks included.
Although the Dometic RV AC gasket has several drawbacks, the advantages outweigh the disadvantages.
If you have a little extra money in your budget, this is the one to choose for your RV.
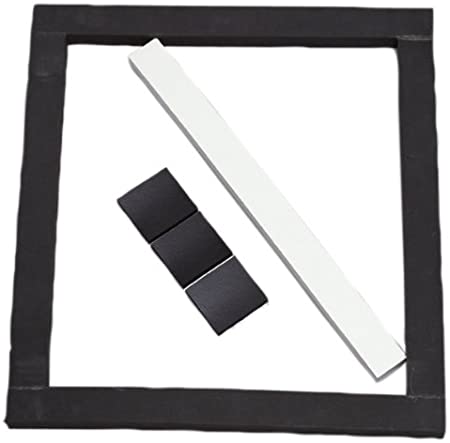
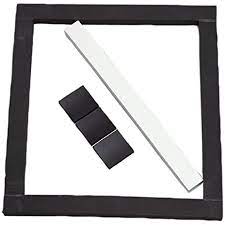
#5. Ventmate 65526 Gasket Kit
You can be certain that the Ventmate gasket set will fit your RV’s air conditioner flawlessly, regardless of the brand.
This square gasket is 14″ x 14″ on the inner diameter, which is the usual size for most RVs.
As a result, it is suitable for all ordinary air conditioners, particularly Coleman models.
Despite the fact that this gasket is not made of a single solid piece of rubber foam, I noted that it has properly sealed the corners, preventing any further leaks.
The material will spread out evenly after installation.
Even if the seams do fracture, it’s doubtful that they’ll come apart and let water in.
You may be certain that this gasket will not dry out or fracture easily.
You should be able to get a couple of years of use out of this product.
However, I still urge that you inspect the gasket on a yearly basis to verify that it is in excellent working order.
The nicest part about this device, in my view, is that it comes with a lot of leveling blocks.
The white one has the same density as the gasket, so it’s ideal for holding the heaviest portion of the air conditioner, which is the compressor.
The additional blocks are just there to keep the remainder of the unit level and stable.
However, some RV owners would want this gasket to have a thicker foam to assure more force.
What We Enjoy
- Fits all conventional air conditioners.
- It has pre-sealed corners to keep leaks at bay.
- Rubber foam of superior quality
- There are various leveling blocks included.
- Provides optimum stability to all elements of the air conditioner.
What We Don’t Care For
- The foam may be made to be more durable.
This gasket is remarkably robust when forced down by the air conditioner.
Furthermore, it is a cost-effective investment for your RV.
#6. Coleman 83323301 Gasket Kit
The Coleman Mach AC gasket kit is unique in that it is very thick while being extremely flexible.
This gasket is very effective because it provides a watertight barrier around the roof’s aperture, keeping rainfall and condensation from the AC unit out of the RV.
If your air conditioner isn’t custom-made, you can be certain that this gasket will fit flawlessly.
The gasket is 14″ x 14″ on the inside, which is the industry standard for RV roof openings.
It makes no difference whether brand you use.
You may expect this gasket to fit if it is standard.
The best part is that this gasket already has an adhesive backing.
It eliminates the need to purchase a gasket adhesive separately.
Simply flip it over and peel off the backing to reveal the adhesive side, then place it on the air conditioner’s base.
When putting down the gasket, be cautious since it’s difficult to replace it without damaging it after the adhesive hits the surface.
Despite the fact that this gasket kit is from a low-cost company, I am certain that it will last a couple of years.
The rubber foam is thick enough to last a long time.
It can also survive heavy rains and other weather conditions without being destroyed too quickly.
Because the highly sticky glue is rather harsh, you must be cautious while attaching the gasket to the bottom of the air conditioner.
Make a few of trial fits before removing the sticky backing if this is your first time using it.
What We Enjoy
- Material is high-density rubber foam.
- All standard-sized RV air conditioning systems will fit.
- It comes with a strong sticky backing.
- Low-cost while maintaining a high degree of dependability
- withstands severe rains and other extreme weather
What We Don’t Care For
- While using a strong glue, use caution when putting it in place.
Coleman has always been associated with high quality, and their gasket kit is no exception.
Despite the fact that I noticed a few flaws with the product, I believe it is an excellent substitute for worn-out AC gaskets.
#7. Leisure Time Marketing 15068 Gasket
If you’re on a budget this month yet need to repair a leak in your RV’s air conditioning unit, this Leisure Time Marketing solution is the finest option.
This gasket kit is one of the most competitively priced on the market, however unlike the low-cost alternatives, it performs as claimed.
It makes no difference what brand of air conditioner you have.
If it’s standard-sized, you can be certain that this gasket will fit snugly.
This gasket’s internal measurements are 14″ x 14″, which is the standard for practically all RV manufacturers.
I particularly like that this gasket may be installed without the need of any extra equipment.
Simply ensure that the surfaces are clean and dry before beginning to peel off the adhesive side’s backing.
This gasket performs similarly to the original gasket that came with the air conditioner, if not better, but I have yet to determine if it will outlive the original.
There have been no leaks or chilly breezes from the air conditioning vent so far.
For something so inexpensive, it’s not a terrible value.
However, I do have one issue with the gasket, which is made up of four rubber foam parts.
Even though the sealed seams are almost welded together, they are the weakest components of the overall gasket, thus there is always the risk of them bursting off over time.
You may, however, review and strengthen it for a more durable seal, and it will be alright.
What We Enjoy
- While being affordable, it nevertheless provides adequate sealing.
- All standard-sized RV air conditioners are compatible.
- It is simple to install since it does not need the use of any extra tools.
- It works exactly like OEM gaskets, but it’s a little less pricey.
- There will be no leaks or chilly drafts, according to the manufacturer.
What We Don’t Care For
- After a time, it’s necessary to double-check and strengthen.
Despite the fact that it takes some rechecking and reinforcing after a time, I found it to be really successful at keeping rainfall and AC condensation away.
#8. Dometic Roof Gasket Kit
I like how thick the material is in this Dometic Roof Gasket kit.
It is 2.5 inches in length, making it one of the thickest gaskets I’ve ever used.
I typically avoid using gaskets that aren’t made of one solid piece of rubber foam, but I’m ready to make an exception in this situation.
One reason is that I observed it properly bonds the connections between the individual strips of foam rubber using a high-quality adhesive.
The joints seem to be welded together.
There are no gaps or pores through which water may leak through.
This gasket also effectively prevents precipitation and AC condensation from entering the RV.
Following the installation of the new gasket, a couple of rainstorms pounded my RV, yet despite buckets of water pouring down over the roof, not a single drop made its way inside.
This gasket was likewise simple to put in place.
Removing the air conditioner and scraping off the old gasket took me longer.
The good news is that the gasket’s underside already includes a strong adhesive, so you won’t need to buy any more glue.
To expose it, just remove the backing paper and place it on the bottom of the air conditioner.
The item is 28 inches long and 18 inches broad for your information.
It’s also incredibly light, weighing in just under one pound.
This implies that the goods will not contribute to the weight of your RV.
My only criticism with this gasket is that it does not include leveling blocks.
I had no choice but to utilize the old gasket pieces as leveling blocks, and they performed well.
However, the kit would have been much superior if it had included the leveling blocks.
What We Enjoy
- Made of robust, long-lasting foam rubber.
- Seams that are well sealed and glued
- A watertight seal is formed around the vent aperture.
- With self-adhesive tape available, installation is simple.
- At less than one pound, it’s surprisingly light.
What We Don’t Care For
- The package does not contain any leveling bricks.
Although you need use additional caution when installing this gasket on the air conditioner, you can expect it to endure for more than a year before needing to be replaced.
With that in mind, I believe it is a wise investment.
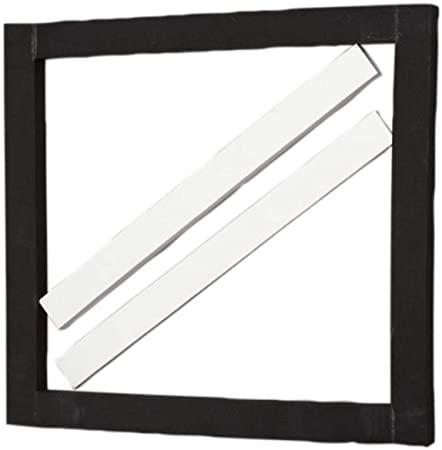
#9. Ventmate 65527 Gasket Kit
The conventional 14″ x 14″ proportions are not used by all RV air conditioners, which is frequently the case with bigger motorhomes.
If this is the case with your air conditioner, the Ventmate 65527 gasket kit is what you need.
This gasket measures 14″ x 16″ on the inside, which is the common size for air conditioners that don’t utilize the regular 14″ x 14″ vent ports.
Seams in gaskets are not my favorite feature.
The fundamental reason for this is because the seams are the weakest part of the gasket.
However, with this one from Ventmate, I’m ready to make an exception.
The seams were fused together with an excellent sealer, making the connections fully waterproof.
This long-lasting gasket is comprised of high-quality, thick rubber foam material, as anticipated.
The gasket does not compress to its maximum capacity right away after installation, and it hasn’t flattened completely even after a week.
It indicates it created a tight seal around the air conditioner’s base.
Even better, this gasket came with two leveling blocks: one that has the same thickness and density as the gasket, and the other that is half the thickness.
While the gasket is still being compressed, you’ll need these foam pieces to keep your air conditioner steady and level.
Only one criticism: the adhesive is so powerful that you cannot move the gasket after it has been adhered to the air conditioning unit.
However, you may look at it as a plus since you know the gasket will not come loose at this point.
What We Enjoy
- With its 1416 inch size, it can accommodate even non-standard apertures.
- Seams are entirely sealed and bonded.
- Gasket material is thick and durable for long-term usage.
- Leveling blocks are included.
- Adhesive backing that is very strong
What We Don’t Care For
- Once glued on, it’s almost hard to move.
When it comes to air conditioning equipment and accessories, Ventmate has always been a brand you can trust, and this gasket kit is no exception.
Given its many outstanding features, it is well worth investing in and checking out.
#10. Valterra A10-1414 AC Seal
This Valterra gasket seal is made of a solid foam that will not disintegrate in a matter of months.
This gasket may last at least a year with good care and installation, which is rather impressive considering how inexpensive it is.
There are just a few other brands in this price range that can match this level of quality.
This gasket can successfully protect rainfall and AC condensation runoff from leaking into your RV if installed correctly.
Even while it will not last as long as the more costly brands, you will find that it is a perfect substitute when you are in a hurry.
For example, if your maintenance budget does not allow for OEM gaskets but you need to replace your old one right away.
Despite the fact that it requires some setup, this device can adhere to the bottom of your air conditioner firmly.
It’s possible because the gasket’s base has a very sticky adhesive backing.
To expose the sticky bit, simply remove the backing paper and lay down the gasket.
Make careful to take your time with this step, since repositioning the gasket without breaking it is very difficult.
The greatest difficulty I have with this gasket is that it requires self-assembly.
You will get four pieces of rubberized foam that must be adhered together to form a frame.
Although the corners come with adhesive, you’ll need firm hands to properly join them.
What We Enjoy
- Made of sturdy, long-lasting foam material that will endure for years.
- When built correctly, it may effectively prevent leaks.
- While being affordable, the product maintains its high quality.
- The gasket is held securely in place by an excellent adhesive.
What We Don’t Care For
- You’ll have to put the gasket together yourself.
This is a wonderful option if you’re on a budget and need to address a leak in your roof as soon as possible.
You just need to be extra cautious throughout the installation to ensure that everything is done correctly.
Buying Guide for RV AC Gaskets
RV AC gaskets may seem little, yet they play an important role in protecting your RV from moisture damage.
It may also aid in the maintenance of your air conditioner’s efficiency.
As a result, you should get the greatest one you can afford.
It will last longer if you use the finest gasket available.
As a result, you won’t have to change it as often.
Here are some crucial elements to consider after you start shopping to assist you locate the finest product.
Material – The kind of material used in AC gaskets determines the type of gasket.
These items are often available in metallic, non-metallic, and semi-metallic varieties.
Each has its own set of advantages and disadvantages.
Metallic gaskets, for example, are very resilient and may endure a long period.
The issue is that the metallic material is susceptible to rust, which may leak into the roof’s inside.
Gaskets made of non-metallic materials are more elastic and compressible.
One disadvantage is that these gaskets deteriorate after a year or two, and when they do, they begin to produce dust.
Semi-metallic gaskets, on the other hand, not only endure a long time, but they also resist corrosion better.
These materials can also be compressed relatively easily.
They do, however, degrade after a few of years of usage.
On the other hand, various brands may provide significantly varying quality items.
If you want professional advise on which brands to use, check out online RV owner’s forums for guidance from others who have been in the same scenario as you.
Brand — A well-known AC gasket manufacturer would not jeopardize its years of hard work by offering a poor product.
When you buy anything from a trustworthy, well-known, and established brand, you nearly always know you’re receiving an excellent product.
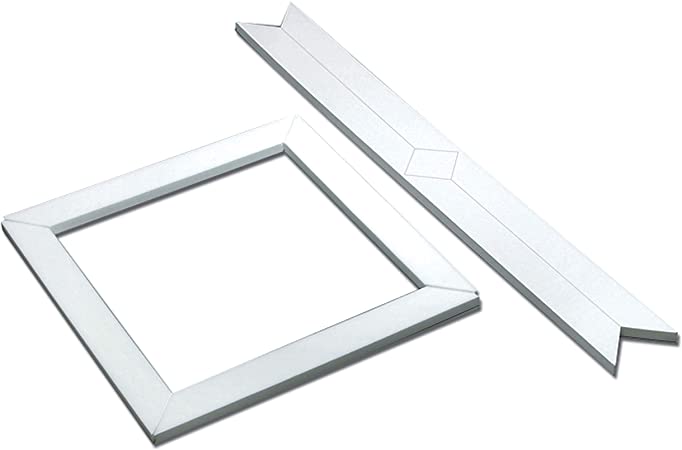
Construction – The majority of gaskets on the market today are made up of four strips of gasket material bonded together with a strong adhesive.
If you can locate a gasket that is made up of one continuous piece with no seams, it is the ideal option.
Many brands, on the other hand, come with seams that operate well regardless.
Before you buy anything, look at the seams.
If you discover that there are still areas of unfused gasket material, this is not acceptable.
Installation Ease — Installing a new AC gasket is a rather simple task, but you can always make it simpler.
For example, the double-sided tape may be pre-applied on the gasket so that all you have to do is peel off the backing and attach the gasket.
When it comes to installation, never use an adhesive or sealer on the side of the gasket that meets the roof.
When you need to repair the gasket later, it will be almost hard to tear the air conditioning unit apart.
Price – These components are not too costly, so you should aim to acquire the ones in the higher price levels.
However, the cost will be different.
The kind of material used has an impact on the price, and metallic and semi-metallic materials are among the most expensive.
When it comes to AC gaskets, though, you should not skimp.
It is an important component that keeps rainwater from entering the RV.
Aside from that, it creates an airtight seal that increases the A/C unit’s effectiveness.
With all of the important jobs it can do, you should go for a high-quality model.
Why Is The Inside Of My RV’s Air Conditioner Leaking?
If water is running down the sides of your air conditioning unit even when there are no clouds in the sky, the issue is with the air conditioning machine itself.
It is, however, not a serious condition.
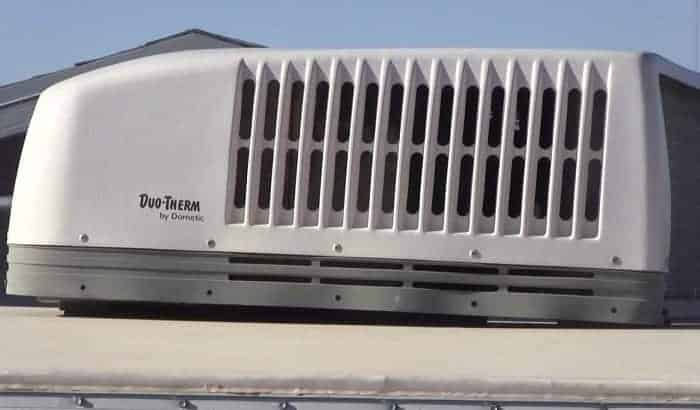
Your air conditioner works by drawing air from within the RV and passing it through very cold copper coils (freon or other kinds of coolant are flowing through them).
The fan blower then recirculates the now-cold air back into the RV’s interior.
Condensation causes water to develop within the air conditioner.
Water hanging in the air condenses on the copper coils’ surface.
Normally, the condensation would flow off the top of the recreational vehicle, but when the track is clogged with dirt and debris, the water has nowhere to go.
It is the cause of the water flowing back and forth in front of the air conditioner.
What Is the Best Way to Repair a Leaking RV Air Conditioner?
Draining the condensation pan and emptying the drain holes of any dirt and debris that may have caused the blockage is one of the simplest methods to repair a leaky RV air conditioner.
The first step is to turn off your RV’s primary circuit breaker.
It may save you from being startled unintentionally.
But don’t be concerned.
There will be no electrical wiring to be done.
Get on the roof, and don’t forget to bring your screwdrivers.
Remove the cowling and inspect the pan at the bottom of the A/C unit once you’ve arrived alongside it.
The condensed water from the air is collected in the catch pan.
Unclog the drain openings and remove as much dirt as possible from the pan.
After that, it should operate normally.
However, this is just a band-aid solution.
The air conditioner is still filthy.
It is preferable to hire a professional air conditioner cleaning service to properly clean the unit.
How Do You Install an Air Conditioner Gasket in an RV?
You’re also seeing leaks in your RV because the AC gasket has failed or is on the verge of failing.
The gasket would keep rains and chilly drafts out if it was still in excellent shape, but it won’t help much if it’s old, dried up, and cracked.
It is for this reason that you should repair your AC gasket on a regular basis.
Don’t panic; replacing the RV air conditioner seal is rather simple, however you will want assistance.
Make sure the RV’s main circuit breaker is turned off before you begin.
The ceiling assembly may then be removed.
You may disconnect the electrical connection between the top A/C unit and the ceiling unit after the bottom of the A/C unit has been exposed.
The bolts that connect the top unit to the tie-down plate must then be removed.
Lift the air conditioner from the roof opening after that.
You may wish to detach and remove the air conditioner’s plastic shroud cover, as it will give you with handholds that will make manipulating the air conditioner simpler.
Climb onto the roof of your RV with the assistance of a friend.
The air conditioner should then be lifted and placed on its side by both of you.
It’s not a good idea to put it on its side since it’ll harm the compressor.
Examine and clean the area where the old gasket used to be.
You may clean with mineral spirits or any other equivalent cleanser.
Make a point of checking to see whether you harmed the roofing material when raising the air conditioner.
If you did, you should fix it right now.
Scrape out the old gasket from the bottom of the A/C unit using a putty knife.
It shouldn’t be too difficult since it was merely adhered using double-sided tape.
You should take your time with this step since it might result in terrible consequences.
Clean the surface with the same item you used to clean the roof after you’ve removed as much of the old gasket as possible.
Place the new gasket in the same spot as the old one with care.
Be cautious since repositioning the double-sided tape after it has adhered might be difficult.
Return the air conditioner to its original position with care.
Make that it is centered over the entrance.
Replace the hold-down bolts and tighten them until the gasket is slightly compressed.
Make sure each bolt is turned the same amount of times.
Replace the ceiling assembly and reinstall the plastic shroud before returning inside the RV to reconnect the A/C to electricity.
Maintenance and Care
Once you’ve finished fitting the A/C gasket, there’s nothing you can do to keep it in good shape.
It’s worth noting that frequently raising the A/C unit can further damage the gasket.
The only thing you can do is make sure the roof gasket is installed correctly the first time.
Conclusion
If you observe water coming from your air conditioner, don’t panic; it’s likely that the issue isn’t with the machine itself.
It’s possible that your air conditioner requires cleaning, the gasket is cracked, or both.
You should obtain the greatest RV AC gasket you can afford so you don’t have to change it every few months.
Spending a little extra money on a high-quality gasket can save you a lot of time and aggravation.
It’s important to keep in mind that water pouring through your roof might cause serious damage to your RV.
Furthermore, gaskets are inexpensive.
You can probably afford to acquire the most costly one if you want to, so don’t scrimp on it.