One of the most well-liked vacuum brands on the market is Shark.
Most models, which are well regarded for their performance, include numerous filters to catch dust while you vacuum.
Vice President of Product Development for SharkNinja, Julien Levesque, on the significance of changing a vacuum’s air filters: “To ensure that you get the best clean possible each time you clean, cleaning your vacuum’s filters as instructed will help preserve its suction strength over time.
All of the filters that come with your Shark vacuum may be cleaned or washed for subsequent uses, including HEPA filters for models that support them.”
How Often Should Your Shark Vacuum Be Cleaned?
No matter whether you have a robotic AI, upright Shark Navigator, canister Vertex, PetPro Stick, or can, it has to be cleaned often.
To maintain suction, dust cups or bins should be emptied every time they are used or about halfway full.
Each month, the exterior housing should be cleaned of dust and the rollers and hoses should be examined for tangles, obstructions, or breakage.
According to Levesque, “each product’s instruction booklet has precise advice on how to clean and maintain your filters.”
The Shark Navigator’s user guide suggests cleaning the post-motor filter once a year and the pre-motor filters every three months.
Tip
Visit sharkclean.com to retrieve the instruction manual for your specific model of Shark vacuum if you’ve misplaced or thrown away the original.
You may learn about the location of the filters, how to clean them, and how often to do so.
What You’ll Need
Resources / Tools
- The sink or a big basin
- Microfiber towels
- Drying ledge
- Nylon brush with a soft bristle
- Garbage can
- Small scissors or a seam ripper
Materials
- Warm and chilly water
Instructions

#1. Security First
Remove the cable from the electrical socket or take the Shark vacuum out of the charging station before cleaning it.

#2. Examine And Tidy Up The Roller Brush.
In order to assist remove dirt and dust from carpets and floors, a vacuum must include a roller brush or beater bar.
The vacuum won’t work properly if it can’t spin due of threads or matted hair.
To cut through knotted material, use a seam ripper or a pair of tiny manicure scissors.
Verify that the roller may move freely.

#3. Maintain The Dust Collection Container Or Bin.
Take out the vacuum’s cup or bin for collecting dust.
Put the container’s contents in a garbage can.
Warm water should be used to rinse the trash can, and the interior and exterior of the container should be cleaned with a microfiber cloth or sponge.
Open the bin’s top and bottom hinged sections if you can so the bin can air dry.

#4. Verify the Hose
Remove the dust container, then detach the hose and look for obstructions.
As you go down the hose, look for any minor cracks or holes that can affect the suction of the vacuum.
Remove any blockages by disconnecting the hose from the area close to the vacuum’s head.
Use a yardstick or garden hose to break apart any obstructions you discover.
Work cautiously and gently to avoid cutting the hose.
After cleaning it with a moist microfiber towel, properly reattach the hose.

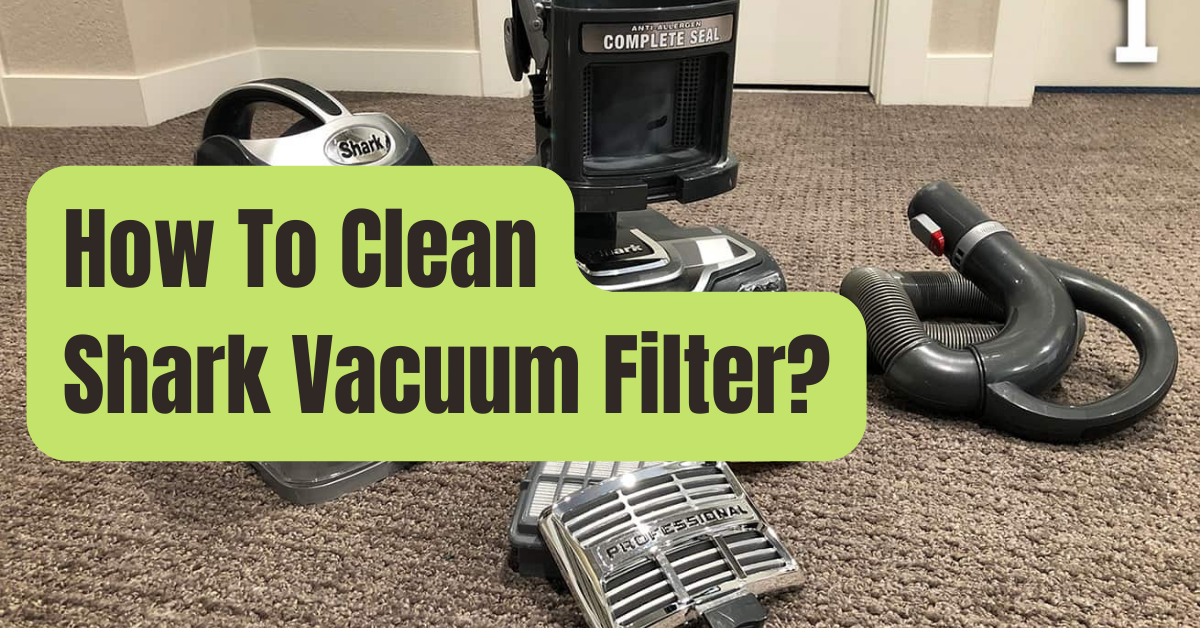
#5. Clear the Screens and Filters
Find the dust screens and filters.
Only rinse the foam and/or felt filters with cold water to clean them.
Avoid using any soap or cleaning agent that might harm the filters.
To remove dirt, gently compress the filters with your fingers.
Until the water is clear, keep changing it.
To remove extra water, roll the filters with a microfiber cloth.
Avoid wringing.
If there is debris stuck to a pleated filter, use a soft-bristled nylon brush (such as an old toothbrush) to gently brush the dust away.
Hold the filter in the plastic housing under a cold water tap until the water is clear to clean it.
To avoid liquid being sucked into any electric component, place the filters on a drying rack and let them air-dry for at least 24 hours before reinstalling them.
Tip
Levesque concurs, “Although we provide a lifetime warranty on our filters, we also offer replacements to our consumers.
If you do a lot of vacuuming and need to wash one set, it’s a good idea to have a second set on hand so you won’t have to wait for them to dry.
Check the instruction handbook for your vacuum for further details since maintenance is model specific.”

#6. Clean the Housing.
Clean the external casing of the vacuum using a moist microfiber cloth.
Pay close attention to and clean up any air vents close to the engine.

#7. Examine the Power Cord
If your Shark vacuum is corded, look for any breaks or exposed wires in the cable.
If you see them, a fix is required.

Tips for Maintaining Your Shark Vacuum’s Cleanness Longer
Regularly empty the dust canister or vacuum bag.
If your house is very dusty, check the filters often.
After each usage, remove additional dust by wiping the vent covers.