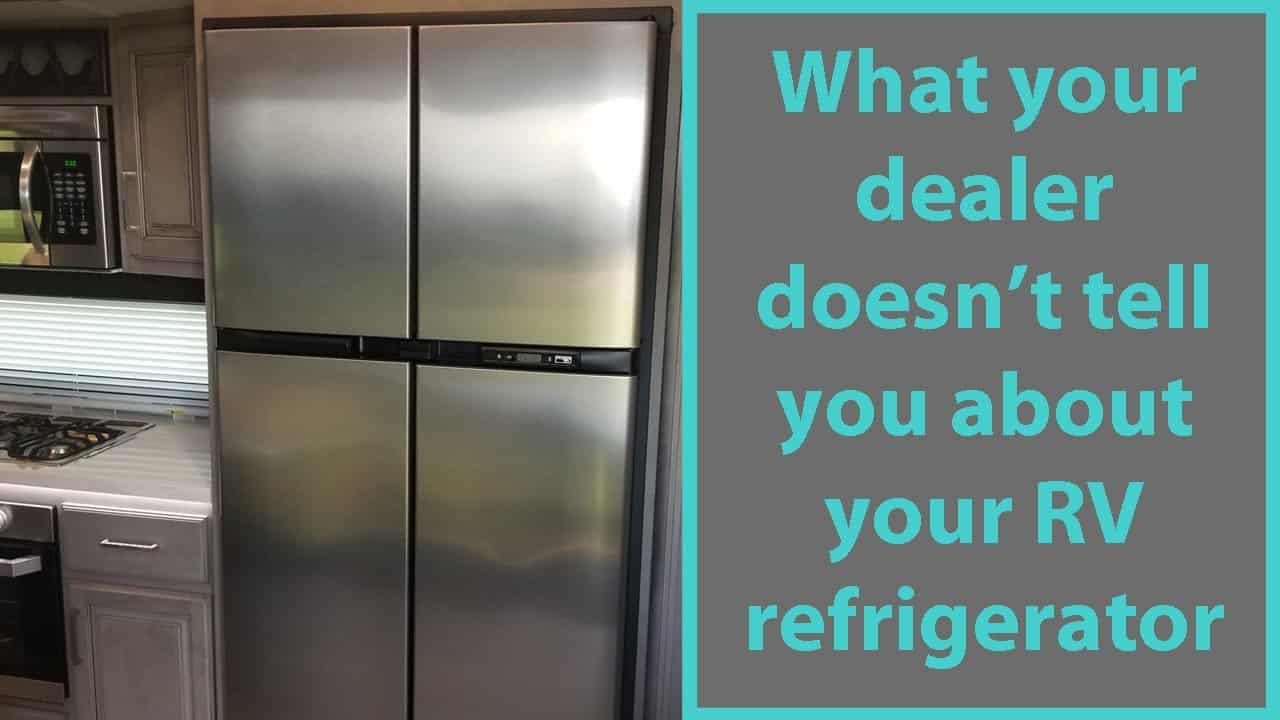
The top producer of RV gas/electric absorption refrigerators in the nation is Norcold.
Some of the quietest refrigerators are produced by them.
However, the refrigerator could “act up” or have certain faults that make it challenging to get the most out of your machine, much like other machinery and appliances.
You may be able to solve some of your refrigerator’s problems by troubleshooting your Norcold appliance.
Even though Norcold has a wide range of models, certain troubleshooting procedures are the same.
How to restart a Norcold fridge
After fixing the appliance, you may need to reset the control board if your Norcold refrigerator displays a “no” “CO” error notice on the control panel.
This will eliminate the issue.
Simply turn your refrigerator off and then back on to resolve a first no cooling problem occurrence.
A power board hardwire reset is required if, after the first incidence was resolved, a second no cooling problem code appears.
The actions listed below should be followed to reset a hardwire power board:
1. Switch off the refrigerator.
2. The following must be disconnected from the power board:
- Positive and negative 12 Vdc wires
- AC adapter cable.
- Gas solenoid valve.
- Wire for the spark/sense electrode assembly (disconnect this wire with extreme caution).
3. Power board cover should be removed.
4. Reconnect the following (in reverse order from step 2) to the power board:
- Wire for the spark/sense electrode assembly ( reconnect with extreme caution)
- Wires for a solenoid gas valve.
- AC adapter cable.
- Positive and negative 12 Vdc wires
5. Activate the refrigerator.
6. Find Pin 15 on the 16-pin wire harness connection (P1). The socket to the right of the white/violet wire is designated as pin 15.
7. Pin 15 should be temporarily connected to the power board ground lug using an insulated jumper wire. Once the controls have been reset, a click sound will be heard.
8. Switch off the refrigerator.
9. To be sure the reset worked, turn the refrigerator on. Repeat steps 7 through 9 if the no cooling fault code appears.
10. Switch off the refrigerator.
11. Take the following off of the power board:
- Positive and negative 12 Vdc wires
- AC adapter cable.
- Wires for a solenoid gas valve.
- Wire for the spark/sense electrode assembly (exercise extreme caution when disconnecting this wire).
12. Put the power board cover in place.
13. The following must be reconnected to the power board:
- Wire for the spark/sense electrode assembly (exercise extreme caution when reconnecting this wire).
- Wires for a solenoid gas valve.
- AC adapter cable.
- Positive and negative 12 Vdc wires
14. Set the refrigerator into operation.
Why Won’t My Norcold Refrigerator Cool Off?
There are various reasons why a no cooling error code could appear:
1. Related to Ventilation:
- Without ventilation.
- Obstruction of ventilation
- Cooling fan is not working.
- As directed by Norcold, the refrigerator was not installed.
2. Door Relevant:
- Doors to the freezer or fresh food section are not properly closed.
- Faulty door gaskets in the freezer or fresh food section.
3. Related to Heat Source:
a. LP Gas
- Clean burner
- Erroneous gas pressure
- Incorrect orifice size
- Incorrect burner
b. Heater AC
- The wrong AC heater.
- Not entirely seated in heater well, heater.
- Only one heater is operationally sound.
4. Related to cooling units
- Unit functioning went beyond allowed off-level levels.
- The flue cover is not positioned correctly.
- Flue baffle is missing or was not placed correctly.
- Cooling unit leaks
Error Codes For Norcold Refrigerators And Their Explanations
#1. Polar series 7, 8, 10 Cu. Ft RV Refrigerators
1. displays “no” and “FL” back and forth as an alert sounds.
The burner did not ignite or re-light, according to the fault code.
2. displays “no” and “AC” back and forth as an alert sounds.
This error number indicates that the refrigerator is not receiving AC electricity.
3. “AC” and “HE” alternately flash when an alarm sounds.
This error number on your refrigerator means there is an issue with the AC heater.
4. “AC” and “rE” alternately flash, and there is also an alert.
If you see this error number, there may be an issue with the controls for the refrigerator.
5. “Lo” and “dc” alternately flash.
This error number indicates that your refrigerator’s DC input voltage is too low.
6. As an alternative, “Lo” “dc,” sound the alarm.
The refrigerator’s DC input voltage is too low, according to this error number.
7. displays “Lo” and “dC” in sequence when an alarm sounds.
The error number indicates that your refrigerator’s DC input voltage is too low.
8. displays “HI” and “dc” alternately when an alarm sounds.
This error number indicates that the refrigerator’s DC input voltage is too high.
9. Instead, it lights “no” and “dt,” and it sounds an alarm.
This error number indicates a breakdown in communication between the controls for the refrigerator.
10. displays “Sr” and sounds an alert.
This error number indicates a problem with the electrical controls of the refrigerator.
11. flashes “oP” and “LI” back and forth as an alarm sounds.
This error number indicates that the refrigerator’s electronic controls are at issue.
12. as an alternative, displays “FL” and “- -” while sounding an alert
This error number indicates that there should not be a flame detected at the burner.
13. When the user interface is “alive,” the temperature setting flashes on and off.
This error number indicates that the temperature is being managed by a backup operating system since the thermistor has been detected as being inoperative.
14. Blank screen
Your refrigerator is either off or it won’t turn on, in which case.
#2. N510 Models
1. “F” The burner failed to start or restart.
2. “A” The refrigerator control does not have access to AC electricity.
3. “C” The refrigerator’s control panel receives insufficient DC electricity.
4. “H” The controls on the refrigerator have a problem.
5. “r” The controls on the refrigerator have a problem.
6. “S” The controls on the refrigerator have a problem.
7. After 10 seconds, the temperature setting flashes, and the mode appears.
The backup operating system is being used by the refrigerator.
Models N7V, N8V,N7X, N8X, N7LX, N8LX
1. In a solid red
- The refrigerator attempted to use the chosen energy source(s) but was unsuccessful.
2. Red, turning on once.
- AC heater problem
3. Red, two-flashing on.
- Faulty internal controls
4. Red, three-flashing on.
- Flaw in internal controls.
5. Red, four-flashing on.
- Relay for the AC heater is jammed.
6. Red, five-flashing on.
- At the burner, a flame is detected even though there shouldn’t be one.
7. Red, eight-flashing on.
- The refrigerator’s DC input voltage is too low.
8. Red, nine-flashing on.
- The refrigerator’s DC input voltage is too high.
9. Red, ten-flashing on.
- The controls are no longer in contact with one another.
10. Every 20 seconds, a green light flashes.
- AC electricity is used to power the refrigerator. The temperature is being managed by a backup operating system since the thermistor has been detected as being inoperative.
11. Every 20 seconds, an amber light flashes.
- The refrigerator uses propane gas to run. The temperature is being managed by a backup operating system since the thermistor has been detected as being inoperative.
Norcold Refrigerator Not Working On Electric Models 865, 866, 868
The following factors might be to blame for your Norcold refrigerator not operating on electricity:
#1. AC Electricity Use
- The installation and venting of the refrigerator do not meet Norcold product specifications.
- It is not used in a level, comfortable manner.
- There is no AC electricity hooked into the refrigerator.
- Terminals (J-4) ground and (+J-5) do not have 12 Volt DC power.
- Pinched wires or loose wire connections.
- The modular connection on the wire harness (cable) is not connected into the eyebrow board and power supply board correctly.
- Blown fuses.
- The AC ELEC mode selection is not selected.
- Incorrect power and voltage of the AC heating element.
#2. DC Electricity Is Used.
- DC is not 12 volts to terminals (+J-5) and (J-4) ground.
- Faulty 3 amp fuse
- The 20 (15 amp fuse does not contain 12 volts DC.
- Disconnected wires.
- The power supply and eyebrow board are not connected to the modular connection on the wire harness.
- The DC mode of operation is not selected on the mode selector.
Troubleshooting Ac Electric Mode Of Operation Models 865, 866, 868
A step-by-step manual for troubleshooting the AC electric mode of operation is provided below:
- Verify the 120 volt AC source.
- Check the power cable for 120 AC volts. Replace the power cable if you don’t have 120 volts.
- Check the terminals J4 and J5’s 12 volt DC input. Repair the 12 volt supply if you don’t have +12 volts.
- The power supply’s cord should be disconnected.
- All of the wires should be taken out of the power supply’s terminals.
- To access the power supply, remove the lid from the power supply.
- The AC and DC inputs should be reattached to the power supply’s terminals.
- Check the 5 amp fuse for 120 volts. If not, replace the 5 amp fuse since you need to have 120 volts.
- Verify that there are 12 volts DC across the 3 amp fuse. Replace the 3 amp fuse if you don’t have 12 volts.
- Check for 12 volts DC when the voltmeter is configured to measure DC. You should change the power source if it doesn’t have 12 volts.
- The power supply cord should be reconnected.
- Pull the Eyebrow assembly away from the refrigerator after removing the screws.
- From the eyebrow, remove the eyebrow board.
- Activate the OFF position on the Mode Selector switch.
- Install a voltmeter. A 12V dc measurement should be taken at Q11’s emitter. If 12 volts is not shown, the wire harness has to be changed.
- The voltage should now fall to 5.6 volts DC after switching the Mode Selector to gas. Replace the Eyebrow board if it doesn’t.
- Turn off the mode selector switch.
- Check the switch terminals with the negative lead of the voltmeter at D12. On each terminal, 12 volts are required. If not, the cable has to be replaced since it is broken.
- Select AC ELECTRIC Mode on the mode selection switch(es). Check for roughly 2 volts DC with a voltmeter. Replace the Eyebrow board if you are unable to detect around 2 volts DC.
- On the power supply’s terminals J-7 and J-8, look for 120 V AC. Replace the power source if 120 volts are not detected.
- Check the resistance of the AC heating element if there is 120V. Replace it with one that is the right size and wattage if it is not within the permissible specifications.
Where Is The Fuse For A Norcold Refrigerator?
The primary control board of the device has three fuses (power board).
A glass body cartridge type fuse (F3) is used to safeguard AC voltage circuits, while two automobile style fuses (FI and F2) are utilized to protect DC voltage circuits.
Changing a Norcold 9163 Fuse
To prevent a circuit overload, the electrical circuits of the refrigerator are fused.
If the fuse blows, replace it according to the steps below:
- Switch off the fridge.
- The wall outlet’s AC power cable should be unplugged.
- The power board cover is located at the back of the refrigerator. Disconnect the AC power cable from the power board cover.
- The power board cover’s 12 volt DC supply cables should be disconnected.
- Remove the power board cover and the ignition/sense wire.
- Pull the power board cover away from the refrigerator after removing the three screws holding it in place. Without the power board cover, do not use the refrigerator.
- Disconnect the extension board on 3-way models.
- The two screws holding the extension board cover to the refrigerator should be removed. Take the refrigerator’s lid off. Without a cover, never run a refrigerator.
- Change the blown fuse with the appropriate fuse.
Fix For Norcold Refrigerator’s Ice-Forming Fins
The source of excessive ice accumulation on the cooling fins of the refrigerator might be identified as a thermistor that is broken or placed incorrectly.
Test the thermister to see whether the thermistor is positioned correctly.
Before beginning the test method, the refrigerator must always be unplugged from the 120 volt AC power source and turned off to defrost the fns.
Thermistor evaluation:
- Take the thermistor off of the fin where it was mounted and place it in a glass of icy water with a thermometer. Give it a five-minute break.
- Before measuring resistance, the ice water must be close to 32 degrees Fahrenheit.
- After that, take off the control board’s lid and disconnect the thermistor.
- Check the resistance between the two wires with a multimeter (ohm scale). 30K to 32K should be the reading.
- Replace the thermistor if it fails the test.
- If the thermistor is found to be in excellent condition, the severe fin icing may be caused by a bad door gasket or a significant air leak.
Five Flashing Norcold Refrigerator Codes
If the power ON/indicator light on your Norcold refrigerator is red, flashes five times, is off for five seconds, and then repeats, it signifies a burner flame was detected when there shouldn’t have been one.
The gas valve may be “mechanically” jammed open, which is the likely reason of this error.
Consider changing the gas train component to resolve this issue.
Contact Norcold customer support if you need help if you are still experiencing problems troubleshooting your refrigerator.
Other complicated problems can call for a reliable repair service.

