The significance of a functioning RV roof vent fan has already been discussed, and we recently reported on the best alternatives for roof vent fan replacement.
The topic of today’s article is mainly focused on the repair process itself, especially the DIY procedures you need follow to effectively replace your RV roof vent fan.
Let’s start now!
What Is A Roof Vent Fan For An RV?
Air circulation is the goal of an RV roof vent fan.
In serving this function, roof vent fans let air to circulate throughout the RV to reduce heat, eliminate moisture and steam, and eliminate aromas from cooking.
Depending on the size of the rig, some rigs contain more than one vent fan.
Some vent fans merely blow air out, while others may suck air in or out using their reverse function.
There are even temperature and rain sensors on several RV roof vent fans.
When the RV reaches a specified temperature, a thermostat turns off the fan, and when rain is detected, a rain sensor causes the rooftop cover of the vent to shut.
An RV roof vent fan has significant uses…and you should replace it if yours breaks down.
Is Replacing An RV Roof Vent Fan A Simple Diy Project?
Replacement of an RV roof vent fan is a pretty easy DIY repair, but you must be able to work on the top of your RV.
That may not be a major concern for some individuals (and certain RVs), but it may be a difficult task for others, in which case hiring a professional to finish the installation would be the best course of action.
However, if you can climb onto the top of your vehicle and you have a few simple tools, you’re probably able to repair your RV roof vent fan on your own.
How Can My RV Roof Vent Fan Be Upgraded?
Although there are a few steps involved, upgrading an RV vent fan is not a challenging undertaking.
The most difficult element of the replacement, apart from working on the roof (always exercise care there; slipping/falling may result in severe harm), is wiring in the new fan.
Instructions are included with each new fan you buy, making this portion of the operation simple to do.
Additionally, they operate at 12-volt DC, which is far less frightening than household electricity at 120-volt AC.
If you need to choose a new RV roof vent fan, we advise you to read our article on the top three fans available, which includes detailed descriptions of each fan to aid in your choice.
Let’s get going.
Step 1: Take Away The Previous RV Roof Vent Fan

Start by removing the vent frame’s screws from the RV.
After that, ascend to the roof and discard all of the outdated roof sealants.
Use a plastic putty knife to remove the old sealant off your RV’s “rubber” roof while taking care not to harm the rubber membrane.
You may use a standard metal putty knife on a fiberglass or metal roof.

The screws holding the vent to the roof must be removed.
There will be a lot of them, so be sure you collect them all.
For tasks like these, a cordless drill identical to the one we have works well.
Sale

DEWALT 20V Max Cordless Drill / Driver Kit, Compact, 1/2-Inch (DCD771C2)
- Dewalt drill’s lightweight, compact form fits in small spaces.
- The power drill’s high performance engine provides 300 unit watts of power, enabling it to do a variety of tasks.
Eliminate the previous fan and any leftover butyl tape.
Before continuing, it’s a good idea to check that your new vent fits well in the aperture.
To continue preparing the space for installation, remove the vent.
There shouldn’t be any issues here since RVs often have 14″ x 14″ slots for fans (which air conditioners also fit into).
Step 2: Examine And Clean The Vicinity Of The Vent Opening.
Wipe away any dirt or lingering sealant in the area surrounding the vent aperture using mineral spirits or denatured alcohol.
When applying mineral spirits or alcohol to the roof of your RV, always use care (and only use the minimal quantity of substance required).
Some roofs, referred to as “rubber” roofs, constructed of materials like TPO or EPDM, for example, might be harmed by using these items excessively.
A tiny bit applied to a cloth should do the task well.
At this point, pause for a moment and pay close attention to the opening’s frame.
Verify the area for any obvious damage or mold.
The vent removal offers you the chance to check for and address any problems that may have developed gradually but aren’t typically obvious.

The area surrounding the entrance should be examined for any signs of prior water incursion as well as for any damage that might make the region subject to leaks once the replacement fan is fitted.
Prior to installing your new vent, perform any required repairs if you discover any damage.
Step 3: Wrap Your New RV Roof Vent Fan with Butyl Tape
You’ll need high-quality butyl tape, sometimes known as “Putty tape,” for this stage.
This product works well for our purposes, and we’ve utilized it:
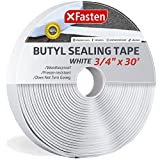
XFasten Butyl Seal Tape, White, 1/8-Inch x 3/4-Inch x 30-Foot, Leak Proof Putty Tape for RV Repair, Window, Boat Sealing, Glass and EDPM Rubber Roof Patching
- HIGH QUALITY RV AND MOBILE REPAIR. The XFasten Butyl Tape can effortlessly imitate how experts seal their windows or roofs, both in terms of appearance and…
- WATER-TIGHT, CORROSION-RESISTANT, AND ELASTIC FINISH. Eliminates gaps during installation and effectively turns off moisture, vapor, corrosive chemicals, and…
All the way around the roof vent, wrap the butyl tape around the bottom flange.

To ensure a tight seal all the way around when you install the new vent, make sure the butyl tape covers the screw holes.
Step 4: Fit The Fresh RV Roof Vent Fan.
Make sure the lid opening of your new vent fan is towards the back of the RV and insert it into the aperture after moving the wires out of the way.

Fix the new vent fan to the roof once the fan has been set up correctly.
Install the screws, then tighten them just enough so that the butyl tape protrudes beyond the vent flange.
Don’t tighten the screws too much.

Remove any extra butyl tape that has escaped around the vent flange after tightening all of the screws.
For this job, a plastic putty knife works well.
Step 5: Properly Seal The New RV Roof Vent Fan
As usual, it’s crucial to apply the right sealant around the flange of your new vent.
Use silicone or any other caulk sparingly.
To do the task correctly, you must use a high-quality self-leveling lap sealant.
We usually have a stock of Dicor self-leveling lap sealant on board our rig and strongly recommend it.
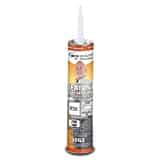
Dicor 501LSW-1 Epdm Self-Leveling Lap Sealant-10.3 Oz. Tube, White, 10.3 Fluid_Ounces (Packaging May Vary)
- Creates a strong secondary seal around the screw heads, air vents, and edges of the roof.
- Adheres strongly to concrete, fiberglass, galvanized metal, wood, vinyl, masonry, and aluminum.
First, apply lap sealant to the screw heads individually.
Then, wrap the flange in a thick bead of lap sealant.
Here, don’t be timid.
Go gently and give yourself enough time to ensure adequate coverage if you want the bead of sealant to join the flange to the roof.

Step 6: Switch On Your Battery Your RV Battery Should Have The Switch Disconnected Or The Negative Cable Removed.
You should either engage (turn off) your RV’s 12V battery disconnect button (if it has one) or separate the negative connection from your RV’s house battery bank before working on any wiring in the vehicle.
You’ll need a 12V power source to connect your new fan since it requires 12V electricity to operate.
The original 12V roof vent fan’s wiring should function flawlessly.
Step 7: Comply With The Directions On Your New Fan To Make The Correct Electrical Connections.
Any new vent fan you purchase will come with instructions on how to connect it to the existing wire.
To hook up the new fan, adhere to those directions.
For this technique, you’ll need to remove a few wires, thus a wire stripper is a useful instrument.
Sale
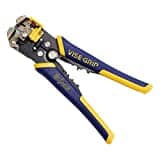
IRWIN VISE-GRIP Wire Stripper, Self-Adjusting, 8-Inch (2078300)
- SELF-ADJUSTING: Our self-adjusting mechanism can strip wire ranging in size from 10 to 24 AWG. Size of Jaw: 2 inches
- ADJUSTABLE STOPPER: The built-in adjustable stopper allows you to control the length of the core strip.
Step 8: Disconnect The Battery Replace The Negative Cable On Your RV Battery Or Disconnect The Switch.
After completing the wiring in accordance with the instructions that came with your new vent fan, replace the negative connection to your 12V battery bank or engage (turn on) your 12V battery disconnect switch.
Step 9: Test the New Vent Fan on Your RV and Replace the Trim Ring
Test the new RV vent fan’s features before finishing the installation.

Reinstall the trim ring after the fan has been verified to be operating correctly.
When tightening the trim ring screws, use care.
The trim ring may shatter if it is overtightened.
Why Is a Running Vent Fan in an RV Important?
RV roof vent fans help regulate the temperature within the vehicle, which is vital from a comfort standpoint.
Additionally, everyone enjoys living in an RV better when cooking and other scents are eliminated.
A roof vent fan’s ability to remove moisture from the RV, which may lead to mold and mildew and other potentially dangerous issues if left unchecked, is possibly its most crucial remedial role.
Any way you look at it, an RV’s roof vent fan is one of its most essential components, which is why the majority of RVs come with one.
RV roof vent fan replacement is not only simple but crucial for an RVer’s quality of life in the event that an RV vent fan stops working over time, owing to an electrical problem, or for any other reason.

