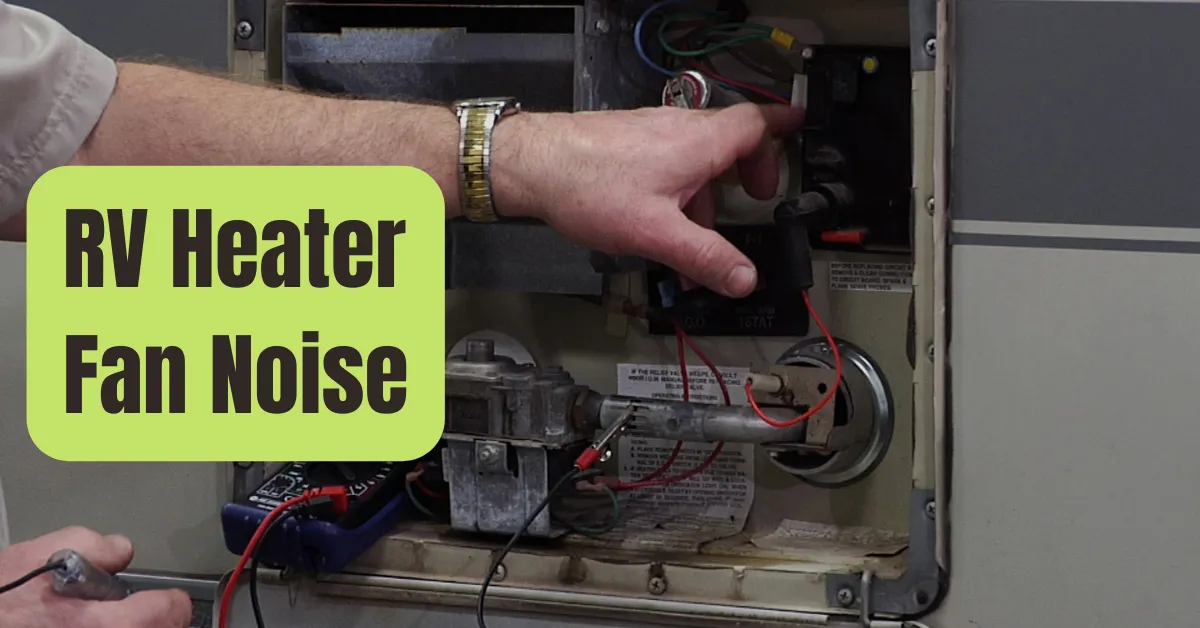
Is the furnace in your RV making noises like an elderly man snoring, rattling, banging, creaking, or roaring? Most RV owners find it hard to live in a cramped place with a loud machine.
Let’s evaluate your current problem so you can live quietly.
How to turn a noisy RV furnace down in six easy steps.
Following these six procedures will make it easy to quiet a loud RV furnace:
- Clean the furnace’s filters, vents, ducts, and exhaust systems.
- Fix damaged bracing and tighten slack hardware.
- Inspection and repair of ductwork
- lubricate and clean the fans.
- Check the gas lines and the ignitor.
- Repairing or replacing a blower motor
Of course, you could just switch it off to get rid of the noise and the problem’s main source.
But I realize you want to repair the furnace and take advantage of the warmth it offers.
To assist you enjoy a furnace that is silent, we’ll go through some practical maintenance and soundproofing advice.
Why Is The Furnace In Your Rv So Loud?
When your house begins producing unusual sounds, you immediately notice it as a motorhome owner.
Your furnace is attempting to alert you something is wrong if it begins producing as much noise as it produces heat.
Despite the fact that there are a number of potential causes for a furnace to sound off, if you can identify the sort of noise you are hearing, you may be able to pinpoint the issue even more precisely.
Including removing trash from the furnace components to simply tightening bolts and lubricating noisy bits.

Find the cause of the annoying noise!
The typical procedures listed below were put together by skilled technicians and are ones that the majority of RV owners would feel confident carrying out on their own.
Get your tools, flashlight, and gloves ready!
Ed Wilcox, a qualified RV technician, leads you through all the processes you need to know to properly maintain your vehicle and repair issues as they arise in the self-guided online course Fix It Yourself.
How to Begin an RV Furnace Repair
Security first! To keep yourself safe when working on the furnace, shut the valve that supplies propane to it and remove the fuse.
Just so you know, your furnace may be utilized when you are disconnected since it is powered by your 12V electrical system.
Step 1: Thoroughly Cleaning The Furnace.
Step one should be a part of your seasonal RV maintenance regimen; occasionally, when it’s hot outside or until issues emerge, items like this are forgotten.
By keeping up with routine maintenance, we may avert some of these serious problems.
It is advised to clean your furnace every summer and winter, and it is quite easy to do.
Both before you start using your furnace and after the whole winter has passed, clean it.
Dust and other dirt may accumulate in layers and enter areas where they shouldn’t if you let this task slip through your fingers.
Unbelievably, a small quantity of dirt may create a significant issue.
The simplest technique to maintain the system operating properly and costly repairs at bay may be to clean the area surrounding and in and around the furnace components.
Use an aerosol dust blower often used on computer keyboards or a wire brush to carefully reach tight spaces.
An old cloth and degreaser cleaner should work well for spots that are easier to reach.
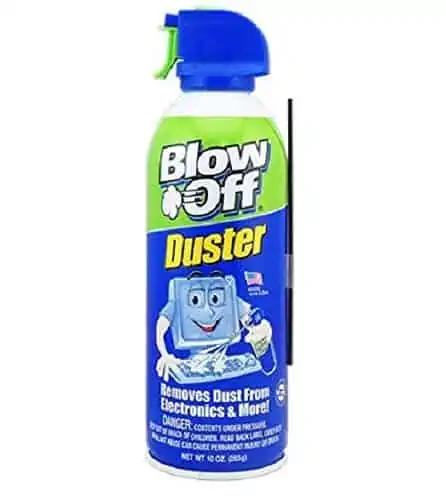
Blow Off 152a Air Duster (10 Ounce Unit) -8152-998-226
- Wonderful for domestic usage
- Recycling is safe for the ozone layer.
- Does repairs on blinds, seats, sculptures, and silk flower arrangements
In case your RV has one, you should also check the furnace filter.
Many don’t since doing so may reduce the furnace’s efficiency by restricting the return airflow.
If you do have one or have an aftermarket one installed, clean it or change it.
Although vacuuming your ducts at least once a season is a good practice, particularly before you use the furnace for the first time that year, it may not reduce the amount of noise your furnace makes.
Through regular usage of your RV, common dirt and dust may enter your ductwork.
Then, when the furnace turns on, it will circulate the air with all that disgusting things in it.
For the same reason, you should also make sure the air exit vents are clean.
If you can, get to the fan blades and clean them with a little brush.
Be careful to properly vacuum the fan blades after cleaning them.
The fan blades might get weighed down with dust, making the furnace noisier.
Cleaning them will help your fan function more efficiently by eliminating the extra weight.
Additionally, you need to examine and clean the furnace’s exhaust pipe.
Noise may be produced if your exhaust is clogged.
Check to make sure your exhaust pipe is clean since RV furnace exhaust pipes are infamous for being obstructed because they provide a warm environment for vermin.
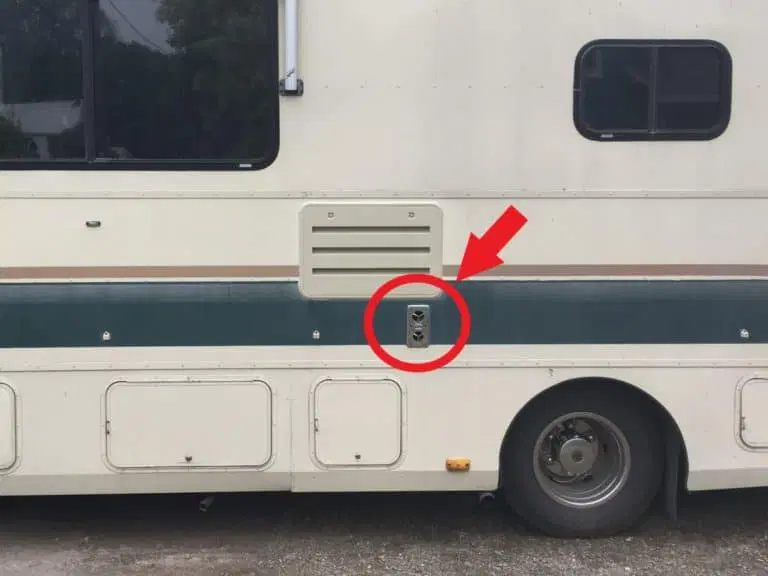
Step 2: Repair Broken Braces and Tighten Loose Hardware
You may be able to stop the rattling by giving your furnace system a once-over to make sure all the nuts and bolts are secure.
Parts might be rattling or vibrating together if there is loose hardware.
Get your toolbox ready since not all of the hardware will be Phillips head screws as you would expect.
Check for any bracing that may have come loose since they might be the source of rattling and other unwelcome unneeded sounds in addition to tightening screws, nuts, and bolts.
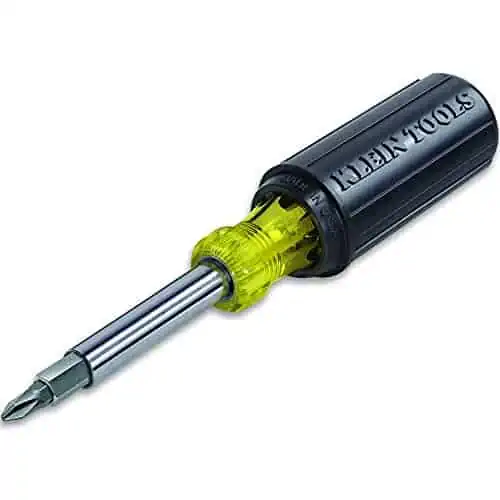
Klein Tools 32500 11-in-1 Screwdriver / Nut Driver Set, 8 Bits (Phillips, Slotted, Torx, Square), 3…
- The multi-bit screwdriver/nut driver shaft can change from three different nut driver diameters to hold eight common tips.
- Includes heat-treated, industrial-strength bits in the following sizes: 3/8-, 5/16-, and 1/4-inch nut drivers; #1 and #2 Phillips; and 1/4- and 3/16-inch
- Blade that may be quickly and easily changed; comfortable Cushion-Grip handle
Some RV owners have discovered that the fan wheel was really rubbing against the metal housing plate situated next to the burner when their fans were loudly screeching.
The horrible noise was simply silenced by inserting a screw to hold the metal housing plate away from the fan and prevent further rubbing.
Broken metal retaining clips have produced some high-pitched vibrating sounds.
The exhaust wheel may move inward and start to make contact with the plastic housing without the holding clip, which might result in a loud screaming sound.
Step 3: Inspection And Repair Of Ducts
The source of your pounding sounds may be found by inspecting your ductwork.
Your RV’s model will determine where your ducting is located.
Your ducting will be positioned on the bottom of the RV if you have floor-mounted vents.
Gather your flashlight, and crawl under your RV.
Gently shake the ducts to check for any apparent locations where the noise could be coming from or anything that seems out of the norm.
Simple bracing that are used to hold duct tubes in place over time have a tendency to break free, which allows the tube to wander about, particularly while heat is being poured through it.
This braces’ replacement is a straightforward process.
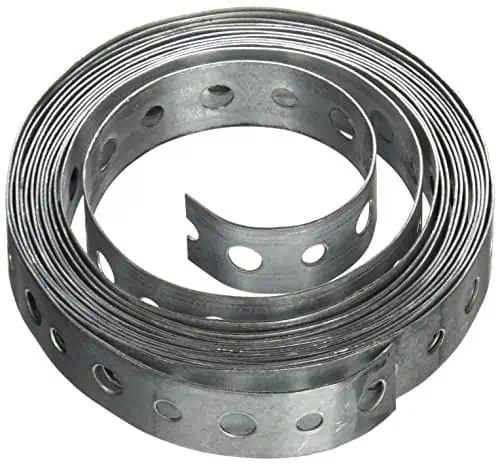
Pick up a roll of perforated metal strapping, cut it to the correct length (the circumference of your duct tube plus a few extra inches to secure it), find a suitable location to secure the duct, screw a screw through one of the strapping’s holes, stretch the strapping along the underside of the duct so it is tightly held, screw another screw to secure the strapping, and snip any excess strapping.
Sale
Sioux Chief 524-1022PK2 3/4-Inch by 10-Feet 22-Gauge Metal Hanger Strap
- Hook strap
- 3/16-inch and 1/4-inch holes alternately spaced
- Zinc-Coated Steel
Additionally, look at the state of your duct collars.
These are the rounded metal fittings that connect the vent covers to the duct tubing.
Loose-fitting collars not only produce noise, but they also lose effectiveness by letting heat to escape before it gets to the coach of your rig.
If you hear a high-pitched whistle-like noise, your ducting may be leaking someplace.
You may easily fix broken tubing by replacing it, or you can use HVAC aluminum tape to seal the leak.

Sale
Professional Grade Aluminum Foil Tape – 2 Inch by 210 Feet (70 Yards) 3.6 Mil – High Temperature -…
- 33 percent MORE THAN THE COMPETITION! 2 INCHES BY 70 YARDS – MADE IN A BEAUTIFUL SILVER METAL FINISH.
- INCREDIBLY RESISTANT – Effectively Performs in Any Weather and Easily Resists Moisture, UV Rays, Flames, and Chemicals!
- PERFECT FOR SEALING AIR DUCTS – Easily seal HVAC Air Ducts and other Hot or Cold Intakes with this product.
Step 4: Fan Lubrication And Cleaning
The furnace’s fan may make loud sounds like squeaking, screeching, grinding, or slamming.
In the simplest situations, clearing the fan of debris or giving it a grease injection might stop the annoying sound.
Alternately, we could wind up delving more deeply into the troubleshooting procedure.
Another possibility is that the fan cage gradually became looser.
To tighten it back into place, an Allen wrench is often needed.
Make sure no animals have gotten inside the heater by carefully inspecting the fan cage and the area surrounding the blower motor.
Even though the fan cage is supposed to avoid problems like these, they sometimes arise and the animal never emerges victorious.
Wasp or mud dauber nests might also be the cause of fan noise.
Check to see if anything is moving about within the fan housing while it is operating if you hear a clunking sound when you manually spin the fan.
Now, lubricating the fan’s bearings may reduce some screaming or screeching brought on by friction, but this is just a temporary solution.
In essence, the bearings are so worn that the bushing, which acts as a bearing, may move relative to the fan motor shaft.
A few drops of mild viscosity oil, such as sewing machine oil, may be applied to the shaft exactly next to the motor to grease the bearing.
The oil should “wick in” if you turn the shaft manually.
This may be done many times.

Sale
Supco M098 G84-620 Zoom Spout, Multi Purpose Precision Oiler, White
- Model M098 G84-620 from the manufacturer
- Original Replacement Item
- SBPC Item
The motor of your furnace will likely need to be replaced soon even if lubricating the bearings was able to solve your loud furnace problem.
Step 5: Inspect the Ignitor and the Fuel Lines
All RV furnaces use propane, which has to be ignited to begin the combustion process.
When the ignitor ignites, there will be a clicking sound, but it should stop as soon as the gas is forced through the pipes.
If you continuously hear a clicking noise, there may be something wrong with the lines or the ignitor that is preventing it from sparking.
Start by checking the obvious, the propane supply, if your furnace isn’t operating (i.e., not producing heat) and your ignitor is clicking away but failing to ignite the furnace.
Verify that the valve is indeed open and that you have fuel.
Perform a visual examination of your lines in the event that the valve is open and you have fuel.
Your lines are probably in excellent shape if they all seem to be intact and you don’t smell the strong rotten egg or dead animal smell of propane.
You most likely have a faulty ignitor at this time, which you can fix yourself or have replaced by taking your RV to an RV store.
The ignitor should stop clicking if your furnace is functioning properly since it has feedback that lets it know whether or not the flame has really been started.
Changing the ignitor could fix the issue, but if the control board or some underlying problem is at blame, a new furnace may be necessary.
Step 6: Repair Or Replacement Of The Blower Motor
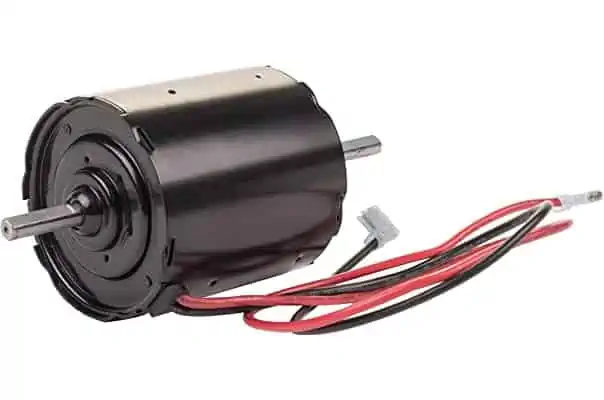
As I previously said, there is a strong probability that your blower motor—also known as a fan or fan motor—is dying a long and loud death if your furnace is screeching.
Ideally, you’ve previously completed steps one and four and verified that the engine isn’t clogged with trash, animals, or dirt.
There are two difficult to identify causes of this screeching sound from the outside
- Defective motor bearings
- A busted steering wheel
A motor wheel will make a metal-on-metal scraping noise when it breaks, but if it is just out of balance or loose, it may sound like a flat tire or a washing machine in the last rinse cycle.
As noted in step four, bad bearings could be temporarily fixed with a squirt of oil.
Apply some oil to the fan shaft, such as sewing machine oil, then whirl the fan a few times to allow the oil to go down the shaft and into the bearings.
Repeat this a few times, and it should temporarily lessen the noise while you look for a new blower.
Nevertheless, you don’t necessarily need to replace your furnace if your blower motor is failing.
Fortunately, it is a rather simple item to replace out on many RVs, however it will depend on the brand and type of your furnace and your RV.
You should have no trouble doing this work if you are confident handling most tasks related to your RV.
If you’d want, you may also pay someone else to perform this job, but it will cost much more money.
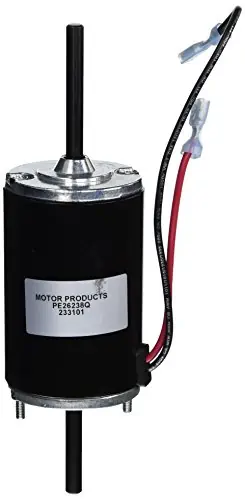
Suburban 233101 Furnace Blower Motor – 12 Volt
- Residential furnace’s blower
- Fits SF-20 (under S/N 12205202), SF-20F (under S/N 012205202), SF-25 (under S/N 012106952), SF-30 (under S/N…
- Part number for suburbs: 233101
This video demonstrates how to take apart your furnace and replace the engine.
The information in the video is excellent, and you should be able to modify the procedure for your particular model.
Your life will be a lot simpler if you can access your furnace from the outside.
Watch the video below to learn how to replace your blower motor without taking apart the complete furnace.
What Amount Of Propane Is Required To Heat An RV?
If the furnace is continuously operating, a 30′ RV would typically burn around 1/3 of a gallon (about 1.4 kg) of propane in 1 hour.
But in reality, there is no precise response to this question since it relies on a variety of distinct variables.
Now, unless it is really cold outside or you’re attempting to make your RV as hot as Hawaii, your furnace doesn’t often operate nonstop.
As it reaches the predetermined temperature, your RV’s furnace will cycle on and off, just like your furnace at home.
Check the BTU rating on the furnace itself to find out how much propane your RV heater consumes.
A simple and dirty technique is to assume 1,000 BTUs per linear foot of RV if you don’t have that available.
Currently, a gallon of propane generates around 90,000 BTUs of energy.
Therefore, a 20,000 BTU furnace will use around 1/4 gallon of fuel every hour of continuous usage.
Once again, this is ongoing usage.
It’s also a good idea to bear in mind that, just to confound us, the majority of propane tanks are rated in pounds.
Propane weights roughly 4.2 pounds per gallon.
Therefore, a properly filled typical 20lb BBQ tank should hold roughly 4.72 gallons of propane.
Other aspects to consider include your RV’s insulation level, the outside temperature, where you are parked (for example, shadowed and windy vs sunny and calm), and if you are utilizing any supplementary heating.
Additionally, keep in mind that propane is utilized for things other than your heater.
When in use, the refrigerator, hot water heater, stove, and generator all burn propane, reducing the amount of time between fill-ups of your propane tank.
RV Maintenance Course for Do-It-Yourselfers
The most expensive costs associated with owning an RV are repairs and upkeep.
I advise learning how to maintain and repair your RV on your own for this reason.
The best approach to learn how to do the most frequent repairs and maintenance on your RV is to take the Fix It Yourself RV Maintenance Course.
You may trust that the content in the course was written and narrated by a Certified RV Technician.
Additionally, it may be downloaded so you can access it from any location, even while boondocking in a remote area without connectivity.
Advice on RV Furnaces Safety
Modern furnaces have several safety mechanisms and are quite secure.
It is crucial to adhere to the advised safety precautions even if your RV has a more recent furnace installed.
#1. Place a Carbon Monoxide Detector in Your Home
Any home or RV that burns fossil fuels needs a carbon monoxide detector, also known as a CO2 detector.
Gases like carbon monoxide are produced when fuels like propane don’t burn fully.
Carbon monoxide is problematic since it has no taste, flavor, or color, making it almost hard for a person to detect.
It may also be fatal.
It is relatively easy to install a carbon monoxide detector in your RV, and doing so might save your life.
You can buy these detectors at any home improvement shop and put them anyplace in your RV.
Some are immediately plugged into your 12V system for RV-specific versions, while others are battery-powered like a smoke detector.
Installing a carbon monoxide detector is highly recommended if fuel, such propane, is present in a confined area.
Sale
Safe-T-Alert by MTI Industries 35-742-WT Dual LP/CO Alarm – 12V, 35 Series Flush Mount, White,…
- Dual-purpose alert simultaneously detects gas leaks and CO gas
- No need to replace missing or dead batteries thanks to dependable 12v power
- Mount flush
#2. Keep the Right Air Flow Going
Maintaining ventilation is crucial when a fuel source is inside of an enclosed environment like an RV.
Airflow is particularly important while your furnace is on.
For this reason, it’s essential to maintain the furnace’s direct vent open and free of obstructions.
Check your furnace vent often to make sure there are no obstructions.
Any furnace backup has the potential to be harmful.
#3. If You Smell Gas, Turn It Off.
You should always switch off your propane furnace if you smell gas.
There may be an accumulation of propane in your furnace if you sense the odor of rotten eggs, which is an additive used to make propane recognizable by humans.
Turn it off right away, and make sure to let some fresh air in by opening windows and doors.
Although it may be chilly, being safe should come first.
A propane furnace should always be used with caution.
It’s advisable to switch off all appliances and wait for them to cool down if you smell anything unusual before starting troubleshooting.

