We’ve learned to enjoy the luxury of hot water in our RVs so we can wash off the bug spray and camp smoke.
Can cold water be used to wash dishes and take a shower? Sure, but are you interested? No.
For the optimal performance and life cycle, water heaters in an RV need maintenance just as all other systems and appliances do.
Even with routine maintenance, problems from usage might arise.
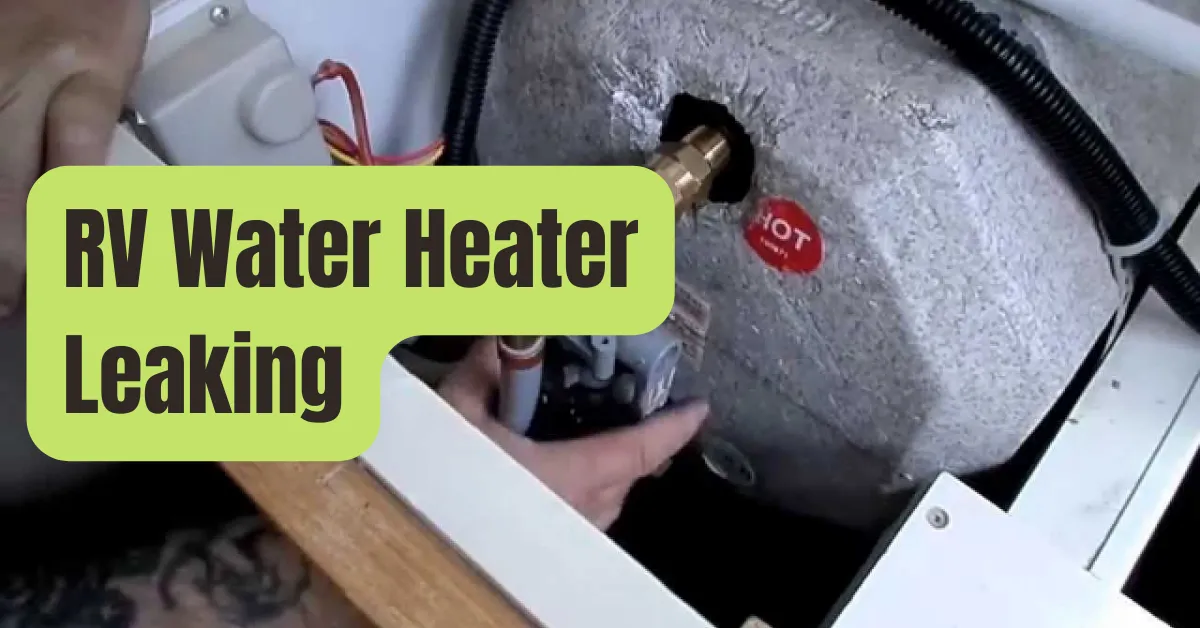
The issue that occurs most often is a leaky water heater.
This could seem negative at first glance.
A new water heater may be costly to install and is often beyond the technical capabilities of the majority of RV owners.
However, fixing a leaky RV water heater is often simple.
A water heater might leak for a few typical causes.
#1. Valve For Pressure Relief
The fundamental workings of a water heater are as follows: Water is put into a tank, which is then heated using either gas or electricity.
When this occurs, the temperature and expansion increase, leading to an increase in pressure within the tank.
The tank and its components can only sustain a given amount of pressure, and the high temperatures and associated pressures may be hazardous.
The safety device that makes sure the maximum pressure or temperature isn’t exceeded is the pressure relief valve.
However, if the pressure relief valve on your water heater is leaking, it could simply be performing its job.
It may be necessary to refill the tank to the right level and with the correct air gap if the valve only leaks while the tank is heated.
The top of the tank has an air gap that allows for some expansion, but sometimes this space is decreased, increasing the access pressure and causing water to drop from the valve.
The valve may be changed by removing it and replacing it after emptying the tank and before refilling it if it is leaking when the tank is cold or generating more than a trickle.
Make that the tank is cool, then carefully remove any pressure.
Hot water at high pressure may be quite harmful!
#2. Drain Stopper
There is a drain plug at the base of the tank on every water heater.
For maintenance purposes, this plug must be constantly withdrawn and replaced; as a result, thread wear and breakage are likely.
Since most drain plugs are made of plastic, it’s simple to break the threads, which will cause a leak.
If the stopper has a suspected pinhole, heating the tank will probably cause the leak to pressurize and produce more of a spray.
By using plastic, a metal plug is prevented from corroding and harming the tank itself.
A drain plug’s damaged threads are inexpensive and simple to repair.
The tank may need to be completely replaced if its threads get damaged.
There are metal plugs that, in principle, shouldn’t ever need to be taken out.
Remember that flushing your tank is more difficult if the drain stopper is not removed, and the narrower valve may prevent heavier material from being drained out.
It’s simple to replace the drain stopper, and now is an excellent opportunity to cleanse the water heater.
#3. Fittings
The fittings on your water heater are probably plastic fittings with a metal clamp keeping them in place, much like the majority of RV plumbing fittings.
When these clamps and fittings malfunction, water may flow slowly or continuously.
A camping excursion over the weekend could be avoided if you have a few connectors and clamps in your toolbox.
Keep in mind that the clamps need a certain tool to be fastened, which is another useful item to have.
You must always turn off the water supply and drain any water from the lines before removing a fitting or disconnecting a water line.
#4. Tank of Water
Hopefully, the worst-case situation won’t come to pass.
You will sadly need to replace the whole tank if you see water leaking from the tank’s body or from any of the fittings that were welded to it.
Considering the tremendous pressure and boiling water temperatures, ignoring a leaky tank may be hazardous.
To pinpoint the site of a leak, the insulation may need to be removed.
A water heater’s whole assembly may be changed, or in certain circumstances, simply the tank.
This worst-case situation may be avoided with routine maintenance, which includes flushing, checking, and replacing anode rods (in systems that incorporate them).
The anode rod is a low-cost tank insurance option.
In order to preserve the material of the tank, anode rods are made to corrode instead of the tank.
A week of chilly showers may be avoided if you know how to replace your leaky RV water heater.
You may complete this and many other RV tasks by working with other RVers and resources like iRV2 Forums.
Use an online application like RV LIFE Maintenance to keep track of all your RV maintenance and repairs.
You can maintain all of your documentation in one location, and you’ll also get timely alerts when maintenance is needed to protect you from having to pay for expensive repairs or maybe having a major accident.