For every corner and crevice of your RV, we’ve listed some of the most frequent installation procedures for different RV TV Mounts.
Information and images.
Following multiple requests for information on how to install a new LCD or LED TV inside an RV, it was decided to compile a collection of ideas and solutions to assist individuals beginning on this do-it-yourself job.
We’ve gathered a list of some of the most frequent installation methods for different RV TV Mounts.
This is the kind of assignment where you may let your imagination go wild, and there are probably various methods to do each of these duties.
This tutorial should serve as a resource for suggestions on how to approach a project like this, as well as put you in the right direction for getting the most out of your new television purchase.
The problem with a TV in an RV is that it may be installed anywhere since each manufacturer has its own position, size, and weight requirements for televisions.
This implies that this sort of project will almost always be customized from top to bottom.
Installation of a TV in a Recreational Vehicle (RV): General Instructions
- Select a TV Mount for Your RV (A guide is provided here.)
- Remove the old television (have you been impressed yet?)
- Remove any extra mounting hardware from the old tube TV.
- Get an idea of how you want to attach your RV TV Mount by looking at the images below.
- Make a location to attach the RV TV Mount to (usually out of 3/4′′ plywood) if required. Even if you believe the area is stiff enough to secure a TV to, it’s always a good idea to do so. The weight of the television and the movement of your RV will wear out the region where the mount is attached.
- If you’re going to utilize a fastener to attach the RV TV Mount, make it a bit more durable just in case. (Carrier Bolts with a washer and nut are preferred.)
- If you’re using an Articulating Mount, be sure to check the length of all your wires and, if required, purchase extension.
- If you’re not utilizing the Wall/Tilt mounts, you’ll need to find a technique to keep the mount secure while in transportation (Velcro or straps are a common choice).
RV TV MOUNT TIP: If you have any special questions concerning mounting your TV, please leave a remark at the bottom of the page or ask a query in the “Ask Danny D” section of our forums. He is our on-site contractor and can help you with your specific circumstance.
Related: 5 Best RV Outside TV Mount of 2026
Installation of an RV TV Mount: Ideas and Pictures
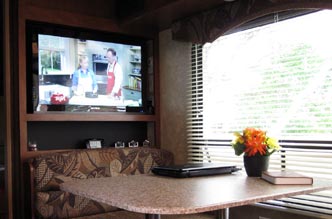
#1. Fixed or Tilted Wall Mount on Plywood Surface
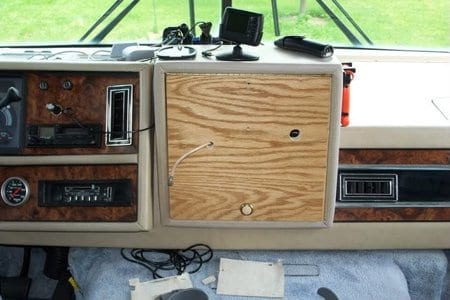
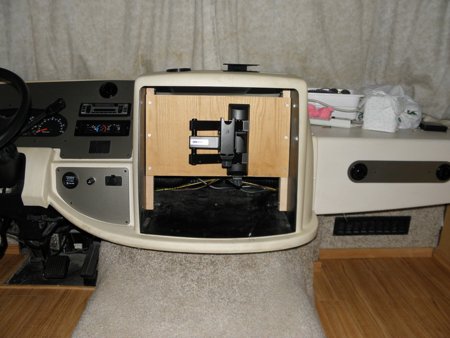
In the Case of Dash
A hinged piece of plywood and some carpentry skills are normally required for this procedure.
To keep access to the wiring and cabinet behind the TV, most people opt for the hinged option.
A Fixed Wall or Tilted Wall Mount is used in this manner.
Now that the large tube TV has gone the way of the dodo, this is a great place to store goods.
Install a cabinet door locking mechanism to prevent the cabinet from shifting during transport.

Overhead
This technique is similar to the dash installation in that it employs plywood and hinges to do the same purpose, but it is done from above.
It provides access to the cabinet behind it, much as the dash.
Install a cabinet door locking mechanism to prevent the cabinet from shifting during transport.

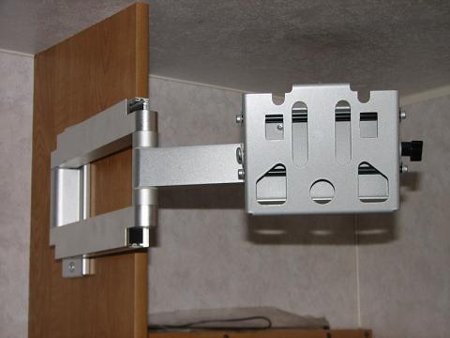
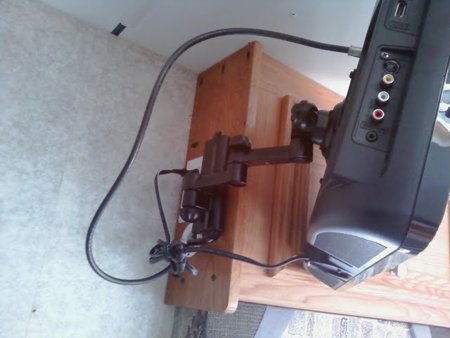
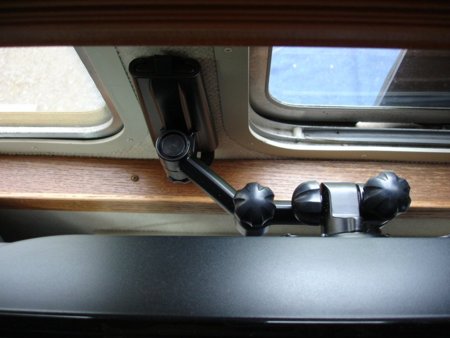
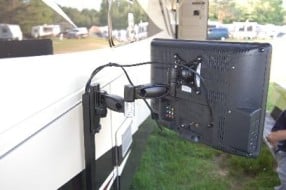
#2. Mount with Arm
In the Case of Dash (Plywood Fabrication Required)
This alternative employs the same concept as the plywood dash installation, but instead of using an Articulating Arm Mount, a permanent non-hinged piece of plywood is placed.
You can still reach the cabinet (but with less space), and the mount is permanently attached to the dash.
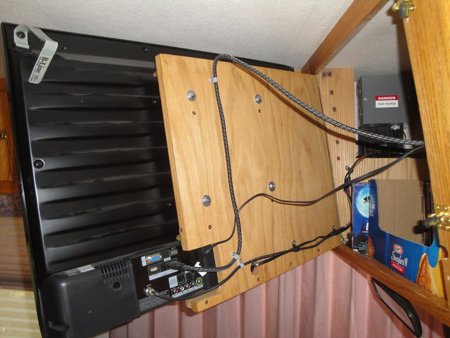
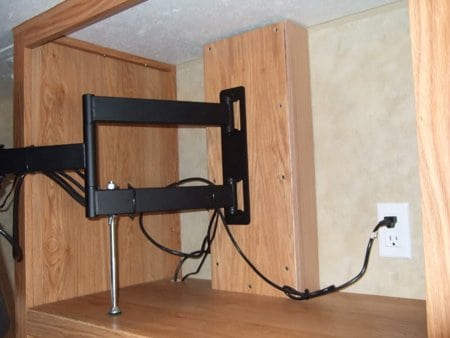
In the Cabinet
This approach is quite common since it is the easiest to set up and because there are often several places on an RV where the mount may be secured.
The disadvantage is that it normally does not seem as appealing to the eye as numerous cables and wires do.
This approach may be made more sturdy by adding stiffness to the cabinet by using plywood on the opposite side of the mount surface.
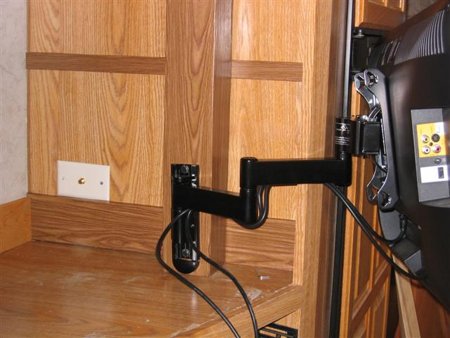
Surface of the Wall
This is a less popular alternative since many people are hesitant to drill holes in their RV’s side, which is reasonable.
It may be a completely fine approach to install your TV if your walls are solid enough and you can locate a stud in the proper position.
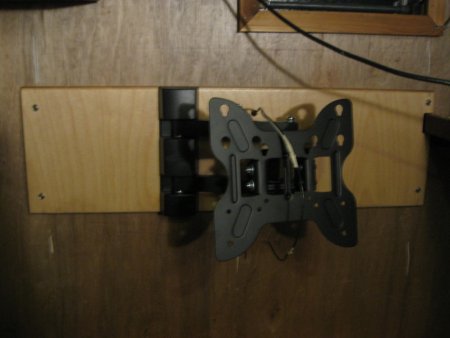
Plywood as a Wall Surface
When attaching to a wall or cabinet, this is the preferable way.
To increase stiffness to the mounting surface, use a plywood cutout on the outside or inside(if feasible) of the mounting surface.
Related: How to Mount A TV Without Studs?
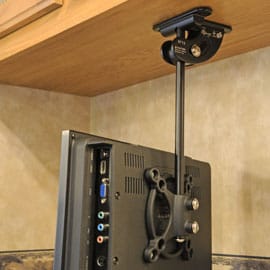
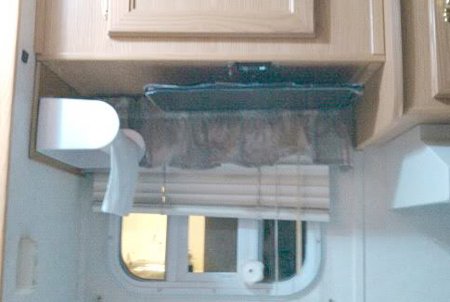
#3. Overhead Plywood Mount with Pull Down Function
The pull down mount may be fitted in the same way as the plywood mounts mentioned above and below.
It can be placed in the same way as the articulating arm, but it can change in height up to 20 inches depending on the model.
That means you won’t have to look up at the ceiling if you adjust the line of sight on your TV to something similar to what you’d find in a traditional house.
The flexibility may be seen in the image below.

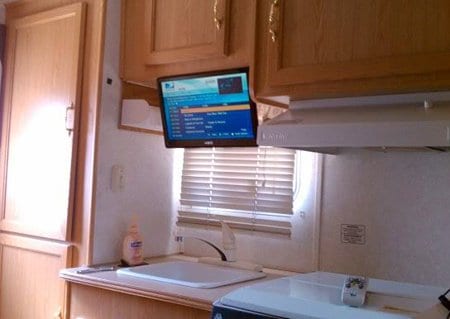
#4. Inside Cabinet Articulating Arm/ Full Motion Mount
This is also a popular option, as many customers like the increased flexibility of having the mount swing out without having to refinish any exposed plywood.
Unless you want to keep objects behind the TV, this approach enables you to complete all of the installation in an area that will never be visible.
Only within the cabinet, this alternative still necessitates the use of plywood as a mounting platform.
This approach also necessitates the use of a locking device during transportation to prevent the TV from swiveling from side to side.
Another Approach
#5. Under Cabinet Mounting
Given the restricted space inside most RVs, this form of installation may be difficult.
This use is best for smaller TVs (under 27 inches), and some under cabinet mounts even offer a fold-up feature for people who are short on room.
Related: What Size Screws Are Used To Mount A Samsung TV? (It Depends!)
Another Approach (Folded up and Down)
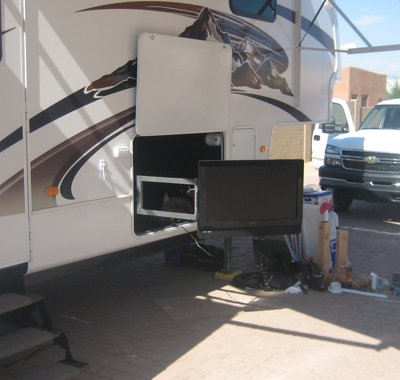
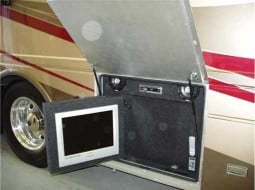
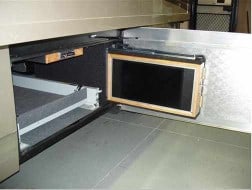
#6. Outdoor Mounting
Given that most televisions are not intended to withstand the environment, outside installation may be difficult.
Many customers choose for RV TV Mounts that enable the TV to be detached and stored safely when not in use.
Other individuals have put swing arms within their RV basements, which is a brilliant method to use the TV when you want it and stow it when you don’t, thanks to the mounts’ design.
Related: How To Mount TV In RV? (Step-By-Step)
Explanation of the Mounting Methods in Video
Part 1 of 2
Part 2 of 2