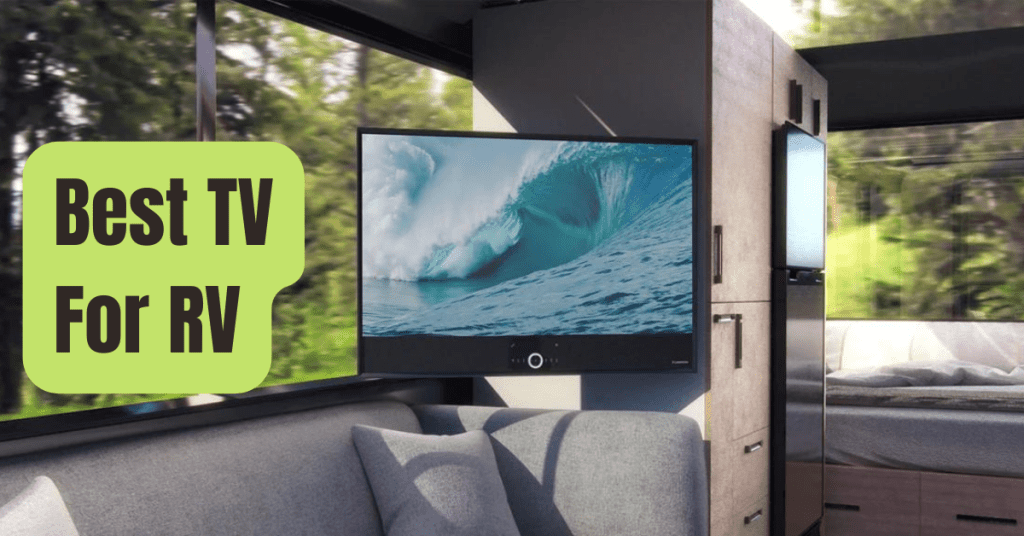
Many individuals buy an RV to have that home-away-from-home feeling, no matter where they are…
And what says “home” more than a well-designed television set?
When it comes to putting a TV in a recreational vehicle, there are a few things to keep in mind.
Let’s take a deeper look at those variables and discover how to install a flat screen TV in an RV step by step!
Is It Possible to Use Any Flat-Screen TV?
Both yes and no.
If you want a long-lasting unit that works with your RV, you should think about the following things.
Type
Internal elements of specialized RV TVs are reinforced to guarantee that it remains securely fastened to the mount and to avoid vibration damage.
This is especially critical if you often travel on uneven roads (which you will at some point).
Shocks, vibrations, and even severe temperatures are not a problem with these TVs.
Most RV TVs also include an anti-screen glare treatment, which comes in handy if your RV lacks blackout curtains.
Having said that, you could theoretically replace it with any high-quality LCD or LED TV.
If you take this route, we recommend using a wall mount developed specifically for RV usage, since it will:
- When your RV is moving, lock the TV in place.
- Vibrations generated by rough roads may be reduced.
Perlesmith RV Lockable TV Wall Mount for Most 23-43″ Flat Screen TVs
Below, we go through how to choose the correct wall mount in further depth.
Weight
When it comes to selecting a TV for your RV, weight is an important consideration.
It’s possible that plywood beams or even the studs in your RV’s walls aren’t robust enough to sustain bigger models.
Always choose the lightest flat-screen TV that still suits your demands as a general guideline.
Related: 5 Best RV Outside TV Mount of 2026
Size
A large TV could appear out of place in an RV interior, where room is already limited.
Before purchasing a television, it’s usually a good idea to choose and measure a prospective location for it.
We suggest that you aim for a TV that is between 19 to 40 inches in size, since this is the most common size for RV TVs.
Consumption of energy
Getting a 12-volt TV rather than a 120-volt TV is usually more convenient since the former may be plugged in without any additional gear.
An inverter or an external power source is required for the latter.
On the other hand, a 12-volt TV larger than 24 inches is difficult to come by.
And, as of this writing, there are no 12-volt Smart TVs available for RVs.
So, the sort of television you purchase is solely determined by your power choices and how you want to use it.
In An RV, Can You Use A Regular TV Mount?
You may technically utilize any mount that is compatible with your television.
However, bear in mind that some mounting methods work better in specific situations.
Let’s take a look at the most common kinds of TV mounts to see which one is best for you.
Mounts That Are Permanently Attached
These are the most basic and cost-effective mounts available.
Fixed mounts take up the least amount of space since they are closer to the wall than other varieties.
However, accessing the wiring may be more difficult as a result of this.
You also won’t be able to move or alter your TV after it’s been installed.
If you’ll be sitting immediately in front of your TV, where the screen’s center is around eye level while you’re seated, fixed mounts are an excellent alternative.
Trailer RV TV Mount for 10-24 TVs
Mounts that Tilt
Depending on the configuration of your RV, you may need to mount your TV above eye level, where screen glares are a regular issue.
Instead, you may use a tilt mount to solve this problem.
These mounts allow you to alter the vertical angle of your TV to compensate for its less-than-ideal viewing location.
Most models can tilt between 8 and 20 degrees, which may not seem like much, but it may make a significant impact.
Tilting TV Wall Mount Bracket
Related: How To Remove TV From Wall Mount In RV?
Mounts That Can Be Adjusted
Adjustable mounts are the most adaptable of them all, with mechanisms that enable you to stretch them outwardly for better viewing comfort and retract them tightly against the wall when not in use.
You may also adjust the tilt, move them left and right, even rotate your TV 360 degrees in a circle on certain models!
Unfortunately, if you don’t obtain an RV-specific adjustable mount, these mounts may be a problem, so shop judiciously.
If it’s merely a standard adjustable mount for residential usage, the adjustable arm might move as soon as your RV moves.
This may lead to a damaged mount and/or TV, as well as the potential for injury to a passenger.
If you desire the convenience of an adjustable mount, we suggest obtaining an RV-specific version.
When your RV is moving, you can lock the adjustable arm in position using this sort of installation.
It also features built-in vibration mitigation to help your TV last longer.
Perlesmith RV Lockable TV Wall Mount for Most 23-43″ Flat Screen TVs
Mounts for the Under-Cabinet
Under-cabinet mounts are a great option if your RV is tiny and you don’t mind obtaining a smaller flat-screen TV.
These units are the most space-efficient of the four since the counter space under the cabinet may still be used.
Beneath-cabinet mounts are ideal for screens ranging from ten to twenty-four inches in size, as well as anything else that fits under your storage cabinets, kitchen cabinets, or even shelving.
For extra space, certain mount styles allow you to fold up and store your TV beneath the cabinet.
One disadvantage of this style of setup is the difficulty in attaching the needed connections to the television.
Mount-It! Flip Down TV and Monitor Mount For Under Cabinet
Related: How To Mount A TV In An RV Bedroom?
In An RV, How Do You Mount A Television?
Where you choose to install your TV will determine how you mount it.
Many customers choose to put their new flat-screen TV in the TV box that certain RV models come with at the front, which holds older television models.
Others like to mount their television on the wall.
Some people even want to put it beneath their cabinet.
In either case, we’ve got you covered!
Installing A Television In An Existing Television Box
You may make this box compatible with a thinner flat-screen TV by making simple tweaks.
All you have to do now is add more wooden frames to the interior of the box to accommodate your mount.
- Remove the old tube television from the TV box placed into the wall.
- Inside the TV box, measure the depth required for your wall mount installation. The edge of your horizontal supports that will keep the mount in place is marked by this dimension. Make a pencil mark at this location.
- Add 1.625′′ to your original measurement and mark it on the box’s sidewalls at the top and bottom.
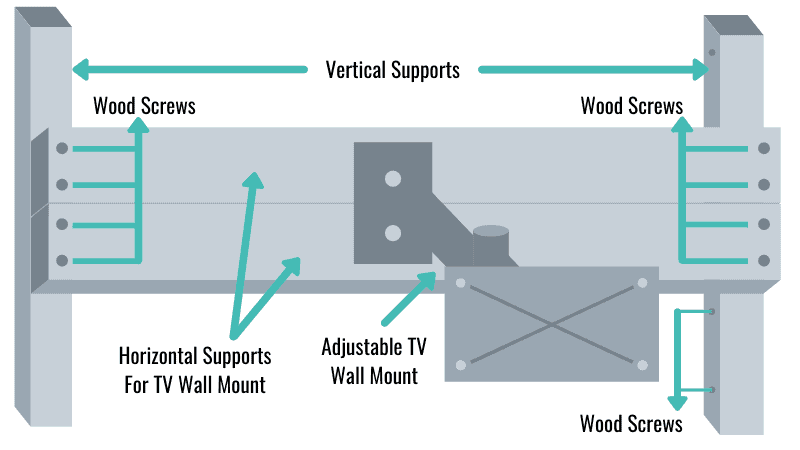
- Measure the height of your TV box and cut two pieces of 24 plywood to that length. These parts will serve as vertical supports for the horizontal supports, providing extra support.
- Use 2.5 to 3-inch wood screws to install the two vertical supports, one on each side of the TV box, with at least four per mount. A robust L bracket may be used to connect the horizontal and vertical supports for further support.
- Measure the height you want your TV to be and connect the horizontal supports appropriately. Screw at least three-inch screws into each end, for a total of eight screws. Pre-drill these supports to avoid damaging the wood with the screws.
- Measure the middle of the horizontal beams and note where the TV wall mount will be attached. If your mount model requires three bolts for support, place two bolts on top of the end.
- Install the wall mount after pre-drilling holes for the wall mount bolts using a 14-inch drill bit.
- Connect your television to the mount. Install two side brackets on opposing sides of the TV to hold it in place for larger TVs. For each bracket, all you need is a 12 x 1-inch wood piece, a bracer for extending the bracket, and 14-inch heavy-duty screws.
Installing A Flat-Screen TV On A Wall In An RV
If your RV doesn’t have a built-in TV box, or if you just wish to put the TV on a different wall, we’ll need to follow the steps outlined in our article on how to attach a TV to an RV wall.
In Conclusion, You Will Need To:
- Determine the best location for your TV on the wall. To make sure the TV is where you want it, have someone hold it against the wall while you sit or sleep in the position where you usually watch TV.
- Find the studs in the wall. Locate the wall studs you’ll be using to attach the TV mount using a stud finder. Using a pencil or tape, mark the place.
- Drill the pilot holes using a drill. Drill the pilot holes for the mounting screws using the appropriate diameter masonry bit.
- The mounting bracket should be affixed to the wall. Make sure you’re using the mounting hardware that came with your purchase.
- Attach the mounting plate to the TV’s back.
- Connect the TV mount to the mounting plate.
- Connect the TV. Finally, connect the TV to the antenna or satellite dish on the RV.
Tip: If you want to receive the most channels and the greatest reception for free, check out our guide to the finest over-the-air RV TV antennas.
Related: 6 RV TV Mount Installation Ideas and Resources
Putting A TV In A Cabinet
This is the simplest of the three methods.
Simply follow the instructions included with the mount and screw it into place under the cabinet.
After that, secure the TV to the mount.